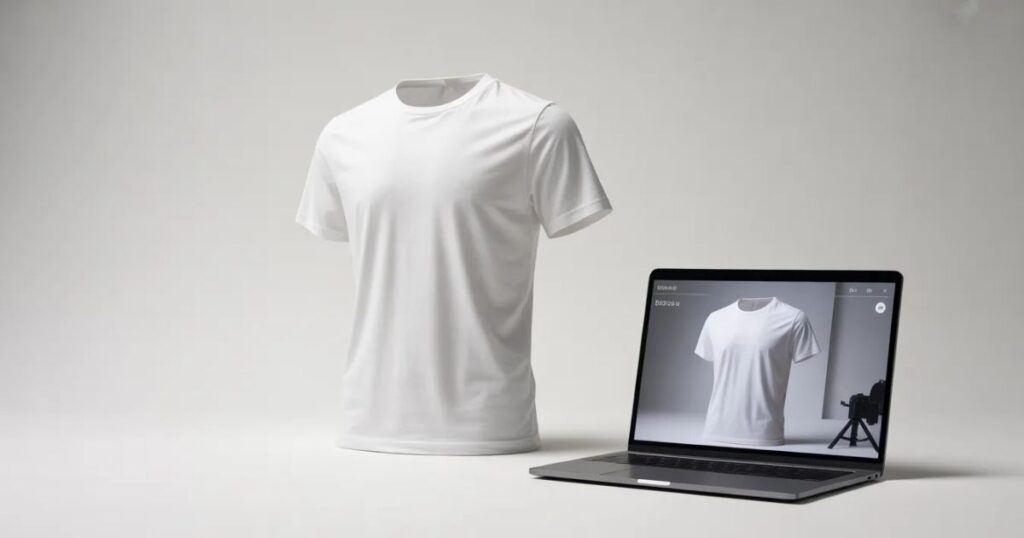
If you sell clothing online, you already know that product images carry a surprising amount of responsibility. They don’t just show the product. They explain it.
Customers rely on images to understand structure, fabric, and fit — all things they would normally evaluate in a physical store. Without that clarity, hesitation appears. And hesitation usually leads to abandoned carts.
For apparel brands selling on Shopify or Amazon, this challenge becomes even more noticeable as the catalog grows. One or two products are easy to manage. Ten products still feel manageable. But once you reach fifty, a hundred, or even several hundred SKUs, consistency becomes difficult.
This is where ghost mannequin photography — and more specifically, a proper ghost mannequin editing checklist — becomes important. Because ghost mannequin editing isn’t just about removing a mannequin from an image. It’s about reconstructing the garment so that it looks natural, balanced, and professional.
When done correctly, customers see a clean product presentation that feels realistic. When done poorly, the product can look distorted or artificial. The difference often comes down to process. That’s exactly what this guide covers.
In this article, we’ll walk through a practical ghost mannequin editing checklist designed specifically for Shopify and Amazon product listings. It’s not theoretical advice. It’s a step-by-step framework used by many ecommerce brands to maintain consistent, high-quality product catalogs. And if you’re managing a growing apparel store, having a checklist like this can save an enormous amount of time — not to mention prevent a lot of visual inconsistencies.
Why Shopify and Amazon Sellers Need a Structured Editing Workflow
One of the biggest misconceptions about product photography is that the work ends once the photos are taken. In reality, the editing stage is where much of the quality is determined.
For ghost mannequin images, editing involves multiple steps:
- Removing the mannequin
- Rebuilding hidden garment areas
- Balancing lighting and shadows
- Aligning garment structure
- Ensuring marketplace compliance
Without a clear ghost mannequin editing checklist, these steps can quickly become inconsistent. And inconsistency creates problems.
For example:
A shirt might look slightly different from the next one.
A jacket might appear uneven at the shoulders.
The collar might look unnatural.
Individually, these issues seem minor. But across an entire catalog, they create a visual experience that feels less professional. Amazon and Shopify customers may not consciously notice every detail, but they feel the difference. A structured workflow prevents that.
Understanding Ghost Mannequin Editing
Before diving into the checklist itself, it helps to clarify what ghost mannequin editing actually involves. The process begins during photography. The garment is placed on a mannequin and photographed to capture its natural shape. Additional images are taken to show inner areas like the neckline or back collar — sections that would normally be hidden by the mannequin.
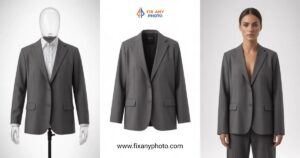
During editing, these images are combined. The mannequin is removed, and the hidden sections are reconstructed to create the final invisible-mannequin effect. The result is a product image that appears as though the garment is being worn, without any visible mannequin or model.
When done correctly, ghost mannequin images provide several advantages:
- Clear garment structure
- Professional presentation
- Consistent catalog appearance
- Improved customer understanding
However, achieving that result consistently requires attention to detail — which is why a reliable ghost mannequin editing checklist becomes essential.
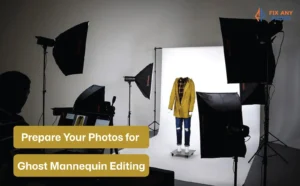
Step 1: Organize Source Images Before Editing
The first step in the checklist actually happens before editing begins. Image organization. Many ecommerce teams skip this step, which leads to confusion later in the workflow.
For each product, make sure the following images are clearly labeled:
- Front image on mannequin
- Back image on mannequin
- Inner neck or collar image
- Additional detail shots if required
Consistent naming helps prevent mistakes during editing.
For example:
product-front.jpg
product-back.jpg
product-neck.jpg
This may seem simple, but when dealing with hundreds of products, clear organization becomes critical.
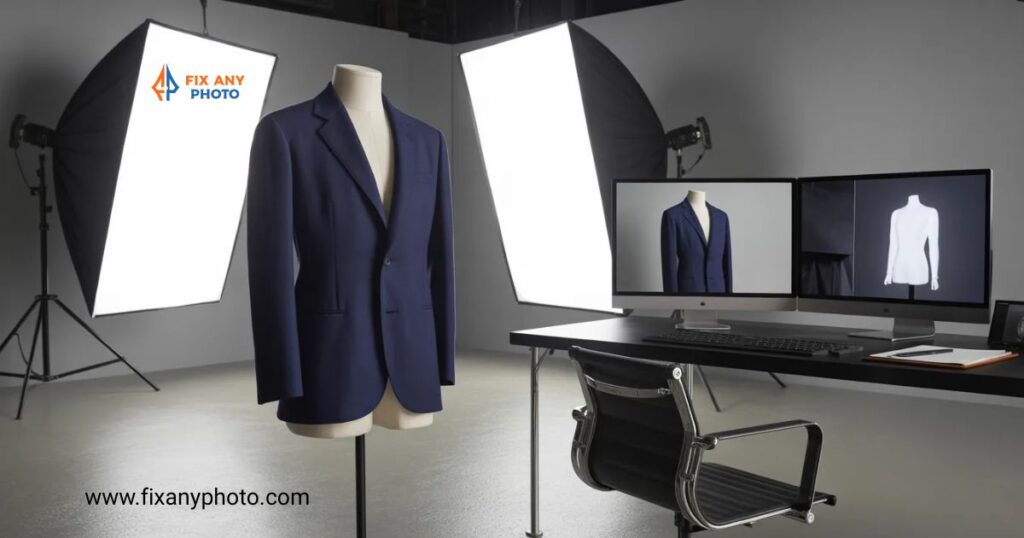
Step 2: Remove the Mannequin Cleanly
The second step in the ghost mannequin editing checklist is mannequin removal. This is where precision becomes important.
The mannequin should be removed without leaving:
- Visible edges
- Jagged outlines
- Distorted garment shapes
Careful masking and layer work are required to maintain the natural outline of the clothing. If the removal process is rushed, the garment may appear hollow or artificial. Customers may not know exactly why the image looks strange — but they will notice something feels off.
Step 3: Reconstruct Hidden Garment Areas
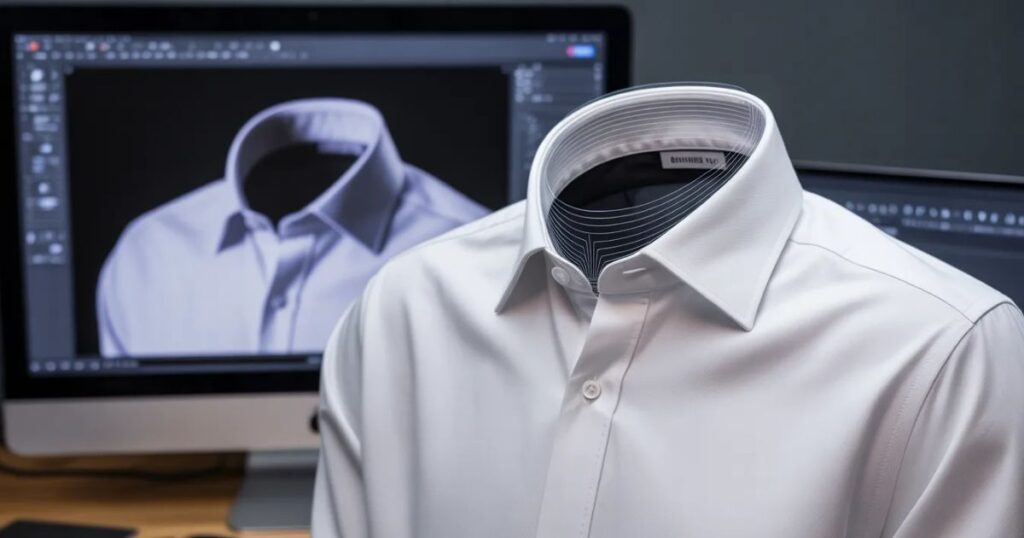
One of the most important parts of ghost mannequin editing is rebuilding areas that were originally covered by the mannequin.
This typically includes:
- Inner collar areas
- Necklines
- Inside back sections
- Sleeve interiors
These areas are reconstructed using the additional photographs taken during the shoot. This step is what transforms a basic mannequin photo into a proper ghost mannequin image. Without reconstruction, the image would simply show an empty gap where the mannequin used to be.
Step 4: Align Garment Structure
After reconstruction, the next step in the ghost mannequin editing checklist is structure alignment. Garments should appear balanced and symmetrical.
Editors check:
- Shoulder alignment
- Sleeve positioning
- Center line symmetry
- Hem alignment
Even slight misalignment can make the product appear poorly fitted. Careful adjustments ensure the garment maintains its natural shape.
Step 5: Balance Lighting and Shadows
Lighting consistency is another key factor. During photography, small variations in lighting can occur. Editing helps correct these differences so that every product appears evenly lit.
Shadow balancing ensures the garment looks dimensional without appearing overly dramatic. This is particularly important for Shopify and Amazon listings, where overly stylized shadows may conflict with marketplace guidelines.
Step 6: Correct Color Accuracy
One of the most overlooked steps in a ghost mannequin editing checklist is color correction. At first glance, garments may look fine directly from the camera. But when those images are uploaded to Shopify or Amazon, even small color differences can become noticeable.
And color accuracy matters more than many sellers realize. Customers rely on product images to understand what they’re buying. If the color appears slightly different from the real product, it increases the chance of returns and negative reviews.
During this stage of editing, teams should check:
- Fabric color consistency
- Lighting balance across the garment
- White balance accuracy
- Saturation levels
The goal isn’t to make the product look more dramatic. The goal is to make it look accurate. Many experienced ecommerce teams treat color correction as a critical step in their ghost mannequin editing workflow, especially when dealing with large product catalogs where color variations are common.
Step 7: Remove Background Distractions
For most Shopify and Amazon product listings, background simplicity is important. The background should never compete with the product itself. In many cases, the standard approach is a clean white background. This allows the garment to stand out clearly and helps maintain consistency across the entire catalog.
Within a proper ghost mannequin editing checklist, editors usually ensure that:
- Background color is consistent across all products
- No shadows or gradients distract from the garment
- The edges of the clothing remain clean and sharp
For Amazon listings specifically, white backgrounds are often required for main product images. Shopify stores have more flexibility, but many brands still choose a white or neutral background to maintain a professional look.
Step 8: Ensure Marketplace Compliance
Editing product images for ecommerce isn’t just about aesthetics. Marketplace rules also need to be considered. Amazon, for example, has strict guidelines for apparel listings.
Typical requirements include:
- Pure white background for main images
- No additional graphics or text overlays
- The product must occupy a large portion of the frame
- No mannequins visible in final images
A structured ghost mannequin editing checklist helps ensure these requirements are met before images are uploaded. Failing to follow marketplace guidelines can lead to image rejection or listing suppression. For sellers managing dozens or hundreds of products, catching these issues during editing saves time later.
Step 9: Standardize Image Dimensions
Consistency in image size is another important step. Many ecommerce stores accidentally upload images with slightly different dimensions, which causes alignment problems on product pages.
For example:
- One product image may appear larger than another
- Cropping may feel uneven across the catalog
A reliable ghost mannequin workflow includes standardizing image dimensions before export.
Common formats include:
- Amazon apparel listings: 2000 × 2000 pixels or higher
- Shopify product pages: often 2000–3000 pixels square
Standardizing dimensions ensures that every product appears balanced within the store layout.
Step 10: Maintain Consistent Product Positioning
Beyond dimensions, product positioning within the frame also matters. Customers notice when products appear too high, too low, or slightly off-center.
Within the editing process, garments should be positioned consistently:
- Centered horizontally
- Aligned vertically with other catalog items
- Cropped evenly across products
This creates visual harmony across the store. When a catalog contains dozens or hundreds of products, this kind of consistency makes the entire brand feel more polished.
Step 11: Sharpen Product Details
After the structural edits are complete, detail sharpening becomes important. Apparel customers often zoom into images to examine:
- Fabric texture
- Stitching
- Seams
- Material quality
If the image appears soft or blurry, customers may assume the product itself lacks quality. Within a well-structured ghost mannequin editing checklist, sharpening is applied carefully to ensure:
- Fabric details remain clear
- Edges stay crisp
- Noise is minimized
The key is subtlety.
Over-sharpening can create unnatural textures that make the garment look artificial.
Step 12: Check Fabric Texture and Wrinkle Balance

Wrinkles are a common issue in apparel photography. Some wrinkles are natural and help show fabric realism. Too many wrinkles, however, can make the product look messy. During editing, teams often perform minor adjustments to balance fabric texture.
This may involve:
- Softening extreme creases
- Maintaining natural folds
- Ensuring fabric looks structured rather than flat
This step helps garments appear well-presented while still looking realistic.
Step 13: Review Edges and Clipping Paths
Clean edges are critical for ghost mannequin images.
Poor clipping paths can result in:
- Jagged outlines
- Missing fabric sections
- Uneven borders
Before exporting images, editors should review all edges carefully. Zooming in during this stage helps identify small imperfections that might otherwise be missed. A high-quality ghost mannequin editing process always includes this final edge inspection.
Step 14: Export in the Correct File Format
Once editing is complete, images must be exported correctly.
Common export formats include:
JPEG
- Smaller file size
- Ideal for ecommerce websites
PNG
- Higher quality
- Useful for certain design environments
For most Shopify and Amazon product pages, high-quality JPEG files provide the best balance between quality and loading speed.
A well-structured ghost mannequin editing checklist ensures images are exported with:
- Correct dimensions
- Proper compression
- Consistent file naming
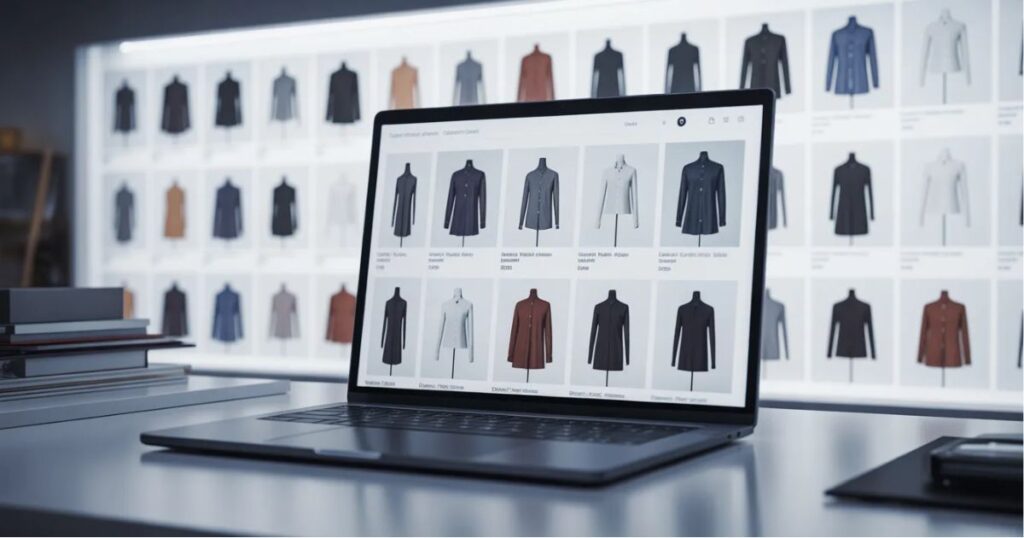
Managing Ghost Mannequin Editing for Large Catalogs
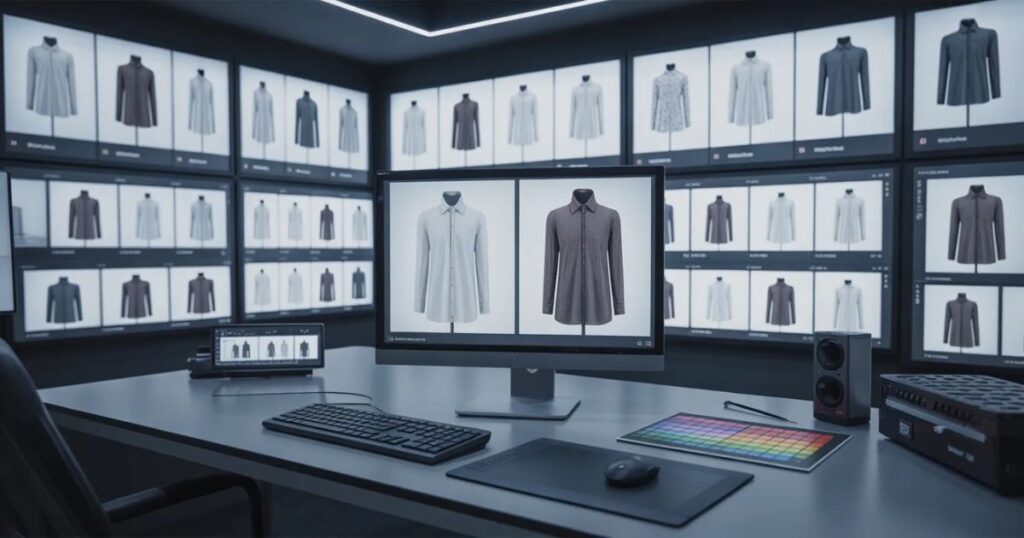
For small stores with only a handful of products, editing images individually can work. But most Shopify and Amazon sellers eventually face the same situation — the catalog grows faster than the image workflow.
Suddenly there are:
- Multiple product variations
- Seasonal collections
- New launches every month
- Hundreds of SKUs to manage
At this point, editing one product at a time becomes inefficient. This is why many ecommerce brands turn their ghost mannequin editing checklist into a repeatable production system.
A typical workflow looks like this:
1. Batch photography sessions
Products are photographed in groups using the same lighting setup.
2. Organized image folders
Each product has its own folder with front, back, and inner images.
3. Editing batches
Editors process multiple garments at once rather than switching between different product types.
4. Quality control review
Images are reviewed before upload to ensure consistency.
This structured workflow reduces mistakes and ensures that every product follows the same visual standards.
The Final Ghost Mannequin Editing Checklist
At this stage, it helps to summarize the entire process into a single reference list. A complete ghost mannequin editing checklist typically includes the following steps:
Pre-Editing Preparation
- Organize product image folders
- Confirm front, back, and inner collar shots exist
- Check garment alignment in original photos
Editing Process
- Remove the mannequin cleanly
- Reconstruct hidden garment areas
- Align garment symmetry
- Balance lighting and shadows
Image Optimization
- Correct color accuracy
- Remove background distractions
- Standardize image dimensions
- Center product positioning
Quality Enhancements
- Sharpen product details
- Balance wrinkles and fabric texture
- Inspect clipping paths and edges
Export & Upload
- Export correct file format
- Optimize image size for web performance
- Verify marketplace compliance
Following this checklist helps maintain consistency across the entire catalog.
Common Ghost Mannequin Editing Mistakes
Even experienced ecommerce teams occasionally encounter editing problems. These issues usually happen when the editing process is rushed or inconsistent. Here are some of the most common mistakes:
Poor Neck Reconstruction
If the inner collar isn’t reconstructed properly, the garment can appear hollow or unnatural.
Uneven Shadows
Shadows that are too dark or too light make the product look artificial.
Misaligned Garments
If sleeves or shoulders appear uneven, the garment may look poorly fitted.
Inconsistent Backgrounds
Even slight background differences can make the catalog look unprofessional.
These mistakes may seem minor individually, but across dozens of products they can affect how customers perceive the brand.
Why Consistency Matters for Amazon and Shopify Listings
One of the biggest advantages of following a structured ghost mannequin editing checklist is consistency. Consistency affects several important areas:
Customer Trust
When product images follow the same style, the store feels more professional.
Conversion Rate
Clear, structured images help customers understand products faster.
Marketplace Approval
Amazon in particular requires strict image compliance.
Brand Identity
Uniform visuals make the store look organized and reliable.
Customers rarely analyze these details consciously, but they influence buying decisions.
When to Consider Outsourcing Ghost Mannequin Editing
As the number of products increases, many ecommerce teams find that editing becomes time-consuming. Ghost mannequin editing requires precision, especially when reconstructing garment areas and maintaining consistent lighting.
For this reason, many Shopify and Amazon sellers eventually outsource editing to specialized services. Professional editing teams can help brands:
- Process large image batches quickly
- Maintain consistent garment structure
- Ensure marketplace compliance
- Reduce internal workload
Reliable services available through the Fix Any Photo homepage support ecommerce brands that need scalable editing solutions. Outsourcing often allows internal teams to focus on marketing, product development, and store growth.
How Ghost Mannequin Editing Supports Ecommerce Growth

It’s easy to think of product editing as a purely technical task. But in reality, it has a direct impact on the overall customer experience.
Well-edited ghost mannequin images help:
- Present products clearly
- Improve visual consistency
- Reduce customer confusion
- Increase perceived product quality
Over time, these improvements can lead to higher conversion rates and fewer product returns. For apparel brands selling online, strong visual presentation becomes part of the sales strategy itself.
Final Thoughts
Managing product images may not seem like the most exciting part of running an ecommerce store. But it’s one of the most important. Customers rely on visuals to understand the products they’re considering. When those visuals are clear, structured, and consistent, the buying process becomes easier.
A structured ghost mannequin editing checklist helps ensure that every product image meets the same standard. It removes guesswork from the editing process and allows teams to maintain a professional catalog even as the product range expands.
For Shopify and Amazon sellers, this consistency can make a meaningful difference — not only in how the store looks, but also in how it performs. Because in ecommerce, product images are more than just visuals.
They’re part of the decision process. And when customers can understand the product instantly, they’re far more likely to move from browsing to buying.