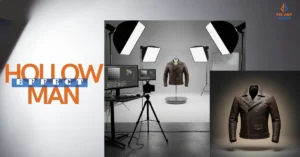
Ever looked at a product photo and wondered how the sleeves look so perfect, like they’re floating naturally with no mannequin in sight? That’s the power of sleeve joint editing.
When I first started ghost mannequin editing, the sleeves were always the hardest part. I’d get the neckline right, but the joints looked stiff or disconnected. And if the sleeves look off, the whole photo loses its charm, buyers notice that instantly.
In 2025, knowing how to do sleeve joint editing like a pro is a must for anyone editing clothing photos. It makes your products look real, clean, and ready to sell.
In this quick guide, I’ll show you how to:
Smooth sleeve lines while keeping natural folds
Rebuild missing fabric where the mannequin was
Add shadows for a soft, 3D look
By the end, you’ll know how to turn awkward sleeves into natural, professional-looking product photos that truly stand out.
Preparing for Flawless Sleeve Editing

Before you even touch Photoshop, half of the sleeve-editing battle happens behind the camera. A little prep during the photoshoot can save you hours of frustrating edits later.
Here’s how to set yourself up for success:
Start With the Right Photos
Think of this as “future-proofing” your editing process.
Shoot extra shots of the inside of sleeves
After removing a mannequin, one of the biggest gaps you’ll find is inside the sleeve opening. That missing fabric is tough to fake from scratch. To solve this, always take a few extra photos of the inside of the sleeves (turn them inside-out if needed). These shots can later be layered into your final image for a seamless, realistic look.Use clips or stuffing to shape sleeves during the photoshoot
Empty sleeves without arms tend to collapse. I often use soft stuffing (tissue paper, foam, even a rolled-up t-shirt) to give the sleeves a natural roundness. Alternatively, small garment clips can hold the fabric in place. This not only makes the garment look better in the photo but also gives you clear sleeve lines to work with when editing.Why prep saves hours of Photoshop time
Trust me on this one: it’s way faster to have a sleeve photo ready to drop into Photoshop than to painstakingly rebuild fabric using clone stamps and brush tools. Think of prep as a time-saving investment, you’ll thank yourself later when you breeze through editing.
Tools You’ll Need

You don’t need a thousand plugins to edit sleeves, but you do need the right essentials:
Adobe Photoshop (my go-to) or GIMP (free alternative). Both support layers, masking, and all the tools you’ll need.
Pen Tool – for cutting out the mannequin and making precise selections.
Clone Stamp & Content-Aware Fill – to rebuild missing fabric or fill small gaps.
Liquify Tool – to adjust the sleeve’s flow without destroying natural folds.
Warp Transform – for reshaping and aligning sleeve curves.
Layer Masks – to blend inside-sleeve shots or shadows naturally.
Optional: Sleeve templates – if you edit clothes often, save a few sleeve edits as PSD templates. You can reuse them and just tweak the fit.
Pro tip: Organize your Photoshop workspace for speed. Keep the Layers, Properties, and Paths panels visible—it’ll save you from endless menu-hunting.
Step-by-Step Guide to Editing Sleeves

Now that you’re prepped and armed with tools, let’s roll up our sleeves (pun intended) and edit.
Step 1 – Cut Out the Mannequin Cleanly
The foundation of a good sleeve edit is a clean cut.
Use the Pen Tool to carefully trace around the garment, paying special attention to the sleeve edges.
Keep your anchor points close together for smooth, accurate curves.
When you convert the path to a selection, feather it slightly (0.5–1px) so you don’t get razor-sharp, fake-looking edges.
Tip: Zoom in at 200–300% while working on the sleeves, you’ll catch tiny bumps that ruin the outline.
Step 2 – Rebuild the Missing Fabric
This is where those prep photos come in handy.
If you shot extra photos of the sleeve’s inside, import them into Photoshop and align them underneath the garment layer.
Use Layer Masks to blend the edges naturally with the rest of the sleeve.
For small gaps (like near the armpit or seams), use Clone Stamp or Content-Aware Fill. Make sure to sample nearby fabric to keep texture consistent.
Tip: Don’t overuse Content-Aware Fill, it’s smart, but it sometimes invents weird patterns that don’t match the sleeve’s grain. Clone Stamp gives you more control.
Step 3 – Shape the Sleeves Naturally
This step is all about giving life back to the fabric.
Use the Warp Transform tool to gently bend the sleeve into a natural curve. Focus on smoothing out stiff or jagged areas.
Switch to Liquify (Forward Warp Tool) to fix smaller distortions, like where the sleeve should narrow near the wrist.
Balance both sleeves—symmetry sells professionalism. If one sleeve looks puffier than the other, tweak it until they feel even.
Tip: Think of how sleeves actually hang on a human arm. Reference a real garment photo if you’re unsure—it’ll keep your edit grounded in reality.
Step 4 – Add Realistic Shadows & Depth
Without shadows, sleeves look flat and fake.
Create a new layer, set it to Multiply blending mode, and paint soft shadows inside the sleeve opening with a low-opacity brush.
For extra realism, use Curves or Levels adjustment layers to deepen the inner sleeve areas while keeping the outer fabric bright.
Don’t forget the underarm area—adding a subtle gradient there adds instant depth.
Tip: Always keep shadows subtle. If they’re too dark, the sleeve will look hollow instead of natural.
Step 5 – Final Retouching & Color Matching
Time for polish.
Smooth out wrinkles or creases that look distracting using the Clone Stamp or Healing Brush.
Use Curves or Hue/Saturation layers to match the inside fabric color with the outside fabric. Sleeves often look mismatched if you skip this step.
Apply a little sharpening (Filter > Sharpen > Unsharp Mask) to make sleeve details pop in high-definition.
Tip: If this is for e-commerce, zoom out and preview the sleeve at “thumbnail size.” That’s how buyers will first see it, so make sure it looks clean even at small resolutions. Also If you want to know about how to bottom joint editing in photoshop just check this out.
The Buyer’s Perspective

Imagine scrolling through an online store and seeing a shirt where the sleeves look flat or cut-off. Even if the fabric is great, your brain instantly thinks: cheap, poorly made, or low-quality photo.
That tiny flaw can lower trust and push buyers toward a competitor with cleaner product images.
For fashion and apparel e-commerce, the visual is everything. Customers can’t touch the fabric or try on the clothes—they rely 100% on photos.
If the sleeves look unnatural, they can’t picture themselves wearing the piece. And if they can’t picture themselves in it, they won’t buy it.
A Quick Example
Let’s take a simple blouse photo.
Before editing: You remove the mannequin, but the sleeves dangle flat. The inside of one sleeve is cut off, and there’s an awkward gap near the shoulder.
After editing: The sleeves are reshaped with smooth curves, a natural fold is added near the elbow, and a subtle shadow gives depth. Suddenly, the blouse looks like it’s ready to walk down a runway, or at least into someone’s shopping cart.
That’s the power of proper sleeve editing. It turns a distracting detail into a selling point.
Pro Tips for Editing Sleeves Like a Pro
After hours of trial, error, and countless Ctrl+Z moments, I’ve discovered a few tricks that make sleeve editing faster and more natural. Here are my go-to tips:
1. Keep Sleeve Edges Slightly Rounded
Sharp, straight edges look fake. Real fabric always curves a little, even on perfectly ironed clothes. When tracing sleeves with the Pen Tool or reshaping with Warp, make sure the edges have a gentle curve.
2. Don’t Over-Smooth the Fabric
It’s tempting to iron out every wrinkle in Photoshop, but perfectly flat sleeves scream “edited.” A few subtle folds and natural creases add authenticity and texture.
Think of it like skincare retouching, you want “healthy glow,” not plastic doll skin.
3. Save Sleeve Edits as Templates
If you’re editing lots of apparel, save your best sleeve edits as PSD templates. You can copy masks, shadows, or fabric overlays and reuse them in future projects.
This trick alone has cut my editing time in half for bulk e-commerce orders.
4. Know When to Outsource
If you’ve got hundreds of clothing photos to edit or complex fabrics like lace or velvet, consider outsourcing sleeve edits to a professional retoucher.
A seasoned editor can polish sleeves faster and more consistently than doing everything manually. Sometimes saving your time is worth more than perfecting every detail yourself.
Common Mistakes to Avoid
Even skilled editors fall into these traps. Watch out for them to keep your sleeves looking realistic:
Sleeves That Look Too Stiff or Flat
If your edit makes the sleeve look like cardboard, you’ve gone too far. Always reintroduce natural curves and folds.
Visible Mannequin Traces
Leaving behind tiny bits of mannequin near the armpit or sleeve edges ruins the illusion. Always zoom in and double-check those areas.
Overdone Shadows or Mismatched Lighting
Too much shadow inside the sleeve can make it look like a black hole. And if the shadow direction doesn’t match the rest of the garment, buyers will notice the inconsistency instantly. Subtlety is key.
Before & After Examples
Nothing explains the power of sleeve editing better than visuals. Here’s a simple progression you can imagine (or better, show in your blog with real examples):
Raw mannequin photo – The mannequin is visible, the clothing shape is fine, but the presentation is distracting.
Ghost mannequin effect without sleeve edit – The mannequin is gone, but the sleeves look flat, deflated, or cut-off.
Final polished sleeve edit – Smooth curves, natural folds, added depth with shadows, the garment looks ready-to-wear and professional.
The jump from step two to step three is where the magic happens.
Conclusion
Editing sleeves after removing a mannequin might seem like a small detail, but it’s the secret sauce that turns a decent product shot into a high-converting, professional image.
Sleeves frame the garment, and when they look natural, buyers can actually imagine themselves wearing the clothes.
Quick Recap:
Prep well by shooting extra sleeve photos and shaping fabric during the shoot.
Cut out the mannequin cleanly and rebuild missing fabric.
Use Warp, Liquify, and shadows to bring sleeves to life.
Retouch and color-match for a seamless final look.
Avoid stiff edges, leftover mannequin traces, and overdone shadows.
With these steps, your sleeves will no longer be the weak spot in your ghost mannequin edits—they’ll be a strong selling point.
Ready to try it yourself? Open up Photoshop and practice on your latest product photos. And if you’d rather focus on shooting while someone else handles the tedious edits, consider outsourcing to a professional sleeve retouching service.
Question for you: What’s the trickiest part of editing clothing photos for you, sleeves, collars, or something else? Drop your answer below, and I’ll share some targeted tips in the next guide!