A few years ago, I was editing a batch of shirt photos for an online store. Everything looked perfect in-camera—the shirts were freshly ironed, the mannequin stood tall, and the lighting setup was on point.
But when I removed the mannequin during editing, the neckline looked awkward and incomplete. It felt like the product was missing something, and I remember thinking, “If I don’t even want to buy this shirt, why would anyone else?”
That’s when I first discovered Neck Joint Editing. It’s a photo retouching technique where you merge two shots—one of the clothing on a mannequin and another showing the inside collar or neck area.
Put them together, and you get a seamless, natural-looking apparel photo with no mannequin in sight. The neckline looks perfect, the garment holds its shape, and the product becomes the star of the show.
Why is Neck Joint Editing Important?
For E-commerce Stores
-
Creates Realistic Product Display: Shoppers can visualize how the clothing will actually look when worn, without distractions.
-
Builds Trust: High-quality product photos directly impact conversion rates. A clear neckline shows attention to detail, and buyers feel confident about what they’re purchasing.
For Fashion Brands
-
Highlights Details: Collars, inner tags, lining, and stitching become visible. This is especially important for premium brands where craftsmanship is a selling point.
-
Consistency Across Catalogs: Neck joint editing ensures that every shirt, jacket, or dress looks uniform in presentation. That consistency strengthens brand identity.
For Professional Photographers
-
Saves Reshoots: Instead of calling models back or re-shooting products, editors can fix necklines in post-production.
-
Faster Than Complex Masking: Compared to manually masking and shaping garments, neck joint editing streamlines the process and delivers more professional results.
In short, neck joint editing is the unsung hero of apparel photography. It turns ordinary shots into polished, shop-ready images that sell.
Types of Neck Joint Editing

Not all garments are created equal—and neither are editing needs. Neck joint editing comes in several forms depending on the type of apparel and the look you’re aiming for. Here are the main categories:
1. Basic Neck Joint
This is the simplest form. You take the front shot of the garment on a mannequin and combine it with an extra collar shot. Perfect for T-shirts, polos, and simple tops where you only need to clean up the neckline and make it look natural.
Example: A basic crew-neck T-shirt where you just need to fill in the missing inner neckline.
2. Invisible Mannequin Effect
This one’s a bit more advanced. Along with the collar, you also add inside labels and stitching to give the product a fully realistic “floating” look. This is what you see on almost every fashion e-commerce site today.
Example: Think of a Zara catalog where you can see the tag and neckline inside a blouse—it feels like you’re holding it in your hands.
3. Sleeve or Arm Joint
For shirts, blouses, or jackets with sleeves, editing gets trickier. You need to remove mannequin arms while still keeping the garment’s natural flow. This involves joining extra shots of sleeves or inner arm areas, ensuring symmetry and consistency.
Example: A men’s formal shirt where the sleeves must look sharp and even after the mannequin is removed.
4. 3D/Complex Neck Joint
This is the big league. It applies to layered outfits like hoodies under jackets, coats with lapels, or multi-layer dresses. Editors must combine several shots (collar, sleeves, inner layers) to build a realistic 3D effect that looks natural from all angles.
Example: A winter coat with a hoodie inside—you need to show both layers clearly without any mannequin interference.
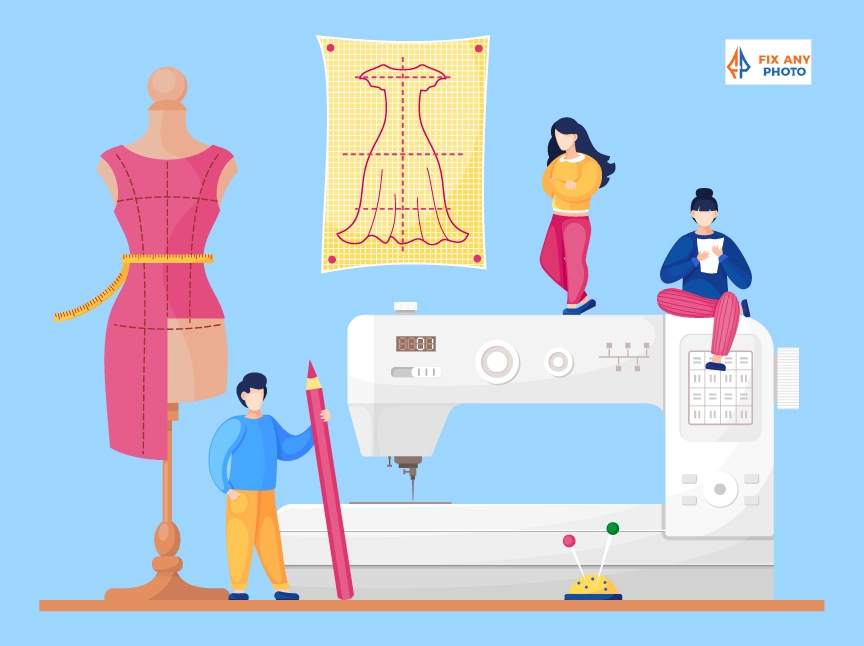
Step-by-Step Guide: How Neck Joint Editing Works

Now let’s get practical. Here’s a breakdown of the full process I (and most professional editors) follow when doing neck joint editing:
Step 1: Preparing the Photos
-
Shoot the front view on a mannequin or model. Keep the camera at chest level for accuracy.
-
Take an inner collar/neck label shot separately. This fills the neckline gap later.
-
Ensure proper lighting and alignment. Uneven lighting makes blending harder, so soft studio light is best.
Always iron the garment before shooting. Editing wrinkles later is far more time-consuming than preventing them during the shoot.
Step 2: Importing into Editing Software
-
Open your shots in a professional editor like Adobe Photoshop, GIMP, or Affinity Photo.
-
While GIMP and Affinity are great, Photoshop remains the industry standard for e-commerce editing because of its precision tools, layer management, and non-destructive editing.
If you’re doing this often, set up Photoshop Actions to speed up repetitive steps like masking and alignment.
Step 3: Clipping & Masking
-
Use the Pen Tool for precise selections around the mannequin. Don’t rush here—accuracy matters.
-
Mask out the mannequin while preserving the garment’s edges, seams, and natural folds.
Zoom in at 200% while tracing edges. It feels slow, but it prevents jagged cuts and keeps the garment looking natural.
Step 4: Combining Neck & Collar
-
Place the inner collar photo under the main garment layer.
-
Align it so the perspective and proportions match seamlessly.
-
This step creates that “ghost mannequin” illusion where the neckline looks natural and complete.
Lower the opacity of the collar layer temporarily to align it perfectly with the main shot.
Step 5: Blending & Retouching
-
Color Correct: Match the collar shot with the garment’s main photo. Lighting differences can make them look mismatched otherwise.
-
Add Natural Shadows: Without shadows, clothes look flat. Use soft brushes or curves to add depth.
-
Remove Flaws: Dust, stray threads, or minor wrinkles can be distracting. Clean them up for a polished finish.
Don’t overdo sharpening or color boosts. The goal is realism, not a plastic-looking garment. step-by-step guide for editing apparel photos
Common Challenges in And How to Fix Them

Even after years of editing, I still run into little hiccups when working on neck joint edits. The trick isn’t avoiding mistakes—it’s knowing how to fix them quickly without ruining your workflow. Here are the most common problems and their solutions:
1. Collar Misalignment
The problem: You add the inner collar shot, but it doesn’t align perfectly with the main garment. It looks tilted or “off.”
The fix: Use Photoshop’s Warp and Transform tools to nudge the collar into place. Warp lets you bend the fabric edges slightly so the lines match up. Transform is great for resizing and rotating until it fits naturally.
2. Lighting Differences
The problem: The collar shot is slightly darker or warmer than the main garment shot because of light placement during the shoot.
The fix: Apply color correction techniques like Curves or Levels to match tones. You can also use selective color adjustment layers to target specific hues (like whites or shadows).
Pro Tip: Check consistency not just in brightness but also in white balance. A shirt that looks cool-toned in one shot and warm in another breaks trust with buyers.
3. Jagged Edges After Clipping
The problem: Your clipping path leaves rough, jagged edges around the neckline, making the edit look amateur.
The fix: Always refine your mask. In Photoshop, use Feather (0.5–1px) and Refine Edge/Select and Mask to smooth out edges without losing garment detail.
4. Missing Garment Details
The problem: Sometimes the inner collar photo isn’t shot properly—or worse, it’s missing.
The fix: You can try smart cloning (using the Clone Stamp or Content-Aware Fill) to rebuild small details like stitching. But if the missing area is too big or complex (like a designer label), it’s often quicker to reshoot the collar photo.
Tools & Software for Apparel Neck Retouch Editing

You don’t need a spaceship-level setup to nail neck joint edits. A good editing program and some patience are enough. Here are the tools I recommend:
1. Adobe Photoshop (Best Overall)
This is the gold standard. Photoshop’s Pen Tool, Masks, and Layer Blending options make it unbeatable for precise edits. Plus, you can save your workflow as Actions to speed up bulk editing.
Best for: Professionals, agencies, or anyone handling large e-commerce catalogs.
2. GIMP (Free Alternative)
If you’re on a tight budget, GIMP is surprisingly powerful. It has masking, cloning, and layering tools similar to Photoshop. The downside? The learning curve is steeper, and it lacks some of Photoshop’s polish.
Best for: Freelancers or beginners who want to practice before investing in Photoshop.
3. Lightroom (For Finishing Touches)
Lightroom isn’t for the actual neck joint process, but it’s fantastic for batch color correction, sharpening, and final polish across hundreds of product images.
Best for: Maintaining consistency in brightness, tones, and contrast across a whole product catalog.
4. Outsourcing Services
Sometimes it just makes sense to outsource. Professional retouching teams (like mine!) can handle bulk edits quickly with guaranteed consistency.
Pros:
-
Saves time for photographers and brands.
-
Professional, uniform results across all products.
-
Scalable for large e-commerce stores.
Cons:
-
Costs more than DIY.
-
Less creative control unless you communicate clearly with the team.
Pro Tip: If outsourcing, always ask for sample edits first to ensure their style matches your brand.
DIY vs Professional Neck Joint Editing
This is the big question: should you learn neck joint editing yourself or hire pros? The answer depends on your project size, budget, and timeline.
Let’s break it down:
DIY Editing
-
When it works best:
-
Small businesses with fewer products.
-
Freelancers or beginners practicing their skills.
-
Tight budgets where outsourcing isn’t possible.
-
-
Benefits:
-
Complete creative control.
-
No extra costs beyond software.
-
Great learning experience if you want to grow editing skills.
-
-
Challenges:
-
Very time-consuming, especially for catalogs.
-
Risk of inconsistent results if you’re still learning.
-
Tip: If you’re just starting out, try practicing neck joint edits on 3–4 images before committing to editing an entire store catalog.
Professional Editing Services
-
When it works best:
-
Medium to large e-commerce stores.
-
Fashion brands launching seasonal collections.
-
Photographers who want to focus on shooting, not endless retouching.
-
-
Benefits:
-
Faster turnaround time.
-
Consistency across thousands of images.
-
Access to advanced retouching skills (shadows, color correction, etc.).
-
-
Challenges:
-
Ongoing cost (usually priced per image or in bulk packages).
-
Requires clear communication to get exactly what you want.
-
Pricing Overview
Neck joint editing is usually priced per image, and costs vary by complexity:
-
Basic neck joint: $0.50–$1.50 per image.
-
Sleeve/arm joint or invisible mannequin effect: $2–$5 per image.
-
Complex 3D edits with multiple layers: $5–$10+ per image.
Neck Joint Editing in E-commerce
If you’ve ever shopped on Amazon, eBay, or Shopify, you’ll notice a trend: the best-performing clothing products almost always use clean, mannequin-free product photos. Why? Because these platforms reward clarity and professionalism.
-
Amazon has strict image requirements (white background, no props, no distractions). Neck joint editing ensures your apparel meets those standards.
-
eBay prioritizes clean and consistent visuals, making it easier for your listing to stand out.
-
Shopify store owners know that polished product images boost brand trust and reduce returns.
Why It Matters for Clothing Categories
Clothing is one of the hardest products to sell online. Unlike electronics or furniture, buyers can’t touch or try them before purchasing. Neck joint editing bridges that gap by making garments look realistic, structured, and appealing.
-
Shirts and Polos: Clean collars, straight sleeves, and crisp fabric details help buyers visualize fit.
-
Jackets and Coats: Complex neck joints highlight layers, lapels, and stitching.
-
Dresses and Blouses: Invisible mannequin edits keep the garment’s natural shape without distractions.
Case Study: Sales Boost with Neck Joint Editing
One of my e-commerce clients sold mid-range men’s formal shirts. Initially, their product photos showed mannequins with cropped collars. Sales were flat, and shoppers often complained that the shirts looked “cheap.”
We switched to ghost mannequin editing with proper neck joint retouching. Within 3 months, their sales conversion rate jumped by 22%, and returns dropped significantly.
The difference wasn’t the shirts—it was how they were presented. When the collars looked crisp and natural, buyers trusted the product.
Final Touches
Neck joint editing gives you the base, but final enhancements take product photos from “good” to “wow.”
-
Add Shadows for Depth: Use picture shadowing to make clothes look three-dimensional instead of flat cutouts.
-
Adjust Brightness/Contrast for Web Display: What looks fine in Photoshop might look dull on a website. Always preview in web format before publishing.
-
Maintain Consistency Across Catalogs: Nothing kills brand trust faster than inconsistent editing. Ensure all garments have the same brightness, shadow style, and cropping.