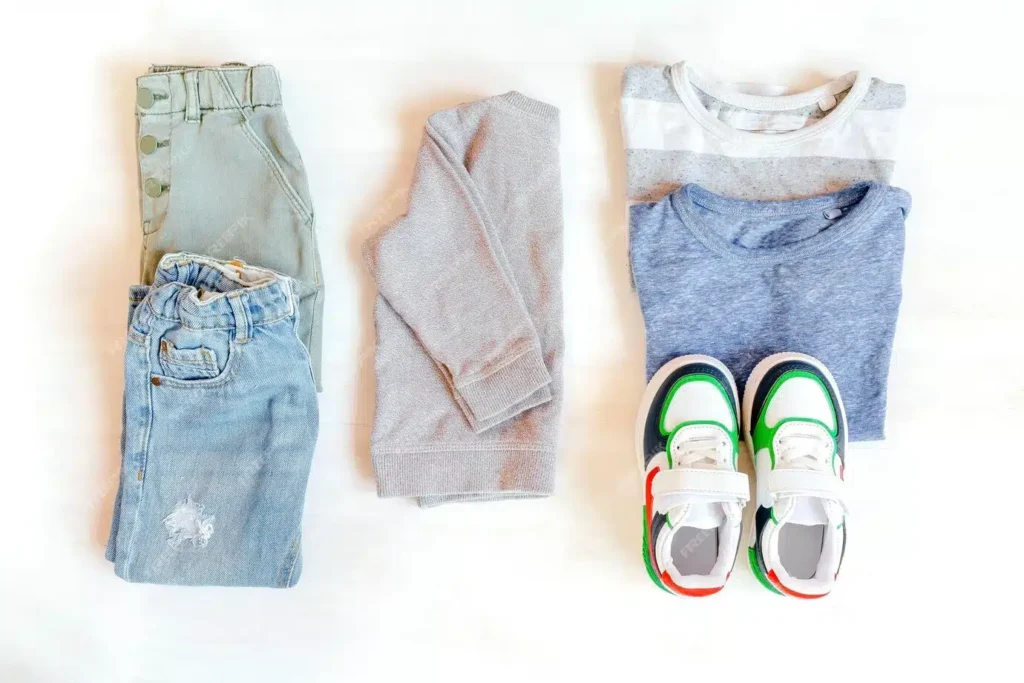
Ghost mannequin photography, also known as 3D mannequin, invisible mannequin, or hollow man, is a clever way to make your clothing come to life in photos. It’s like a 3D magic trick where an invisible human figure appears to be wearing your clothes. In simpler terms, it’s an image where you see the garment, but it’s as if an invisible person is rocking it.
You have these fantastic clothes or products to show off, but who wants those boring ghost mannequin shots? Let’s spice up your photos with some fun and creative ideas!
Are you eager to photograph your stylish clothes but want to avoid the ghost mannequin hassle? In an easy-to-understand way, here’s your handy guide:
First, think about how you want to present your clothing. Is it on a model, mannequin, or through flat-lay photography? Decide what works best for your brand.
Make sure you have the right equipment, including a camera, tripod, and lighting setup, to ensure high-quality photos.
Before shooting, ensure your clothing items are clean, pressed, and in the best condition.
Find a well-lit space and create a setup that showcases your clothing effectively. Consider the backdrop, props, and any styling elements.
Check and adjust your camera settings, focusing on exposure, aperture, and shutter speed to capture your clothes in the best light.
Take multiple shots from various angles, capturing details, and unique features of your clothing. Don’t be afraid to experiment with different poses and compositions.
After you’ve taken your shots, use photo editing software to enhance and retouch your images. This step is crucial for attracting customers and making your clothes look their best.
Find a spacious, flat surface and select a suitable background. Simplicity often works best.
If possible, use natural light for the most flattering results. If not, incorporate one or two external lights.
Opt for a low ISO, a fast shutter speed, and a high f-stop to maintain image quality and focus.
Position your camera directly above the clothes to capture that perfect flat-lay look.
Make slight adjustments until you’re satisfied with the shot. Ensure everything is neatly arranged and appealing.
Perfect Flat Lay Photography with Canon EOS 5D Mk III:
Place the fabric in the center.
Ensure a straight neck and shoulders.
Tailor to the clothing’s gender.
Maintain symmetry.
Neatly fold sleeves.
Keep the front seamless.
Capture your flawless shot!
With these steps, you’ll ace flat-lay photography without a ghost mannequin.
In flat-lay photography, every detail matters. Even the tiniest slip-up can be glaring. That’s why post-processing steps in to save the day:
Your images may be good, but with a bit of final editing, they can become outstanding. Services like background removal, product retouching, color correction, and clipping paths work like magic.
Sometimes, even a well-decorated setup needs a background removal to truly shine. Post-processing offers a quick fix for background adjustments.
A subtle tweak in color correction can make your attire pop or set the mood just right. It’s the little things that make a big difference.
Need a shadow to add depth? Post-production can craft shadows that complement your vision.
Unwanted wrinkles? Leave it to the professionals to smooth things out.
Photography post-processing enhances the overall look. By availing these services, you boost your product’s visibility and attract potential clients. It’s the key to perfection!
Not all clothing is suitable for flat-lay photography. This style works best for items like kidswear, t-shirts, shirts, jumpers, blazers, jeans, trousers, socks, swimwear, scarves, towels, and more. These are the stars of the flat-lay show!
Select the technique that best meets your needs and resources. Your product images will look wonderful, and your buyers will appreciate the extra effort you put into making them come to life.
Discover fresh tips, tutorials, and insights on product photo editing, product photography, and e-commerce growth. Every article is crafted to help you create stunning images that boost your brand’s success.