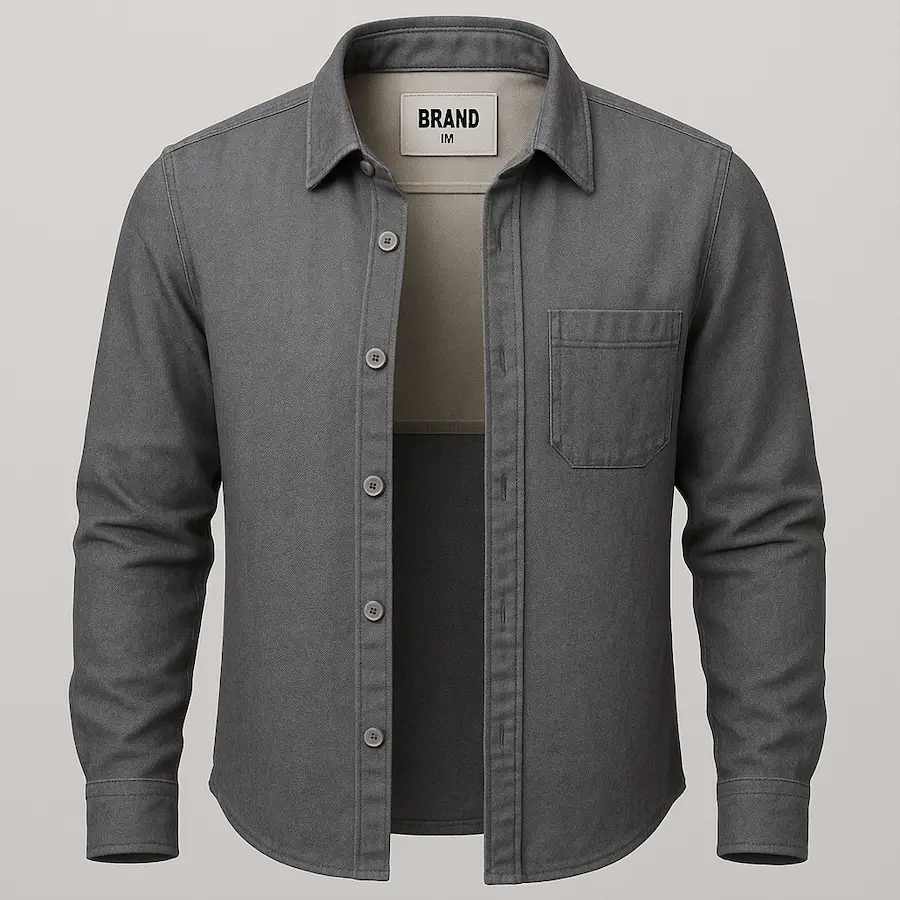
I’ll never forget the first time I tried to pull off a Ghost Mannequin Photoshop effect. I had just finished photographing a gorgeous denim jacket on a mannequin and thought Photoshop would magically erase the torso with one click. Spoiler alert: it didn’t.
Instead, I spent hours clicking, erasing, and quietly (okay, not so quietly) cursing at my screen. The end result? It looked like a melted wax sculpture wearing a jacket. Humbling, to say the least.
But that experience lit a fire under me. I wanted to master ghost mannequin editing and make my images look as polished as the ones I admired online. Dozens of projects (and countless cups of coffee) later, I’ve built a step-by-step workflow that gives me clean, professional results every single time.
In this tutorial, I’ll show you exactly how to go from raw photos to a flawless invisible mannequin effect. From prepping your files, to aligning and masking layers, to blending the final image – I’ll walk you through each step so you can skip the frustration and get that pro-level finish right away.
Gear and Files You Need
Before you jump into editing, make sure you have the right resources:
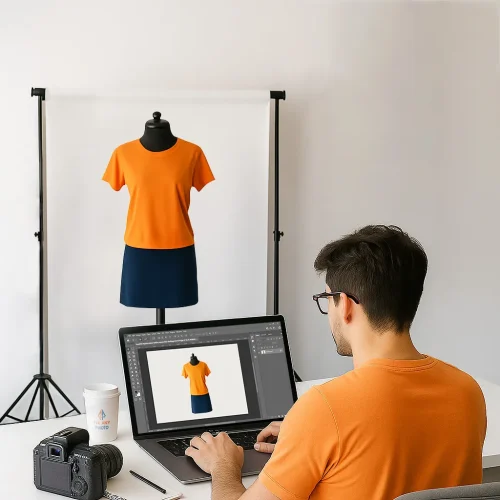
High‑resolution photos. You’ll need at least two shots of your garment: a front view and a back or inside label view. Many photographers also take side shots, sleeve inserts, or detail shots. Make sure your lighting and camera angle stay consistent across all images. According to Color Experts International, the ghost mannequin process involves photographing the garment on a mannequin or live model and then combining the images to remove the mannequin while retaining the shape and fit.
Adobe Photoshop (or equivalent). Photoshop’s layer masks, selection tools, and blending modes make this process easier. Free alternatives like GIMP can do the job, but the workflow may vary slightly.
A graphics tablet (optional). While not required, a tablet makes detailed masking more precise and comfortable.
Time and patience. This is not a one‑click edit. The more meticulous you are, the more realistic your results will be.
Preparing Your Workspace
Organization is key when working with multiple layers. Here’s how I set up my workspace:
Create a new project folder. Keep all your raw photos, PSD files, and exports in one place. Name your files clearly (e.g., jacket_front.CR2, jacket_back.CR2, jacket_label.CR2).
Open Photoshop and import your images. I drag all relevant shots into a single document. Each photo appears as its own layer. Rename your layers immediately (e.g., Front, Back, Label). There’s nothing worse than losing track of “Layer 5 copy.”
Arrange layers in logical order. I place the Front layer at the top, followed by the Back or Label layer underneath. You can hide layers by clicking the eye icon until you need them.
Zoom in and inspect. Look for wrinkles, dust, or lighting inconsistencies. Jot down any issues you’ll need to address later.
A clean workspace not only saves time but also helps you avoid editing mistakes like masking the wrong layer or misaligning edges.
Removing the Mannequin
Here’s where the magic begins. You’re going to isolate the garment and remove the mannequin so it appears hollow. Don’t worry if this feels intimidating, you’ll get faster with practice.
1. Duplicate the Front Layer
Right‑click the Front layer and choose Duplicate Layer. Name the copy Front Mask. This duplicate will be the layer you mask away. Keeping the original intact allows you to backtrack if needed.
2. Create a Precise Selection
Select the Front Mask layer. Use one of Photoshop’s selection tools to outline the garment. Here are your options:
Pen Tool (P). This is my go‑to for clean edges. Click around the garment to create anchor points and curves. When you return to the starting point, right‑click and choose Make Selection. Set Feather Radius to 0.5–1 pixel.
Quick Selection Tool (W). For garments with simple backgrounds, drag the tool inside the clothing area. Photoshop automatically selects similar pixels. Hold Alt to subtract from the selection if it spills over.
Object Selection Tool (Shift+W). Introduced in newer versions of Photoshop, this tool can automatically detect objects. It’s worth trying, but often needs refinement.
Take your time here. Sloppy selections lead to uneven edges and amateurish results. Zoom in and adjust the points until the path hugs the garment snugly.
3. Add a Layer Mask
With your selection active, click the Add Layer Mask icon at the bottom of the Layers panel.
This hides everything outside the selection. You should now see just the garment, floating on a transparent background, but the mannequin inside the neckline and sleeves is still visible. Don’t worry, we’ll fix that next.
4. Mask Out the Mannequin
To remove the remaining mannequin parts inside the garment, you’ll need to paint on the mask:
Select the mask thumbnail of the Front Mask layer.
Choose the Brush Tool (B). Pick a soft round brush with 100% opacity.
Set your foreground color to black (to hide) and your background color to white (to reveal).
Carefully paint over the mannequin areas inside the neckline, sleeves, and bottom hem. Zoom in to ensure you don’t paint over the garment itself.
If you make a mistake, switch your foreground color to white and paint over the area to reveal it again. That’s the beauty of layer masks, non‑destructive editing keeps your original image safe.
5. Clean Up Edges
Even with careful selections, you might notice jagged edges or halos. To refine the mask:
Right‑click the mask thumbnail and choose Select and Mask… This opens a workspace where you can use the Refine Edge Brush to improve hairline edges and feather transitions. Adjust the Smooth, Feather, and Contrast sliders to your liking.
Alternatively, lightly paint along the edges with a small, soft brush. Zoom in at 200–300% for precision.
It may seem tedious, but polished edges are what separate professional ghost mannequin images from amateur attempts.
Merging Front and Back Views

Now that you’ve isolated the front, it’s time to add the interior view that will replace the missing mannequin.
This step is essential for collared shirts, jackets, and garments with unique inner labels.
The post‑production process involves layering these images together so the garment looks hollow.
1. Align the Back Layer
Make the Back layer visible and drag it beneath the Front Mask layer. Lower the opacity of the Front Mask layer to around 70% so you can see the back image underneath.
Use the Move Tool (V) to align the collar, seams, and any graphics. It helps to temporarily reduce the opacity of both layers to fine‑tune the alignment.
2. Add a Mask to the Back Layer
Once aligned, add a layer mask to the Back layer. Use a soft brush to paint black on areas of the back layer that shouldn’t show, usually everything except the neckline, inner collar, or label.
Remember, the goal is to reveal only the interior details while keeping the main shape from the front view.
3. Blend the Layers
Return the opacity of the Front Mask layer to 100%. You may notice slight color or brightness differences between the two layers.
Use adjustment layers such as Curves, Levels, or Hue/Saturation clipped to the back layer to match the tonal values. Tweak until the transition looks seamless.
Blending and Retouching
With the mannequin gone and the inner collar in place, your image should start to look like a professional product photo.
But there’s still work to do, wrinkles, dust, color casts, and shadows can drag down the final image.
1. Retouch Wrinkles and Imperfections
Clone Stamp Tool (S). Hold Alt to sample a clean area, then paint over wrinkles or dust spots. Use a low opacity (20–40%) and vary your sample point often to avoid repeating patterns.
Healing Brush (J). This tool automatically blends sampled texture with surrounding color. It’s perfect for minor imperfections.
Dodge and Burn (O). Dodge lightens and burn darkens. Use these tools on a new 50% gray layer set to Overlay blending mode to add subtle shading and depth.
2. Adjust Colors and Contrast
Professional product photos have accurate, vibrant colors. If your garment looks dull or the shadows appear muddy:
Add a Curves Adjustment Layer. Create gentle S‑curves to add contrast without crushing details.
Use Selective Color or Hue/Saturation adjustments to fine‑tune specific color channels. For example, you might remove a slight blue cast from a white t‑shirt.
Check the histogram. Ensure your highlights aren’t blown out and your shadows still contain detail.
3. Add Natural Shadows
Ghost mannequin images risk looking like cutouts if you don’t add a subtle shadow under the garment. Here’s my method:
Create a new layer below all others and fill it with white.
Select the garment mask (Ctrl + click on the mask thumbnail).
Go to Layer → New → Layer via Copy (Ctrl + J) to create a copy of the garment’s silhouette on the new white layer.
Fill the silhouette with black or dark gray.
Apply a Gaussian Blur (Filter → Blur → Gaussian Blur) at a radius of 20–50 pixels.
Lower the opacity of the shadow layer to around 20–40% and move it slightly downward. This creates a soft, realistic drop shadow.
Saving Web‑Optimized Images
Once your edit looks polished, it’s time to export. Large file sizes slow down your website and hurt SEO. My workflow:
Flatten a copy of your layered file (keep your original PSD with layers for future edits).
Go to File → Export → Save for Web (Legacy)…
Choose JPEG with a quality setting between 70–85. This balances file size and image quality.
Check the final dimensions. For most e‑commerce stores, 1500–2000 pixels on the longest side is sufficient.
Save using descriptive, keyword‑rich file names (e.g., ghost‑mannequin‑blue‑jacket.jpg). This improves SEO and makes your files easy to organize.
Google prioritizes pages that load quickly and have descriptive, accessible images. Optimizing your exports can improve your site speed and search ranking.
Common Mistakes and How to Fix Them
Even with a solid workflow, things can go wrong. Here are a few pitfalls I encountered and how to avoid them:
Misaligned Layers
If the back view isn’t perfectly aligned with the front, you’ll end up with a crooked collar or mismatched seams.
Always double‑check alignment by lowering the opacity of the top layer and lining up seams, patterns, and tags.
Sometimes flipping the back layer horizontally helps if the collar is asymmetrical.
Color Mismatch Between Layers
Different lighting conditions or camera settings can cause the inner label shot to have a slightly different hue.
Use Curves or Color Balance adjustment layers clipped to the back layer to match colors.
You can also use the Match Color feature under Image → Adjustments → Match Color.
Jagged Edges
If your selection has rough edges, they’ll become obvious when composited. Always zoom in and refine your mask.
Soft, feathered edges create a natural look. You can also use the Smudge Tool on the mask at a low strength (5–10%) to gently nudge pixels into place.
Forgetting Inner Shots
I once finished editing a jacket only to realize I had no shot of the inner collar. Without that piece, the neckline looked like a gaping hole. Always plan your photography session with a shot list that includes front, back, and any inserts (sleeves, collars, hems).
Over‑Editing
It’s tempting to smooth every wrinkle and boost every color, but too much editing can make clothing look fake.
Leave some texture so the garment feels real. Remember, you’re selling a tangible product, not a digital rendering.
Advanced Tips for Faster Workflow
Once you’ve mastered the basics, these tricks can speed up your process:
Use actions and presets. Record your steps (like creating shadows or setting up adjustment layers) as an action. Next time you edit, play the action and adjust as needed. Saving time on repetitive tasks lets you focus on the fine details.
Batch process with Smart Objects. If you have multiple garments shot in the same lighting, turn each image into a Smart Object, apply non‑destructive adjustments, and update them across multiple files simultaneously.
Third‑party plugins. Tools like Topaz Labs DeNoise or Luminar AI can help with noise reduction and color grading. Use them sparingly and always finish with manual adjustments.
Level Up Your Product Photography
Ghost mannequin editing is part precision, part creativity. It may feel tricky at first, I’ve been there, but with practice, your workflow gets faster and your eye for detail sharper.
Start simple, maybe with a shirt, then level up to jackets or lace dresses. When things get messy, return to the basics: clean selections, neat masking, and consistent lighting. Master these, and your images will shine in any marketplace.
Now it’s your turn, have you nailed a ghost mannequin edit you’re proud of, or had a funny fail along the way? Share your story in the comments. We’ll learn (and laugh) together.
FAQs About Ghost Mannequin Editing
Why use ghost mannequin editing?
It makes clothes look professional, realistic, and distraction-free, perfect for e-commerce.
Can I create the ghost mannequin effect without Photoshop?
Yes, but Photoshop gives the most control. Some alternatives exist but are limited.
Which photos do I need for ghost mannequin editing?
At least two shots: a front view on the mannequin and an inside collar/back shot.
How long does it take to edit one ghost mannequin photo?
For beginners, 15–20 minutes. With practice, just a few minutes.
What Photoshop tools are used most?
Pen Tool, Layer Masks, Clone Stamp, Curves, and Liquify.
Can beginners learn this easily?
Yes! With practice and tutorials, it’s a beginner-friendly skill.
Does ghost mannequin editing improve sales?
Absolutely, professional images boost trust and conversions.
Can I outsource ghost mannequin editing?
Yes, many brands hire retouching services to save time and get consistent results.


