Budget‑Friendly vs Pro Gear for Ghost Mannequin Photography
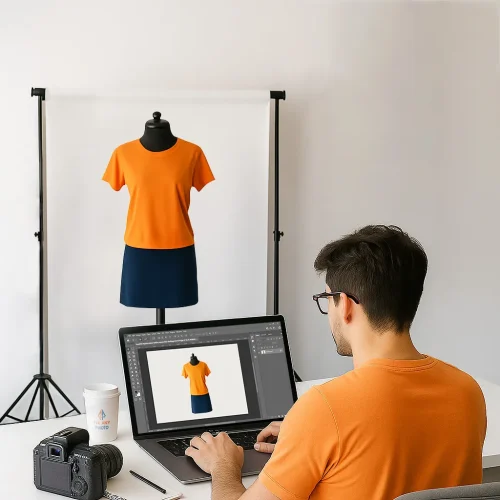
When I first dipped my toes into the world of ghost mannequin photography, my “studio” was a corner of my apartment.
My gear? A midrange DSLR inherited from an uncle, two cheap clamp lights from the hardware store, and a white sheet taped to the wall.
My results weren’t horrible, but they certainly weren’t jaw‑dropping either. Each time I scrolled through competitors’ product pages, I felt like my images whispered “home studio” while theirs shouted “professional.”
Over time I upgraded my kit piece by piece and learned that you don’t have to max out your credit card to shoot pro‑looking ghost mannequin photos.
In this post I’ll walk through the gear journey I’ve taken, compare budget and pro options, and help you decide where to invest and where to improvise.
Pro Gear: Worth the Investment?

Let’s start with the dream scenario. If money were no object, you’d probably outfit your studio with the latest full‑frame mirrorless camera, crisp prime lenses, powerful strobes and seamless backdrops.
Does this gear make a difference? Absolutely. But is it strictly necessary to produce sellable images? Not at first. Here’s what you get when you spring for pro equipment:
Top‑Tier Cameras & Lenses
High‑end cameras like the Canon EOS R5 or R6, Sony A7 IV, and Nikon Z6 II deliver stunning detail thanks to their full‑frame.
These bodies handle low light beautifully and offer wide dynamic range, which means more information captured in highlights and shadows.
This is particularly helpful when editing ghost mannequin shots, where you sometimes expose for both a shiny satin sleeve and a dark inner collar.
Fast prime lenses such as a 50 mm f/1.8, 85 mm f/1.8, or versatile 24–70 mm f/2.8 create creamy background blur and render fabric textures with incredible.
Professional Lighting
A pro photographer’s kit often includes powerful continuous lights or strobes with modifiers like softboxes and grids.
Sets such as the Godox SL‑60W LED lights, Elinchrom D‑Lite RX 4/4 softbox kit, or other high‑wattage monolights offer consistent, flicker‑free illumination and plenty of power to shoot at low ISO settingsdocs.google.com.
They also allow you to sculpt light precisely, adding dimension to garments and preventing harsh shadows.
Sturdy Supports & Backdrops
Premium tripods, C‑stands, and heavy‑duty backdrop systems minimize vibrations and keep your setup consistent from one shoot to the next. Professional backdrops are often seamless vinyl or high‑quality paper that resists wrinkling and easily cleans up between sessions.
Intangible Benefits
In addition to the obvious technical advantages, pro gear simply feels good. Knowing you have reliable equipment reduces stress and lets you focus on styling and composition.
Clients notice the professional environment too—it’s much easier to justify higher rates when your studio looks the part.
But there’s a catch: investing in pro gear is expensive. Full‑frame bodies cost thousands of dollars, fast lenses aren’t cheap, and high‑powered lights add up quickly.
If you’re just starting or shooting sporadically, those costs can eat into your profit margin. Luckily there are budget options that perform surprisingly well.
Budget Setups That Work

I didn’t start my business with a Canon R5. My first serious camera was a Canon EOS Rebel T8i, paired with the kit 18–55 mm lens.
It cost a fraction of a full‑frame camera yet delivered respectable resultsdocs.google.com. Here are some budget options worth considering:
Camera Bodies: Entry‑level DSLRs and mirrorless cameras like the Canon Rebel T8i, Sony A6400, and Nikon D5600 are all capable of producing crisp images for e‑commercedocs.google.com. While their APS‑C sensors aren’t as large as full‑frame, they still deliver plenty of resolution for web and print catalogs. Pair them with a prime lens (e.g., a 50 mm f/1.8) and you’ll notice a huge jump in quality compared to a kit zoom lens.
Lenses: If you can afford one upgrade, make it a good lens. A nifty‑fifty (50 mm) prime offers a bright aperture for shallow depth of field and better low‑light performance. Budget macro lenses are also great for capturing intricate stitching or embellishments.
Lighting Kits: Affordable continuous lighting kits like Neewer’s two‑pack softbox kit or DIY ring lights give you soft, even illumination without breaking the bankdocs.google.com. Combine these with inexpensive reflectors (white foam boards work wonders) and you can mimic a multi‑light setup. Natural light near a large window, diffused with a white sheet, is also a budget photographer’s best friend.
Backdrops & Supports: Don’t underestimate the humble white wall or a roll of craft paper taped up with painter’s tape. I’ve shot countless garments against a plain wall and pulled it off convincingly. A decent midrange tripod will keep your images sharp. If you don’t have a professional backdrop stand, clamp your backdrop to a bookshelf or use tension rods between walls.
Even with this inexpensive kit, my early clients were thrilled because I focused on fundamentals: proper lighting, clean compositions, and meticulous editing.
In many ways, the constraints forced me to be creative and resourceful.
Where to Spend vs Save
When you’re building a kit, some items matter more than others. Here’s my rule of thumb:
| Spend | Save/Improvise |
|---|---|
| Lenses: A high‑quality lens is a long‑term investment. The difference between a plastic kit lens and a well‑built prime is night and day. | Backdrop Stands: Start with whatever you have. Tape, clamps, and makeshift stands can support a backdrop if you’re careful. |
| Lighting: Good light is half the equation in photography. A solid continuous light or strobe will outlast multiple camera bodies. | Camera Body: Cameras depreciate quickly. An entry‑level or midrange body will get you far. Upgrade when your business demands it. |
| Tripod: A sturdy tripod eliminates motion blur and keeps framing consistent. | Reflectors & Diffusers: DIY reflectors using foam board or window light diffused with a sheet work just fine. |
| Color Calibration Tools: A simple gray card and monitor calibration device ensure accurate colors. | Fancy Props: Keep props minimal. Your focus should be on the garment. |
Lens Quality Matters Most
I cannot overstate how much a good lens improves your photos. The jump from a cheap zoom to a prime lens is immediately noticeable, images are sharper, colors are richer, and low‑light performance improves.
If you only upgrade one piece of equipment this year, let it be a lens. When I finally bought an 85 mm prime, my portraits and product shots went from amateur to professional overnight.
DIY Hacks & Repurposed Gear

One of the joys of being resourceful is discovering that you can build nearly anything with everyday items. Here are some of my favorite DIY hacks:
Foam Board Reflectors: Buy a couple of white foam boards from the craft store. Prop them opposite your light source to bounce light back onto the garment. Instant fill light!
Clamp Lights with Diffusion: Hardware store clamp lights are cheap. Soften them by clipping on a white shower curtain or tracing paper. Always keep flammable materials away from hot bulbs and use LED bulbs to reduce heat.
Lazy Susan Turntable: For simple 360° product spins, place your mannequin or product on a sturdy lazy Susan. Mark rotation increments with tape on the table and rotate manually between shots. It’s not as precise as a motorized turntable, but it works in a pinch.
PVC Pipe Backdrop Stand: Two vertical PVC pipes connected by a horizontal pipe create a makeshift backdrop frame. You can disassemble it for storage and adjust the width by cutting pipes to length.
Foam Inserts & Pins: Cheap foam or bubble wrap stuffed into garments helps maintain shape. Use straight pins and clamps on the backside of the garment to eliminate sagging.
These hacks kept my costs low when I started. They also taught me about light manipulation and problem solving, skills that still serve me when working with expensive gear. For bigger projects, I often rely on expert product image enhancement to achieve consistent, professional results.
Upgrading Over Time
The best part of building a ghost mannequin studio is that you don’t have to buy everything at once. Here’s how my upgrade path looked:
Started with an entry‑level DSLR and kit lens. Learned the fundamentals of exposure, composition, and basic editing.
Added a 50 mm prime lens. The jump in quality convinced me to continue investing in glass.
Upgraded lighting. I purchased a budget softbox kit and later replaced one of the lights with a more powerful LED panel.
Switched to tethered shooting. I began connecting my camera to a laptop, which improved efficiency and allowed me to spot issues immediately.
Invested in a full‑frame camera and professional lens. Only after my business was consistently profitable did I make the leap to a Canon R6 and a 24–70 mm f/2.8 lens.
Upgraded to professional strobes. With higher‑paying clients and more complex shoots, I invested in studio strobes with modifiers. They allowed me to control light with precision and handle reflective fabrics gracefully.
Each upgrade solved a real problem. When I couldn’t get crisp edges with my kit lens, I bought a prime.
When my cheap lights kept flickering, I upgraded to LED panels. For polishing the final results, I often rely on professional image retouching to make sure every photo looks clean and consistent.
Sample Budget Tiers & Cost Breakdown
To make things more concrete, here’s how you might structure your spending across three tiers. These are rough estimates based on what I’ve purchased over the years and prices at the time of writing:
| Tier | Camera & Lens | Lighting | Accessories & Backdrop | Total |
|---|---|---|---|---|
| Starter (~$600–$800) | Used APS‑C body (e.g., Canon T7i) + 50 mm f/1.8 lens (~$500) | Two clamp lights with DIY diffusion (~$40) | White wall, foam board reflectors, basic tripod (~$100–$200) | ~$640–$740 |
| Mid‑range (~$1,500–$2,000) | Entry‑level mirrorless (e.g., Sony A6400) + prime lens (~$1,000) | Two budget softboxes or LED panels (~$300) | Collapsible backdrop & midrange tripod (~$200–$300) | ~$1,500–$1,600 |
| Pro (~$4,000+ ) | Full‑frame body (Canon R6, Sony A7 IV) + 24–70 mm f/2.8 (~$3,500)docs.google.com | Three continuous or strobe lights with modifiers (~$800–$1,000) | Seamless paper backdrops, heavy‑duty stands, tethering station (~$500–$700) | ~$4,800–$5,200 |
These figures illustrate that you can assemble a workable kit on nearly any budget. The key is to allocate funds where they yield the greatest improvement: glass and light.
Case Study: Upgrading Lighting Boosted Sales
One of my favorite success stories involves a boutique that sold handmade linen shirts. Initially, they sent me product images shot on a smartphone under fluorescent ceiling lights.
The colors were dull, and the shirts looked wrinkly and lifeless. I offered to reshoot a few items in my studio.
At the time, my kit included an APS‑C camera with a prime lens and two budget softboxes. The photos looked cleaner, but I still battled color casts because the lights weren’t powerful enough to overpower ambient light.
A few months later, I invested in a professional LED panel with a higher output and color accuracy. I invited the boutique owner back for another session.
This time, the linens glowed. The texture popped, the whites were truly white, and the images required far less post‑production.
When the owner updated her website, she messaged me within a week: “I don’t know what you did differently, but our traffic and sales jumped! People keep commenting on how beautiful the clothes look.”
The only change was the lighting upgrade. That experience cemented for me that certain gear investments directly affect your client’s bottom line.
It also made it easier for me to justify the cost. If my new lights lead to happier clients and repeat work, they pay for themselves.
Balancing Gear Lust with Business Realities
I won’t lie I love new gadgets. It’s easy to get caught up in the excitement of gear. But remember that gear is a means to an end. Your clients care about beautiful, accurate images that help sell products, not whether you used the latest model.
Focus on mastering composition, lighting, and retouching skills before chasing the next camera release.
Working with limited gear teaches you to be creative. I learned to bounce light off walls, adjust my exposure in camera, and fix flaws in post because I didn’t have a top‑tier kit to rely on.
Those skills continue to pay dividends when I work with expensive equipment. The gear doesn’t make the photographer; the photographer makes the gear shine.
Gear Up and Get Creative
The takeaway? You don’t need to empty your savings account to create stunning ghost mannequin images. Start with what you have, invest in quality where it matters, particularly lenses and lighting, and build your kit as your business grows.
Keep track of which upgrades make the biggest difference and focus on skills rather than gadgets.
Have you built a budget studio? Did you discover a brilliant DIY hack that makes your setup sing? Or do you swear by a particular piece of pro gear? I’d love to hear about your own gear journey.
Share your stories, tips, and even your funniest equipment fails in the comments below. Let’s support each other as we level up our ghost mannequin photography!
Top FAQs for Ghost Mannequin Photography
Do I need expensive gear to start ghost mannequin photography?
Nope! You can start with a budget DSLR, basic lights, and a DIY backdrop. Skills and lighting matter more than fancy equipment.
Which is more important: camera body or lens?
The lens every time. A good prime lens (like a 50mm f/1.8) makes a huge difference in sharpness, color, and low-light performance.
Can I use natural light for ghost mannequin photos?
Yes! A big window with diffused light (use a white sheet as a diffuser) can work wonders if you don’t have studio lights.
What’s the best budget camera for beginners?
Models like the Canon Rebel T8i, Sony A6400, or Nikon D5600 are affordable yet capable of producing crisp, professional results.
How do I avoid harsh shadows in my photos?
Use soft, even lighting with softboxes or umbrellas, place your mannequin away from the wall, and edit with subtle dodge and burn.
What’s the first gear upgrade I should make?
Invest in a lens before anything else. A prime lens will instantly boost your image quality more than a camera body upgrade.
Are budget lighting kits good enough?
Yes. Affordable kits like Neewer softboxes provide plenty of soft light. Pair them with reflectors or foam boards for a pro look.
Do backdrops really matter?
Not as much as you think! A clean white wall, craft paper, or DIY backdrop can work until you’re ready to invest in seamless paper.
How do I know when it’s time to upgrade my gear?
Upgrade when your current gear is holding you back—for example, if you can’t get sharp images, fight with flickering lights, or clients demand higher quality.
Can DIY hacks really replace pro gear?
They can go a long way! Foam boards, clamp lights with diffusion, and PVC stands can mimic pro setups and save you money when starting out.

