Even the most professional photo editor has horror stories. Ask me about the time I accidentally cloned my own hand into a product shot, or the day I delivered a finished image only to realize the collar was floating three inches above the shirt.
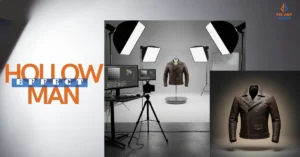
Ghost mannequin editing is a craft, and like any craft, it’s easy to trip up. The good news? Once you know where others have stumbled, you can step around those potholes.
This post exposes common ghost mannequin editing mistakes and shows you how to dodge them gracefully.
Mistake 1: Uneven Edges & Rough Cutouts
There’s nothing worse than a jagged outline around a sleek dress or shirt. Uneven edges scream “amateur” and distract from the garment.
This issue usually comes from using crude selection tools or rushing through masking. A competitor’s article lists uneven edges as one of the top ghost mannequin mistakesdocs.google.com.
The Fix
-
Use the Pen Tool or Refine Edge: Take the time to draw a precise path with the Pen tool, then convert it to a selection. For softer fabrics, the Quick Selection tool followed by Refine Edge works well. Feather your selection by 0.5–1 pixel to avoid a hard edge.
-
Zoom In: Work at 200–300% magnification when tracing. Small imperfections are more noticeable once the image is zoomed out.
-
Mask Non‑Destructively: Always use layer masks rather than erasing pixels. If you make a mistake, paint white back onto the mask to recover the garment.
-
Check on Multiple Backgrounds: After making your selection, place the garment on both dark and light backgrounds to check for halos or stray pixels. Clean up with the Brush tool.
Mistake 2: Harsh Shadows & Lighting Issues

Harsh shadows can make a mannequin’s absence obvious. Dark spots under sleeves or behind collars draw the eye away from the product.
These shadows often originate during the shoot: misaligned lights, too much contrast, or mixing light sources. During editing, trying to fix them can result in unnatural, patchy shading.
A competitor’s summary of common mistakes lists harsh shadows among the major issues. Proper lighting not only creates flattering images but also simplifies editingdocs.
The Fix
-
Shoot with Soft, Even Lighting: Use large softboxes, umbrellas, or diffuse natural light to avoid strong shadows. If you’re seeing dark areas, increase the fill light or adjust the key light’s angle. Ensure lights match in color temperature to avoid strange casts.
-
Separate Subject & Background: Position the mannequin at least three feet from the backdrop. This prevents shadows from appearing behind the garment and makes it easier to remove the background cleanly.
-
Use Dodge & Burn: During editing, gently dodge (lighten) overly dark areas and burn (darken) hotspots. Work on a separate layer set to Soft Light mode and paint with a low‑opacity brush. This method is subtle and prevents blotchy transitions.
-
Create Natural Drop Shadows: Instead of leaving a harsh black patch under the garment, create a soft drop shadow on a new layer. Use the Elliptical Marquee tool to draw a shape under the hem, fill with black, then blur and lower opacity. This anchors the garment visually without overwhelming it.
Harsh shadows are one of the biggest issues in product photography, but with professional ghost mannequin services you can achieve clean, consistent results.
Mistake 3: Color Mismatches Between Collar & Main Image

You know that moment when you combine the front and back images to create the invisible mannequin effect, and suddenly the inside label appears a different shade of blue than the shirt?
This mismatch happens when you shoot the inner collar under different lighting or when your white balance shifts between shots. Uneven color is jarring and can undermine trust in the product.
The Fix
-
Match Lighting During the Shoot: Keep your lights in the same position and intensity for both the main garment and the inner label shots. Tape marks on the floor help maintain consistencydocs.google.com.
-
Use Custom White Balance: Record a custom white balance using a gray card at the start of your shoot. Keep your camera settings consistent. If you change lighting or move the mannequin, reset the white balance.
-
Color Match in Post: In Photoshop, use a Curves or Levels adjustment layer clipped to the inner label layer. Eyedropper tools (set to 5×5 sample size) help identify average color values. Nudge curves until the label matches the main garment. For minor shifts, a Hue/Saturation adjustment works wonders.
-
Check Skin Tones & Whites: If the product is white or has skin‑colored elements, make sure they remain neutral. Use the Info panel to ensure the RGB values are balanced. A white garment should have roughly equal R, G, and B values.
Mistake 4: Wrinkles Left Untouched

Wrinkles and creases are part of real clothing, but in product photos they can look unkempt. When customers scroll through a catalog, they expect garments to appear pristine. Leaving wrinkles in a ghost mannequin image implies that the product is poorly made or used.
The Fix
-
Prepare Garments Before Shooting: Iron or steam clothing thoroughly. Use pins, clips, and foam inserts to smooth fabric and maintain shape. A well‑prepared garment minimizes editing later.
-
Use Frequency Separation: In Photoshop, frequency separation lets you smooth fabric without destroying texture. Apply a Gaussian Blur to the low‑frequency layer to eliminate wrinkles while preserving high‑frequency details like knit patterns.
-
Spot Healing & Clone Stamp: For isolated creases, the Spot Healing Brush or Clone Stamp tools allow you to paint over the wrinkle using nearby smooth areas. Work on a new layer so you can adjust opacity or delete changes.
Mistake 5: Over‑Editing Until Clothes Look Fake
It’s tempting to smooth every wrinkle, sharpen every seam, and brighten colors until garments glow. Over‑editing results in plastic‑looking clothes that feel more like a rendering than reality.
Customers may question the accuracy of the product photo and feel misleddocs.google.com.
The Fix
-
Zoom Out Frequently: When editing at 200%, it’s easy to lose perspective. Zoom out regularly to see how changes affect the overall image.
-
Use Subtle Adjustments: Aim for enhancements rather than transformations. Adjust contrast, saturation and sharpness in small increments. If in doubt, dial back your edits by 10–20%.
-
Preserve Texture: Don’t blur away natural fabric weave. Customers want to see how a knit looks or how denim grain shows. Use selective sharpening on seams and edges instead of globally.
-
Get Feedback: Ask a colleague or friend to review your edits. Fresh eyes will spot unnatural smoothing or HDR halos that you may have missed.
Additional Pitfalls & How to Avoid Them
Cropping garments inconsistently makes catalogs look messy. Ensure that hem lines appear at the same height across all images. Use guides in Photoshop or Lightroom to maintain uniform margins. When in doubt, shoot wider and crop later.
Missing Shots of Inner Labels or Details
For ghost mannequin editing, you need a separate shot of the garment’s inside (collar, waistband, or sleeve) to composite behind the main image.
Forgetting to capture this shot means you’ll scramble during editing or deliver incomplete results. Create a shot list and tick off each angle as you go.
Inconsistent Scaling
If you resize images manually, it’s easy to display garments at slightly different scales. Use templates or actions to ensure each final image has the same dimensions and cropping. This consistency helps buyers compare products easily.
Overlooking Dust & Threads
Tiny lint, stray threads, and dust specks may go unnoticed on set, but they leap out once the image is online. Zoom in at 100% and use the Spot Healing Brush or Clone Stamp to clean up. A lint roller on set saves editing time later.
Mistake 6: Misaligned Seams & Symmetry
Ghost mannequin editing is all about creating the illusion that a garment floats in midair, perfectly centered and symmetrical. However, when seams don’t line up or one sleeve hangs lower than the other, the illusion collapses.
These issues often occur when the garment isn’t straight on the mannequin, or when you composite the inner collar at a slightly different angle. A skewed logo or crooked buttons stand out like a sore thumb.
The Fix
-
Straighten in Camera: Before you start shooting, step back and check that the garment hangs evenly. Use a level or the grid on your camera’s live view to make sure the center seam aligns with the frame. Adjust the mannequin, straighten the shirt, and clip or pin as needed.
-
Use Guides: In Photoshop, add vertical and horizontal guides to align seams and center points. When compositing the inner label, transform it (Ctrl/Cmd+T) and use the guides to line up seams and collars.
-
Check Symmetry Before Exporting: Flip your canvas horizontally (Layer → Duplicate Layer → Edit → Transform → Flip Horizontal). Misalignments jump out when you view a mirrored version. Undo the flip when done.
-
Crop Consistently: After editing, crop all your images using the same aspect ratio and position to keep hems and shoulders at consistent heights.
Mistake 7: Wrong File Formats & Oversized Files
You’ve finished editing and hit “Save As.” Without thinking, you choose TIFF at the highest resolution because bigger must be better, right? Later, you upload dozens of 50 MB files to your website and wonder why pages load sluggishly.
Large file sizes slow down sites, hurting SEO and user experience. On the other hand, saving your images as heavily compressed JPEGs can introduce ugly artifacts, color banding, and noise.
The Fix
-
Choose the Right Format: For most e‑commerce uses, save ghost mannequin images as high‑quality JPEGs (quality 80–90). This balances file size and image integrity. Keep a layered PSD or TIFF version for your archives.
-
Resize Appropriately: If your website displays product images at 1200×1600 pixels, there’s no reason to upload a 6000‑pixel file. Export at or just above the display size. Many e‑commerce platforms optimize images further, but you should still resize before uploading.
-
Embed sRGB Color Profile: Web browsers expect images in the sRGB color space. If you leave your file in Adobe RGB or ProPhoto RGB, colors may appear dull or shift when displayed online.
-
Use Compression Tools: After exporting, run images through compression tools like TinyPNG or ImageOptim. These can reduce file size without noticeable quality loss.
Mistake 8: Not Saving Non‑Destructive Files
After hours of precise masking and color adjustments, you flatten your layers and save a JPEG. A week later, the client asks if you can adjust the collar slightly.
Without the layered file, your only option is to start over or attempt clumsy edits on a flattened image. Non‑destructive editing isn’t just a buzzword—it’s a lifesaver.
The Fix
-
Keep Your PSDs: Always save your layered working file. Disk space is cheap; your time is not. Use an organized folder structure and descriptive names so you can find the files later.
-
Use Adjustment Layers & Smart Objects: Rather than applying filters directly to layers, convert your garment and label layers into Smart Objects. Use adjustment layers for color corrections. This way, you can adjust settings at any time.
-
Separate Retouching & Composites: Keep retouching (e.g., clone stamp, healing) on separate layers above your base composites. This makes it easier to tweak or delete individual edits without affecting the underlying images.
-
Backup Your Work: Use cloud storage or an external drive to back up your PSD files. Accidental deletion or drive failure can cost you hours of work.
Mistake 9: Poor File Organization & Naming
Imagine receiving 300 files named “IMG_001.jpg,” “IMG_002.jpg,” and so on. Which one is the front shot? Where is the collar detail? Without proper naming and organization, ghost mannequin editing becomes a chaotic scavenger hunt.
The Fix
-
Develop a Naming Convention: Name files consistently, e.g., “productname_front.jpg,” “productname_back.jpg,” and “productname_inside.jpg.” If you’re working with variations (color, size), include those in the filename.
-
Use Folders: Organize your raw files, working PSDs, and final exports into separate folders. Within each, create subfolders for each product. Clear structure saves time when looking for a specific image.
-
Label Layers Clearly: Inside your PSD file, label layers “Front,” “Inside Collar,” “Shadow,” etc. Group related layers. When you return to an edit weeks later, you’ll know where everything is.
-
Create a Shot List: On set, prepare a list of required shots (front, back, sleeves, inside) and tick them off as you shoot. This prevents missing angles.
Real‑Life Examples & Fixes
When I first tried ghost mannequin editing, I cut out a black hoodie using the Quick Selection tool. I was in a hurry and didn’t zoom in. The resulting edge looked like it had been gnawed by rats.
Worse, I saved over my PSD file, leaving myself no way to fix it. Lesson learned: always duplicate layers and save versions. Nowadays, I take my time with selections and work with layer masks so I can refine edges without panic.
Another time, I photographed a chiffon blouse under harsh afternoon sun. The sunlight caused deep shadows on the sleeves, and in the composite the inner label was a completely different color.
I managed to salvage the image by dodging and burning and using a Curves layer on the collar, but the time spent could have been avoided with softer lighting and consistent white balance at the shoot.
Finally, I once got a bit too enthusiastic with the Liquify tool, slimming a jacket’s waist to make it appear more fitted. The client asked why the real jacket looked different when it arrived.
I realized I had crossed the line between enhancing and misrepresenting. Now I limit Liquify to removing bulges from foam inserts and leave garment shape as it is.
Ghost Mannequin Editing Mistakes to Avoid (And Laugh About!)
Ghost mannequin editing requires patience and attention to detail. Uneven edges, harsh shadows, mismatched colors, forgotten wrinkles, and over‑editing are among the most common pitfalls.
By preparing garments properly, shooting with even lighting, taking your time with selections, and maintaining a light touch in post‑production, you can avoid these issues.
Remember that small mistakes accumulate across a catalog and can erode trust, while careful craftsmanship elevates your brand.
Now it’s confession time. What’s your funniest or most cringe‑worthy ghost mannequin editing fail? Did you ever deliver an image with a floating collar or a missing sleeve? Share your stories in the comments so we can learn and laugh together.
And if you have any tips I didn’t mention, add them below, I’m always looking to improve my own workflow!