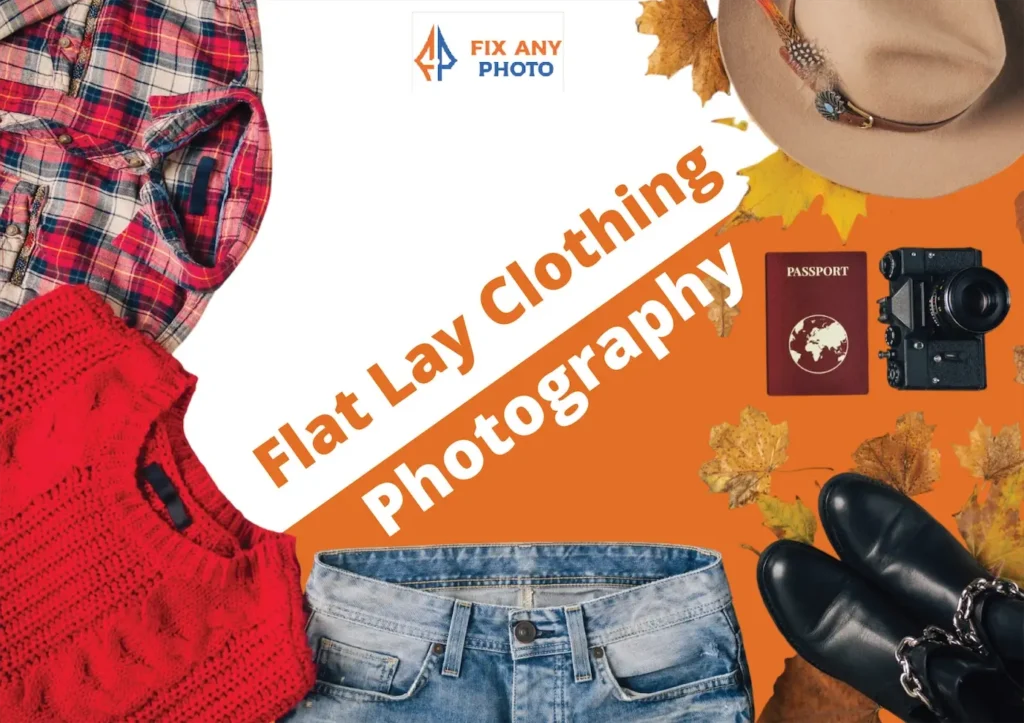
Flat lay clothing photography isn’t just about making pretty pictures. It’s about creating fast, controlled, and versatile visuals that work across every marketing channel:
-
Product detail pages (PDPs): Crisp, no-nonsense images where buyers can see exactly what they’re getting.
-
Lookbooks: Build cohesive collections without booking models or full studios.
-
Emails & ads: Quick-loading visuals that still look polished and professional.
-
Socials (IG, TikTok, Pinterest): The format thrives in the scroll, it feels natural, not staged.
I like to think of flat lay clothing photography as the Swiss Army knife of e-commerce visuals. It’s affordable, scalable, and endlessly adaptable.
Key Benefits for eCommerce Teams
-
Speed: No need to hire models or book huge shoots. Lay it down, shoot it, ship it.
-
Control: You decide the angles, props, colors, and mood, no surprises.
-
Brand cohesion: Keeping everything styled from above creates a uniform look across your catalog.
-
Better margins: More output with less cost compared to full production shoots.
When Flat Lay Isn’t the Right Choice
That said, flat lay clothing photography isn’t perfect for every product. If your item’s value depends on fit or drape—like tailored suits, silk dresses, or flowy fabrics, flat lay can undersell it.
Customers may struggle to imagine how it moves on the body. In those cases, consider ghost mannequin photography or lifestyle model shots instead.
Pre-Production: Strategy, Story, and Shot List

Here’s a truth I learned the hard way: the success of a flat lay shoot is won or lost before you even touch the camera. That’s why pre-production is your secret weapon.
Let’s break it down.
Step 1: Define Your Brand Goal
Ask yourself: are you shooting for conversion or awareness?
-
If it’s about conversion, focus on clean, informative layouts for product detail pages.
-
If it’s awareness, push creative concepts, think seasonal drops, bold color stories, or lifestyle vibes.
You also want to decide whether the shoot highlights a hero collection (big seasonal push) or evergreen staples (the workhorses that stay in stock).
Step 2: Know Your Audience Persona
Flat lay styling changes depending on who you’re speaking to:
-
Minimalists: Crisp white background, subtle props, neutral palettes.
-
Maximalists: Layered textures, bold props, rich colors.
-
Budget shoppers: Straightforward, no distractions, focus on value.
-
Premium buyers: Luxe fabrics, curated props, and a touch of storytelling.
Step 3: Pick Your Story Angles
This is where creativity comes in. A flat lay can tell a dozen different stories depending on styling:
-
Seasonal drop (fall knits with coffee mugs and warm tones).
-
Capsule wardrobe (mix-and-match basics shown as a collection).
-
Athleisure routine (leggings, sneakers, water bottle, earbuds).
-
Eco fabrics (props like plants, recycled packaging, earthy tones).
Step 4: Build a Shot List Template
A good shoot runs on a clear shot list.
Here’s my go-to:
-
Hero layout: The big overhead shot everyone remembers.
-
Full outfit set: Shirt + pants + shoes + accessories styled together.
-
Colorways: Show all available colors side-by-side for easy comparison.
-
Detail macros: Close-ups of stitching, labels, textures.
-
Packaging: Branded tissue, boxes, or eco bags.
-
UGC-style lifestyle lay: Messy-chic vibe that feels like a real customer’s photo.
Step 5: Create a Moodboard
Flat lay lives or dies on consistency. Before the shoot, lock down:
-
Palette: Your color range (monochrome, bold pops, pastels).
-
Textures: Fabrics, surfaces, props.
-
Prop tone: Minimalist vs decorative, luxe vs casual.
-
Reference grid: A Pinterest board or PDF of inspiration shots.
Step 6: Build a Run of Show
Finally, plan the flow of your day:
-
Time blocks (don’t forget snack breaks, trust me).
-
Garment order (light to dark to avoid lint chaos).
-
Steaming buffer (wrinkles are the enemy of flat lay).
Pre-production may feel like “extra work,” but it’s really about saving time and money on shoot day. A clear plan means fewer reshoots, tighter brand visuals, and happier clients.
Gear That Works (Budget → Pro)

Here’s the truth: you don’t need a $5,000 studio to start with flat lay clothing photography. I’ve shot gorgeous e-commerce content on a shoestring budget and on full pro rigs.
The gear you choose really depends on your budget, goals, and workflow.
Let’s break it down piece by piece.
Surfaces
Your surface is your canvas. The wrong one can make even the best clothes look cheap.
-
Foam board: Cheap, lightweight, easy to replace when it gets dirty.
-
MDF with vinyl wrap: Sturdy, customizable, and gives you a variety of textures.
-
Acrylic: Great for sleek reflections. Works well for premium products.
-
Backlit DIY table: A fun hack—glass sheet + LED strips + diffusion film = glowing even light from below.
Supports
You’ll need to shoot straight down, which means your gear must stay stable.
-
Tripod with horizontal arm: Entry-level but does the job.
-
C-stand + boom + sandbags: The pro’s choice for safety and flexibility.
-
Ceiling rail system: If you shoot daily in a studio, this setup saves your back.
Cameras
You can actually shoot flat lay with almost any camera, yes, even your phone.
-
Smartphone (ProRAW/RAW mode): Perfect for beginners or UGC-style visuals.
-
Entry DSLR/mirrorless: Canon Rebel, Sony a6000, solid affordable picks.
-
High-res workhorses: Canon R5, Sony A7R V, Nikon Z7 II for brands needing billboard-level detail.
Lenses
Your lens choice will shape the look.
-
35mm or 50mm prime: Natural look with sharp details.
-
24-70mm zoom: Flexible focal range when shooting different garment sizes.
-
100mm macro: For detail shots, stitching, labels, and fabric texture.
Lights
Lighting can make or break a flat lay. Luckily, you’ve got options:
-
Window light + reflector: The cheapest, most natural setup.
-
LED panels: Consistent, cool-running, adjustable color temperature.
-
Strobes with softboxes/umbrellas: The pro standard, crisp, color-accurate, and controllable.
Light Modifiers
Think of these as the makeup brushes of your photo toolkit.
-
Softboxes (60–90cm): Big, soft light for smooth shadows.
-
Scrim: Diffuses harsh light, like clouds over the sun.
-
V-flats: Bounce light or block it to control spill.
-
5-in-1 reflector: Portable and budget-friendly.
Tethering & Triggers
Saves you from running back and forth to check your shots.
-
Remote or intervalometer: Hands-free shooting.
-
Tethering (Capture One or Lightroom): Instant previews on your laptop.
Styling Kit
The unsung heroes of a clean flat lay shoot:
-
Steam iron or garment steamer
-
Clips, pins, and double-sided tape
-
Lint roller (non-negotiable!)
-
Cotton gloves for handling fabrics
-
Foam shapers, tissue, or acrylic risers to add dimension
Safety & Ergonomics
Don’t ignore this part, your body will thank you.
-
Anti-fatigue mat if you’re standing all day
-
Cable ties and gaffer tape (no tripping hazards!)
-
Sandbags to keep stands stable
Nice-to-Have Extras
When you want to level up:
-
Color checker & gray card: Perfect color accuracy.
-
Polarizer filter: Cuts glare on shiny fabrics.
-
Overhead grid: A pro’s dream for consistent top-down lighting.
Budget vs Pro Builds
-
Budget Build (≤$300): Window light, white foam core, phone tripod with boom, clips/tape, lint roller.
-
Pro Build ($1.5k+): 2 strobes with softboxes, boom stand, tethering setup, macro lens, scrim & V-flats.
My advice: start small, then upgrade only what slows you down. Your creativity matters more than your gear.
Space & Surface: Backdrops, Tables, and Build-Outs

Flat lay success isn’t just about your gear, it’s also about the space you shoot in and the surfaces you shoot on. The cleaner and more controlled your setup, the more professional your images look.
Backdrop Choices
Pick a backdrop that matches your brand vibe:
-
White seamless: The e-commerce classic, clean and distraction-free.
-
Fashion gray: Neutral, timeless, great for luxury brands.
-
Muted colors: Soft beige, blush, sage for lifestyle vibes.
-
Textured vinyl (linen, concrete): Adds depth without overpowering the product.
-
Acrylic/glass: Creates chic reflections, often used in high-end lookbooks.
Size & Scale
Here’s a common mistake: cramming too much into the frame. Always allow 30–50% negative space. This makes cropping easier for web, ads, or social platforms.
DIY Backlit Table Plan
Want pro-level even light without dropping thousands? Here’s a hack I’ve actually built:
-
Get a sturdy table frame.
-
Place a sheet of glass or acrylic on top.
-
Mount LED strips underneath.
-
Add diffusion film or frosted plexiglass.
Now you’ve got a glowing base that lights fabric evenly and kills shadows. Perfect for lighter or translucent garments.
Cleanliness & Static Control
Nothing ruins a shoot like lint or dust. Make cleanliness part of your workflow:
-
Wipe surfaces with microfiber cloths.
-
Use compressed air for small particles.
-
Spray with anti-static solution to keep fabrics from clinging.
A spotless setup means less retouching later, and that’s time (and money) saved.
Lighting for Flat Lays

Lighting is the silent storyteller of flat lay clothing photography. Get it right, and your fabrics glow, textures pop, and colors stay true. Get it wrong, and you’ll be battling dull images, weird shadows, or shiny hotspots in post.
Natural Light Setup
One of the easiest (and cheapest) setups is using window light.
-
Position your product near a large window at a 45–90° angle to the garment.
-
Add a diffuser (sheer curtain, diffusion panel, or even parchment paper) to soften harsh sunlight.
-
Place a reflector opposite the window to bounce light back and even out shadows.
-
Use black foam core or flags to kill spill light if the scene looks too flat.
This setup gives you that airy, lifestyle-friendly vibe that works beautifully for social media and lookbooks.
Artificial 2-Light Setup
For consistency and control (especially for e-commerce), artificial light is king.
-
Place your key light at a 45° angle above the product, slightly higher than the surface.
-
Add a fill light on the opposite side at equal height to balance shadows.
-
This keeps shadow direction subtle and uniform across all your SKUs.
Pro tip: If budget allows, shoot tethered and use a light diagram once, then replicate it for every session. That’s how you nail brand consistency.
High-Key eCommerce Look
Most online stores love a clean, bright, shadow-free look. To achieve this:
-
Use a large soft source (think 90cm+ softbox or umbrella).
-
Feather the light (aim it slightly past the product) to avoid hotspots.
-
Add flags or black cards at the edges to keep contrast under control.
Shiny or Glossy Elements
Ever tried shooting satin, sequins, or plastic packaging? It’s a glare nightmare. The fix:
-
Add a scrim between the light and product for an ultra-soft glow.
-
Use a polarizing filter on your lens to cut reflections and tame hotspots.
Consistency Is Key
E-commerce shoppers expect every product to look the same in terms of brightness, tone, and shadows.
-
Use an incident light meter (or your camera’s false color/histogram) to set exposure.
-
Lock those settings and apply them across your entire shoot.
Camera Setup & Settings

Once your lights are dialed in, your camera setup is what keeps everything sharp, consistent, and professional.
Overhead Stability
Flat lays demand shooting straight down. Here’s how to avoid shaky, tilted shots:
-
Mount your camera on a boom arm or horizontal tripod.
-
Always use a counterweight and sandbags for safety.
-
Check alignment with a bubble level or digital grid to ensure the frame is perfectly overhead.
Recommended Camera Settings
-
Aperture: f/5.6–f/11 → keeps the whole garment sharp from edge to edge.
-
Shutter Speed: 1/125–1/200 if using strobes; slower speeds are fine with tripod and natural light.
-
ISO: 100–200 for max image clarity.
-
White Balance: Custom or gray card (don’t trust auto).
-
File Format: Always shoot RAW for maximum editing flexibility.
-
Focus: Use live-view with manual focus. Add focus peaking or check tethered to ensure critical sharpness.
Phone Settings
If you’re shooting with a phone:
-
Switch to Pro/Manual mode.
-
Lock AE/AF (auto exposure & focus).
-
Enable RAW/HEIF capture if available.
-
Turn on the grid lines for alignment.
-
Use a remote shutter or timer to avoid shake.
Smartphones today (especially iPhones in ProRAW or Samsung/Pixel RAW) can deliver shockingly good results if you pair them with good light and surfaces.
Styling Apparel: From Wrinkles to Wow

Flat lay clothing photography lives or dies by styling. Even if your gear and lighting are perfect, a wrinkled or limp shirt will look like… well, a wrinkled limp shirt. Styling turns “meh” into “wow.”
Prep Work
Before the garment even touches your backdrop:
-
Steam or iron everything. Wrinkles are impossible to “Photoshop out” cleanly.
-
De-lint with rollers (especially for dark fabrics).
-
De-pill knitwear with a fabric shaver.
-
Reshape garments that stretched or warped in storage.
Shaping Techniques
Flat lay is all about simulating the presence of a body without showing one. Tricks include:
-
Hidden clips and pins: Tuck excess fabric behind the garment.
-
Foam or cotton fill: Add volume to sleeves and hoods so they don’t collapse.
-
Shoulder definition: Use small props under fabric to mimic form.
-
Cuff rolls: Roll neatly to add shape and style to long sleeves.
Folds & Drifts
Fabric drape tells a story—style it to match the garment’s personality.
-
Soft S-curves: Perfect for knits, scarves, or athleisure for a relaxed vibe.
-
Crisp folds: Better for formalwear, structured pieces, or premium collections.
Logo & Label Management
You’d be amazed how often logos end up crooked.
-
Check alignment with a ruler or your grid overlay.
-
Watch for moire patterns (weird wavy lines) on labels—sometimes solved by shifting angle or adjusting shutter speed.
Texture Pop
To show texture, you need to create micro-shadowing:
-
Add a gentle side fill to emphasize stitches and weaves.
-
Avoid harsh direct light that flattens or blows out shiny fabrics.
Styling is where the magic happens. With the right folds, fills, and props, even a basic cotton tee can look like a premium piece.
Composition & Visual Design
Styling clothes flat on the floor is one thing—making them look good in frame is another. That’s where composition comes in. It’s the secret sauce that separates an amateur “laundry on the floor” shot from a scroll-stopping flat lay.
Layout Formulas
Every strong image has an underlying structure. Here are some easy-to-use ones:
-
Grid: Perfect for catalog-style shoots—organized, clean, straightforward.
-
Triangle: Place three elements (like jeans, sneakers, a tee) to form a visual triangle. Balanced and pleasing.
-
Rule of thirds: Place your hero garment off-center for a natural, lifestyle feel.
-
Radial: Arrange props around the main item like rays—great for accessories or capsule wardrobes.
-
Diagonal flow / Z-path: Lead the eye across the frame—ideal for story-driven layouts.
Balance & Rhythm
Ask yourself: do you want the shot to feel calm or energetic?
-
Symmetry: Creates calm, authority, and neatness (think luxury brands).
-
Dynamic asymmetry: Slightly off-balance styling adds movement and interest (great for social media).
Negative Space
Leave breathing room. Crops for PDPs, ads, and especially mobile-first layouts all demand space for text overlays. 30–50% empty background is not wasted—it’s design.
Leading Props
Props aren’t just fillers; they can guide the eye:
-
Lines: Scarves or belts pointing toward the garment.
-
Frames: Books, trays, or laptop edges creating structure.
-
Anchors: Shoes or bags that visually ground the layout.
Layering
Flat lay doesn’t have to mean flat-flat.
-
Stack items with acrylic risers or foam blocks.
-
Add foreground objects slightly out of focus.
-
Use parallax shadows (small lifts) to add depth and realism.
Color Strategy
Color isn’t decoration—it’s communication. It sets the mood before anyone even notices the product.
Palette Building
Some tried-and-true formulas:
-
Monochrome: Different shades of the same color (minimalist, chic).
-
Complementary: Opposite colors (blue + orange) for bold punch.
-
Split-complementary: A safe way to use contrast without chaos.
-
Analogous: Neighboring colors (blue, teal, green) for harmony.
Brand Color Guardrails
Your flat lays don’t exist in a vacuum—they’ll sit on your site, app, or emails. Always check that your backdrop and props don’t clash with your brand UI or PDP design. A neon pink background might look great on Instagram but fight your Shopify template.
Color Checker Workflow
Color accuracy = fewer returns. My workflow is simple:
-
Shoot a color checker card in the same light.
-
Create a profile or preset in Lightroom/Capture One.
-
Apply it across all images.
-
Double-check fabric swatches in post.
It’s a little extra work up front, but nothing builds trust like clothing that looks the same online and in real life.
Props with Purpose
Props are like seasoning: a little enhances the dish, too much ruins it.
Prop Taxonomy
Think of props in categories:
-
Functional: Belts, watches, hats—things that go with the outfit.
-
Thematic: Sunglasses, headphones, skincare—sets a lifestyle vibe.
-
Seasonal: Leaves, flowers, snowflakes—anchors the image in time.
-
Lifestyle: Coffee cups, books, tech—suggests how it’s worn.
-
Texture props: Marble, linen, wood—adds depth without stealing the show.
Keep It Clean (The 1–2–1 Rule)
Stick to one hero garment, two supporting props, and one texture. This keeps the focus where it belongs: on the clothes.
Propping for Story
Props tell a story beyond “here’s a shirt”:
-
Commute: Shirt + tie + coffee + metro pass.
-
Gym bag: Leggings + sneakers + water bottle + earbuds.
-
Beach day: Shorts + sandals + sunglasses + towel.
-
Back-to-school: Kidswear + crayons + small backpack.
Shooting Workflow (Repeatable)
Here’s the system I use to stay consistent from shoot to shoot. It keeps clients happy and saves me hours in post.
-
Calibrate: Use a gray card or color checker. Lock exposure before the first shot.
-
Hero Shot: Full garment, front and back. This becomes your anchor image.
-
Variants: Capture all colorways and size markers in the same setup.
-
Detail Set: Zoom in on stitching, buttons, fabric texture, or labels.
-
Outfit Build: Cross-sell bundles (shirt + pants + accessories).
-
Creative Social Frames: Shoot extras in 4:5 (IG), 9:16 (TikTok/Reels), and 1:1 (Pinterest).
-
Safety Shots: Always grab a clean plate (empty backdrop) and extra angles for retouch flexibility.
Pro tip: Create a checklist template so you never forget a step.
Specialty Garments
Not all clothes behave the same way on a flat surface. Here’s how I handle the tricky ones:
Denim
-
Highlight the grain and stitching with angled side light.
-
Watch for cyan color shifts—correct in post if needed.
Knits
-
Use soft light with gentle side fill to reveal knit texture.
-
Avoid heavy pressing—let the natural stretch show.
Satin & Silk
-
Large, diffused light sources only (no bare bulbs, ever).
-
Add a polarizer to cut shiny hotspots.
Activewear
-
Sculpt shape with a rim card or edge light.
-
Add props like earbuds or a yoga mat to suggest movement.
Outerwear & Puffers
-
Stuff sleeves and bodies with tissue or foam to keep volume.
-
Use a gentle top flag so shiny nylon doesn’t blow out.
Kidswear
-
Scale props (tiny shoes, toys) to make garments feel proportionate.
-
Hide safety pins to keep things in place.
-
Bright, playful palettes always win.
Preventing Common Problems
Even with the best planning, flat lay clothing shoots can throw curveballs. The good news? Most problems have simple fixes if you catch them early.
Mixed Color Casts
Different light sources (like window + ceiling bulbs) can create ugly color shifts. The fix: stick to one light type and always use a gray card for calibration.
Moiré on Fine Weaves
Tiny fabric patterns sometimes create weird wavy lines (moire) on camera. Solution: slightly adjust your angle or aperture, or soften the effect in post with blur/NR tools.
Perspective Drift
If your camera isn’t perfectly overhead, garments will look skewed. Use a bubble level or tether with an on-screen grid to keep everything straight.
Lens Distortion
Wide lenses can warp shapes. Stick to 35–50mm primes or a zoom in that range for true-to-life proportions.
Reflections From Phones
If you’re shooting accessories like sunglasses, phone reflections sneak in. Use a polarizer filter or shift your angle until they vanish.
Dust & Lint
The enemy of every dark fabric shoot. Keep a lint roller, gloves, and compressed air on standby.
Garment Creep
Clothes love to shift mid-shoot. Pin or secure them with double-sided tape so everything stays in place.
Post-Production: Pro Workflow
Editing flat lays is where you polish good images into great ones. Here’s my pro workflow:
Ingest & Culling
-
Import into Lightroom or Capture One.
-
Apply star ratings or color labels to sort.
-
Group shots by SKU so you can batch edits later.
Base Adjustments
-
Adjust exposure, white balance, and contrast first.
-
Add texture/clarity sparingly—overdoing it makes fabrics look crunchy.
Color Accuracy
-
Use HSL sliders for fine tweaks per fabric.
-
Keep accessory tones (like skin tones in jewelry props) looking natural.
Cleanup
-
Remove dust, lint, or stray threads with the healing/clone tool.
-
Smooth minor creases without making garments look fake.
Shape Fixes
-
Use warp/liquify tools for small realignments (symmetry is key).
-
Straighten geometry so hems and seams don’t look crooked.
Background Work
-
Replace with pure white (RGB 255, 255, 255) or a branded tone.
-
Add realistic shadows—soft drop, contact, or gradient—for depth.
Batching
Efficiency = profit. Save edits as presets or actions so you can apply them across all SKUs in one click.
Background Removal/Replace & Compliance
Not every marketplace plays by the same rules, so compliance matters.
Marketplace Standards
-
Amazon: Pure white background, at least 2560px, no props for certain categories.
-
eBay: White or light gray backgrounds, with set margins.
-
Zalando: Similar strict white requirements.
Always check platform guidelines before final delivery—non-compliant images can get listings rejected.
Cut-Out Methods
-
Pen Tool Path: Precise, clean edges (best for formalwear).
-
AI Select Tools: Fast, especially for simple shapes, but refine edges for knits/fur.
Shadow Rebuild
Once the background is removed, shadows bring back realism:
-
Vector ellipse + Gaussian blur + multiply layer for subtle depth.
-
For more realism, use 3D shadow layers with gradient fades.
Template PSDs
Build a master Photoshop template with smart objects. This way, you can drop in new garments and export fast without redoing the layout each time.
Export Presets & Specs
The final step: export images in the right format for each platform. Here are my go-to settings:
PDP (Product Detail Pages)
-
2000–3000px on the longest side
-
sRGB color profile
-
JPEG, quality 80–90
Zoom/Detail Images
-
3000–5000px for crisp close-ups
Amazon
-
At least 2560px on the longest side
-
Pure white background
-
No props or distractions if category-restricted
Shopify
-
2048px squares
-
Consistent padding for a uniform look
Social Platforms
-
Instagram feed: 4:5 (1080×1350px)
-
Reels/TikTok: 9:16 (1080×1920px)
-
Pinterest: 2:3 ratio
File Types
-
JPEG: Web use (small + fast).
-
PNG: When transparency is required.
-
TIFF/PSD: Master files for archiving or advanced retouching.
Naming, Metadata & DAM
Once the shoot is done, the battle shifts to organizing your assets. Nothing kills momentum faster than trying to find “that one blue shirt photo” buried in Final_final_v2(2).jpg.
Naming Convention
A clean system saves hours. One I recommend is:
brand_sku_color_view_variant_v01.jpg
Example: nike_12345_navy_front_flat_v01.jpg
This way, files stay human-readable and machine-searchable.
Metadata
Don’t skip metadata—it powers search inside your DAM (Digital Asset Management system):
-
Keywords: fabric, season, color (e.g., “linen, spring, coral”)
-
Rights: photographer/stylist credits
-
Usage notes: licensing restrictions, model release info
Backup: The 3-2-1 Rule
-
3 copies of every file
-
2 different media types (hard drive + cloud)
-
1 off-site copy for disaster recovery
Trust me, you don’t want to reshoot because of a dead hard drive.
Consistency at Scale
Shooting 10 products is fun. Shooting 1,000 is where things break—unless you build systems.
Style Guide
Lock in a visual playbook so every shot looks brand-consistent:
-
Background tone
-
Crop rules
-
Shadow intensity/spec
-
Color calibration pipeline
Templates
-
PSD templates: hero, detail, bundles
-
Lightroom/Capture One styles: for base color/exposure consistency
Automation
-
Lightroom export presets for web/social/print
-
Photoshop actions & droplets for repetitive tasks
-
CSV-driven bulk edits for renaming and metadata injection
Outsourcing
When volume spikes, outsource retouching—but with control:
-
Provide a QA checklist (color accuracy, alignment, background tone)
-
Always review samples before green-lighting batches
Measure What Matters
Flat lay photography is creative, but it’s also performance-driven. Here’s how to know if your images are working:
A/B Tests
Experiment with:
-
Hero crop vs full frame
-
White vs branded background
-
Strong vs soft shadows
-
Minimal vs lifestyle propping
KPIs to Track
-
PDP conversion rate
-
Add-to-cart percentage
-
Dwell time on product pages
-
Scroll depth
-
Image zoom interactions
Heatmaps
Use tools like Hotjar or CrazyEgg to see where shoppers’ eyes linger. Place your key garment details there.
Budget vs Pro Studio (ROI)
At some point, every brand faces the gear vs outsourcing question.
Cost Breakdown
-
One-time gear buy: tripod, lights, backdrops, camera = upfront but long-term savings
-
Per-SKU outsourcing: predictable costs, but they add up fast with volume
Throughput Planning
-
Solo shooter: ~5–10 SKUs/hr (including styling + shooting)
-
Small team: 20+ SKUs/hr with styling + retouch pipeline
When to Upgrade
-
You hit volume thresholds (hundreds of SKUs monthly)
-
You see returns rising due to inaccurate color/fit
-
Your editing backlog eats more time than the shooting itself
Sustainability & Inclusivity
Flat lay photography is evolving beyond just pretty pictures—it’s about values.
Sustainable Props
-
Reusable surfaces (MDF, acrylic)
-
Natural, recyclable props (linen, cork, wood)
-
Avoid single-use plastics (fake greenery, disposable decor)
Inclusive Visuals
-
Show size diversity in outfit bundles, not just XS samples
-
Props and color choices should be culturally sensitive (avoid stereotypes)
-
Build visuals that reflect the real customer, not just the “idealized” one
Legal & Rights
It’s easy to overlook, but legal slip-ups cost money.
-
Logos & Trademarks: Ensure permission before featuring third-party marks.
-
Music & Fonts (for social videos/graphics): Always license, even for “free” assets.
-
Model/UGC Items: If you feature personal items (like a recognizable tote bag), get consent.
Checklists, Templates & Downloadables
Readers love practical takeaways. Here’s what you can offer as bonus content:
On-Set Checklist
-
Garment prepped (steam, lint, shape)
-
Surface clean & leveled
-
Light test with gray card
-
Tether check: focus + framing
-
Styling kit within reach
-
Sandbags on all stands
Shot List Template
-
Hero front/back
-
5 detail shots
-
All colorways
-
Bundle outfit
-
Creative social frames
Retouching Action List
-
Base adjustments
-
Cleanup (lint, creases)
-
Shape fixes
-
Background replace/clean
-
Shadow build
-
Color match
-
Export
Export Presets Pack
Specs table for PDP, Amazon, Shopify, IG, TikTok, Pinterest.
Style Guide Starter PDF
One-page guide to background tone, crops, and shadow rules.
FAQs (Better Than the Rest)
Q: How do I keep garments perfectly flat without looking lifeless?
A: Use tissue/foam shapers in sleeves and add soft folds—flat but not “dead.”
Q: What’s the best overhead rig for a tiny room?
A: A C-stand with boom arm or even a phone tripod with a horizontal mount.
Q: Natural light keeps changing—how do I stay consistent?
A: Shoot at the same time of day or use blackout curtains + artificial lighting.
Q: How do I show true fabric color online?
A: Color checker → calibrated monitor → consistent export profile (sRGB).
Q: Easiest way to add depth without messy shadows?
A: Use risers + micro-shadowing with a reflector instead of harsh light.
Q: Best phone apps for tethering?
A: Lightroom Mobile, Capture One for iPad, or CamRanger.
Q: Can I reuse one PSD template for 100 SKUs?
A: Absolutely—just use smart objects for fast swaps.
Q: Do I really need a color checker?
A: Yes, if accuracy matters. It reduces returns from “wrong shade” complaints.
Q: How do I style upsell outfits naturally?
A: Bundle complementary pieces (tee + jeans + sneakers) instead of forcing unrelated items.
Q: What export settings balance fast site load with crisp zooms?
A: JPEG at 80–90% quality, 2000–3000px longest side for PDP.