Ever taken what you thought was the perfect shot – only to spot something awkward later? Maybe the mannequin’s hip looks twisted, or a pair of jeans seems uneven at the knees.
I remember editing one client’s product photo where the pants looked like they were made for two completely different people. The top half screamed “buy me now,” but the bottom half looked like it belonged in a clearance bin.
That’s when I discovered the power of bottom joint editing.
In simple terms, bottom joint editing means fixing and aligning the lower body areas in photos , hips, knees, even furniture legs if we’re talking lifestyle shots.
Think of it as giving your image better posture. Just like standing straight in real life makes you look more confident, bottom joint editing makes your photos look polished and professional.
By the end of this guide, you’ll know exactly why bottom joint editing matters, when to use it, and how you can start practicing it in Photoshop – even if you’ve never touched these tools before.
What is Bottom Joint Editing?
Okay, so let’s break it down.
Bottom joint editing is basically retouching the “hinge points” of your subject—places like hips, knees, or ankles, that can easily look distorted in photos.
Sometimes it’s the clothing that causes the problem (like stiff jeans creating an odd crease), and sometimes it’s the angle of the camera. Either way, the result is the same: your image feels “off,” even if you can’t pinpoint why.
Why it matters:
-
Symmetry sells. Balanced, natural-looking images feel more trustworthy to customers.
-
Distortion kills confidence. If clothes look twisted or uneven, buyers may think the product is low quality.
-
Polish equals professionalism. A smooth, natural lower body edit elevates your image instantly, no expensive reshoot needed.
Think of bottom joint editing as ironing your digital photo. The wrinkles may be small, but once they’re gone, the whole thing looks sharp and ready to wear.
My Real-Life Example
One time, I worked on an e-commerce project where the model wore a sleek skirt. Everything looked great, except the way the skirt hung around the knees.
It made her look slightly pigeon-toed, even though she wasn’t. Instead of calling the client to reshoot, I used Photoshop to adjust the bottom joint area. I smoothed the lines, straightened the hem, and suddenly, the skirt looked like it belonged on a magazine cover.
The client’s exact words? “We didn’t even know this was possible, this just saved our whole collection shoot.” That’s when I knew bottom joint editing wasn’t just a small tweak, it was a game-changer.
For fashion photos, I often pair joint fixes with mannequin retouching to make outfits look natural and professional.
When Do You Need Bottom Joint Editing?
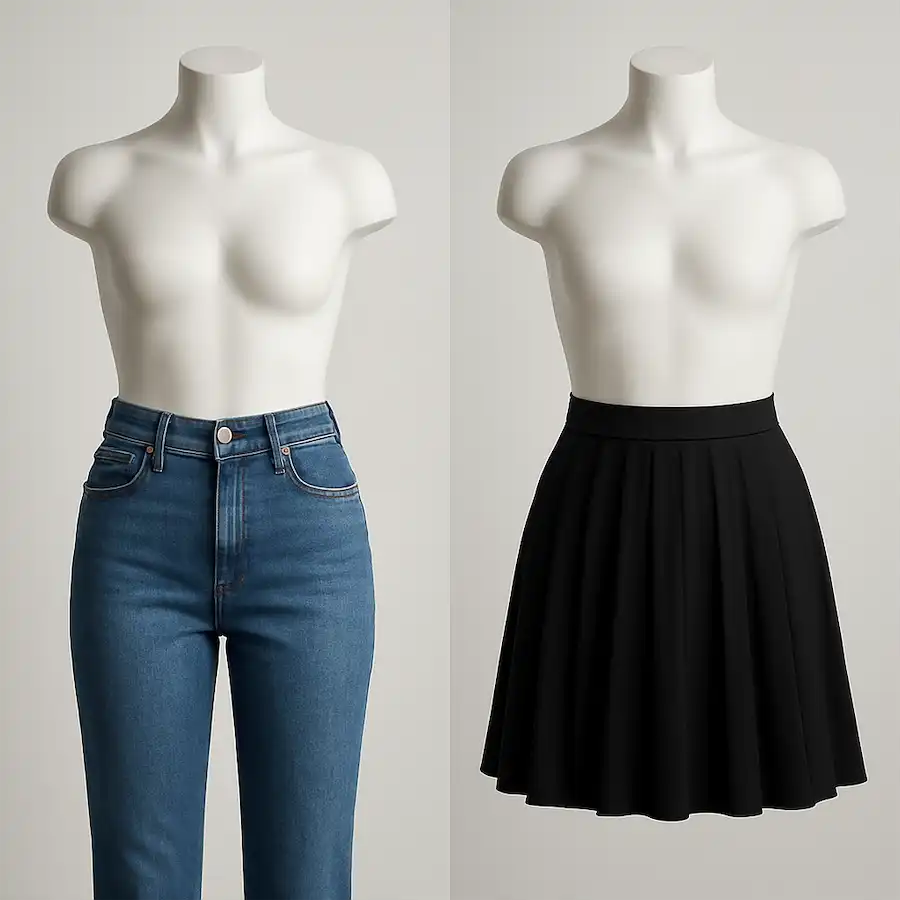
E-commerce Product Photography
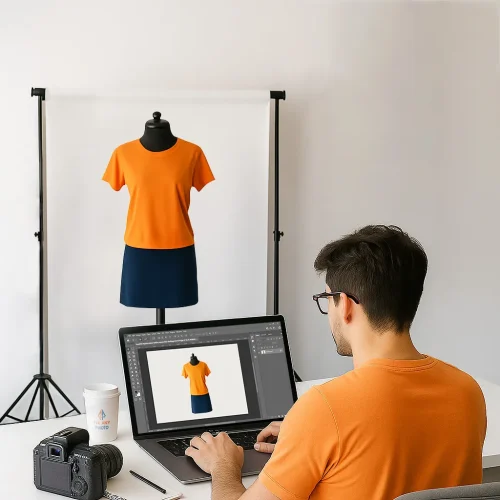
If you’ve ever shot ghost mannequin photos, you know the hip and knee areas are the trickiest. Pants can sag, skirts can tilt, and dresses often look lopsided. Bottom joint editing helps:
-
Fill ghost mannequin gaps where fabric doesn’t align.
-
Balance hems so skirts and dresses don’t look uneven.
-
Straighten pants legs so they hang naturally.
Pro tip: This small tweak can actually boost sales. Customers don’t want to “imagine” how a garment will look, they want it to look perfect already.
Fashion Portrait Retouching
Models are human. They slouch, lean, or bend slightly when holding a pose for too long. That’s where bottom joint editing shines.
-
Correct awkward posture that makes one leg look shorter than the other.
-
Align hips and knees for that confident, editorial vibe.
-
Example: I once had a portrait where the model leaned just a touch, making her dress crease oddly at the knees. With a quick bottom joint adjustment, she went from “tired after a shoot” to “runway ready.”
Real Estate / Lifestyle Shots
This one surprises people, but bottom joint editing isn’t just for people. I’ve used it on furniture legs, lamp stands, even stair railings in interior shots.
-
Straighten furniture legs that appear bent due to camera angle.
-
Fix wide-angle distortions that make objects look tilted.
-
Example: I edited a listing photo once where the dining table looked like it was about to collapse because of perspective distortion. A little joint editing, and suddenly the place looked elegant instead of cramped.
How to Do Bottom Joint Editing (Step-by-Step)

So now that you know what bottom joint editing is and when to use it, let’s roll up our sleeves and actually do the editing in Photoshop. Don’t worry – you don’t need to be a Photoshop wizard to pull this off. With a little practice (and patience), you’ll start seeing results right away.
Preparation
Before we jump into tools, let’s set the stage properly:
-
Choose the right photo editing software.
-
Photoshop is my go-to because of its flexibility.
-
GIMP is a free alternative if you’re on a budget.
-
Lightroom works for light corrections, but it’s not ideal for detailed joint work.
My advice: stick with Photoshop-it’s worth every penny for these kinds of edits.
-
-
Duplicate your original layer.
-
I can’t stress this enough—always protect your original image.
-
Shortcut:
Ctrl + J(Windows) orCmd + J(Mac). -
This way, if something goes wrong, you can always fall back without starting over.
(Trust me, I’ve learned this the hard way at 3 a.m. on a deadline project.)
-
The Editing Process
Here’s where the magic happens.
-
Outline the joint area.
-
Grab the Pen Tool (precise but takes practice) or Lasso Tool (quicker, less precise).
-
Carefully select around the hip, knee, or furniture leg that needs adjusting.
-
Pro tip: feather your selection by 1–2 pixels to keep edges soft.
-
-
Apply the Liquify Tool for smooth alignment.
-
Go to
Filter > Liquify. -
Use the Forward Warp Tool inside Liquify to nudge the joint into place.
-
Small movements = natural results. (Push too hard and your subject will look alien!)
-
I usually keep brush pressure low (around 20–30) for better control.
-
-
Blend with Clone Stamp or Healing Brush.
-
Clone Stamp (
S) copies texture from one area to another. -
Healing Brush (
J) blends textures automatically. -
Use them to remove creases, fill mannequin gaps, or fix any stretched pixels from Liquify.
-
-
Add shadows and highlights.
-
This is what makes your edit look natural instead of flat.
-
Use the Burn Tool to add depth in shadow areas.
-
Use the Dodge Tool to brighten highlights where light naturally falls.
-
Example: when editing knees in jeans, a soft shadow line can make fabric folds look real instead of painted.
-
Pro Tips
-
Zoom in (a lot).
Work at 200–300% zoom when fixing joints. The human eye is amazing at spotting tiny distortions, and what looks fine zoomed out might look weird up close. -
Keep proportions natural.
It’s tempting to “fix” everything, but don’t overdo it. If you stretch too much, legs can look unnaturally long or hips too narrow. Always compare your edit with the original before finalizing. -
Match textures and shadows.
This is the secret sauce. If one pant leg has a strong shadow and the other doesn’t, the viewer will instantly know something’s off. Take the time to balance light and fabric textures across both sides. - These same rules also apply to other types of apparel retouching, like neck joint adjustments, where balance and realism are just as important.
Common Mistakes in Bottom Joint Editing
Even though bottom joint editing sounds straightforward, I’ve seen (and made) plenty of mistakes over the years. Here are the big three you’ll want to avoid:
-
Over-editing.
-
The temptation is real, push Liquify too far, and suddenly your model’s legs look like they belong in a funhouse mirror.
-
My rule: if the viewer notices the edit, you’ve gone too far. Subtlety is your best friend here.
-
-
Ignoring shadows.
-
A clean joint edit without shadows looks fake, like a cutout sticker pasted on a background.
-
Always reintroduce natural shadows or highlights so the photo keeps its depth.
-
-
Forgetting alignment.
-
If the knee looks fixed but doesn’t line up with the hip or ankle, the whole body feels “off.”
-
Step back, zoom out, and check proportions with the rest of the subject before calling it done.
-
Flip the canvas horizontally in Photoshop once you’re done. Fresh eyes catch mistakes way faster when you look at the image mirrored.
Tools & Services That Make It Easier
When I first started, bottom joint editing felt intimidating. But with the right tools, it gets a whole lot easier:
-
Photoshop:
-
Liquify for reshaping hips and knees.
-
Puppet Warp for precise tweaks (great for furniture legs or clothing lines).
-
-
Free alternatives:
-
GIMP and Photopea both offer selection and warp tools—perfect if you’re not ready to invest in Photoshop yet.
-
-
Professional retouching services:
-
If you’re dealing with bulk product edits or super tight deadlines, outsourcing saves time. I’ve handled projects for e-commerce clients who needed 500+ apparel shots polished. Doing it solo would’ve taken weeks, but with a service, it was done in days.
-
Why Bottom Joint Editing Boosts Visual Impact
This isn’t just about nitpicking details, it’s about creating photos that actually work for your goals.
-
E-commerce sales: Clean, symmetrical clothing photos = more clicks and fewer returns. Customers trust what they see.
-
Professional portfolios: A polished portrait with aligned posture looks magazine-worthy.
-
Customer trust: Well-balanced visuals tell buyers you care about quality, which makes them more confident in your product.
Think about it: would you rather buy pants that look crooked and wrinkled, or ones that sit perfectly straight on a mannequin? The difference could mean dozens of lost sales.
Ready to Take Your Photos to the Next Level?
Bottom joint editing might feel like a small detail, but it’s one of those small hinges that swing big doors. By fixing posture, aligning clothes, and respecting shadows, you can transform an average shot into a professional, high-impact image.
My advice? Practice the basics yourself—learn Liquify, Puppet Warp, and blending tools. But if you’re swamped with product photos or want guaranteed results, don’t be afraid to outsource.
Need your product photos to look flawless without spending hours in Photoshop? Let’s talk—my editing services can handle everything from bottom joint editing to full retouching.
Question for you: Have you ever struggled with fixing awkward joints or posture in your photos? What’s been your biggest challenge?
FAQs About Bottom Joint Editing in Photoshop
1. What does bottom joint editing mean in Photoshop?
It’s the process of fixing and aligning lower body areas like hips, knees, and ankles to make photos look natural and balanced.
2. Why do e-commerce stores use bottom joint editing?
It makes clothes look symmetrical and professionally presented, which builds buyer trust and increases sales.
3. Is bottom joint editing only for fashion photos?
No, it’s also used in lifestyle and real estate photos to straighten furniture legs, objects, or anything distorted by the camera.
4. Which Photoshop tools are best for bottom joint editing?
Liquify, Puppet Warp, Clone Stamp, and Healing Brush are the go-to tools for smooth corrections.
5. Can I do bottom joint editing without Photoshop?
Yes. Free tools like GIMP and Photopea can handle basic edits, though they’re less advanced than Photoshop.
6. How do I keep edits looking realistic?
Always match textures and shadows, zoom in for details, and avoid over-stretching proportions.
7. What’s the most common mistake in bottom joint editing?
Over-editing, when joints look unnaturally smooth or misaligned with the rest of the body.
8. Does bottom joint editing take a long time?
For a single image, it can take just a few minutes once you know the tools. Bulk editing may require outsourcing to save time.
9. How do shadows affect bottom joint edits?
Shadows add depth and realism. Ignoring them makes your edits look flat and fake.
10. Should beginners try bottom joint editing?
Absolutely! Start with small adjustments, practice regularly, and your results will improve quickly.


