I can’t tell you how many times I’ve nailed the lighting, color, and composition in a photo, only to have wrinkles ruin the whole thing. It’s frustrating, right? You’ve got the perfect shot, but those creases make it look sloppy and unprofessional.
If you shoot for clothing e-commerce, you already know that wrinkles can kill a good image. They draw the eye, break up clean lines, and make even high-quality fabrics look cheap. But don’t worry, fixing them is easier than you think.
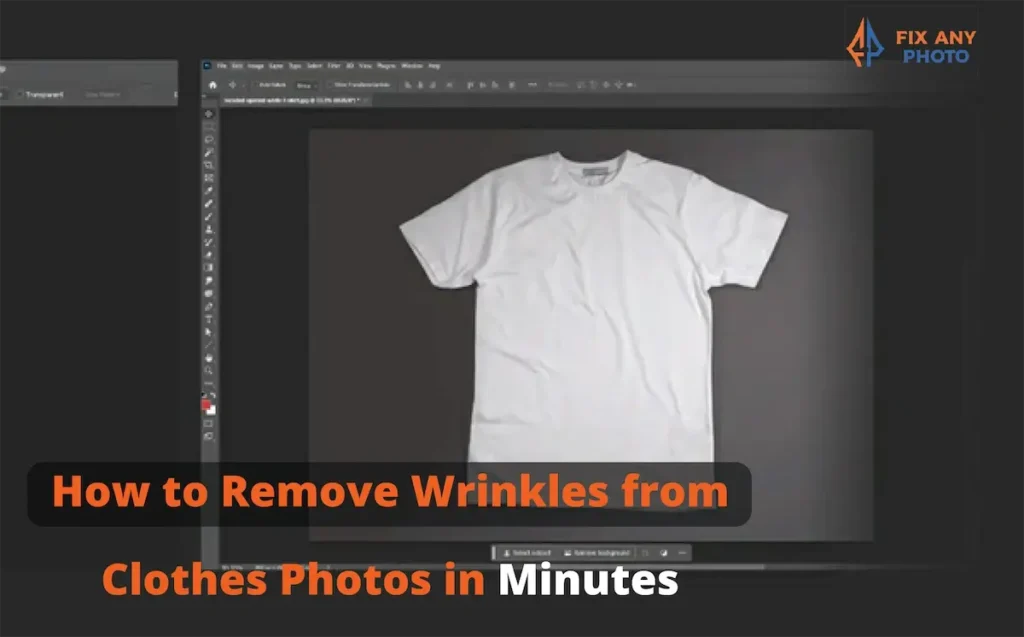
In this guide, I’ll show you quick, effective ways to remove wrinkles using Photoshop, Lightroom, AI tools, and mobile apps. These are the exact tricks I use to turn “almost perfect” photos into polished, professional product images.
Removing Wrinkles Matters in Product Photography
Wrinkles aren’t just fabric issues, they mess with perception. When a shirt or dress looks wrinkled, customers instantly think the product is low quality. Smooth clothes, on the other hand, signal care, style, and professionalism.
I’ve seen this many times: two identical photos, one wrinkle-free and one not. The smooth version always gets more attention. Clean visuals make the texture, color, and shape pop, while wrinkles distort everything.
Studies show that crisp, clean product photos can boost conversions by up to 30%. That’s reason enough to smooth things out. See how professionals fix wrinkles for flawless, ready-to-sell images.
And let’s be honest, customers don’t want to see laundry-day realism. They want their clothes to look ready-to-wear, not ready-to-iron.
Preparing Your Photo Before Editing

Before you dive into Photoshop, make sure your image is ready to work with. A few smart steps at the start can save you hours later.
Use High-Resolution Images
Always start with a sharp, high-resolution photo. The higher the resolution, the easier it is to retouch wrinkles cleanly without blurring fabric details. I’ve tried fixing low-quality images before, it’s like trying to iron clothes in the dark. You can do it, but it’s not going to end well.
Good lighting and a clear image make all the difference when blending textures or colors. The more pixels you have, the smoother your edits will look.
Basic Lighting and Shadows Check
Lighting can make or break a product photo. Harsh light exaggerates every tiny wrinkle, while soft, even light helps smooth them out naturally. If you’re shooting again, use diffusers or reflectors to soften shadows and highlight the fabric’s real texture.
When I first started, I’d blame my editing skills for every tough wrinkle, but most of the time, it was bad lighting playing tricks on me.
Lesson learned, good light fixes half your problems before Photoshop even opens.
Duplicate Your Layer (in Photoshop)
Here’s a golden rule: always work on a duplicate layer. That way, you can compare your edits with the original anytime. It’s a small habit that keeps your work clean and gives you full control if you ever need to step back.
Plus, it’s oddly satisfying to hit that “before and after” toggle and see how much better your image looks.
Quick Wrinkle Removal Methods (Step-by-Step Tutorials)

Now that your photo is prepped, it’s time to roll up your sleeves (hopefully not wrinkled ones) and start editing.
Here are my favorite, tried-and-true methods to make clothes look perfectly smooth, from professional Photoshop techniques to quick mobile fixes.
Method 1: Using Photoshop’s Healing Brush Tool
When I first discovered the Healing Brush, I honestly thought it was Photoshop’s gift to mankind. It’s fast, forgiving, and perfect for small clothing wrinkles that don’t need complex editing.
Here’s how I use it:
-
Select the Healing Brush Tool (J) from the toolbar.
-
Choose a soft round brush and hold Alt (Option on Mac) to sample a nearby smooth area.
-
Gently paint over the wrinkles in small strokes. Photoshop blends the sampled texture with the color underneath, making wrinkles disappear naturally.
-
Adjust brush hardness and opacity depending on the fabric. I keep hardness low for cotton or soft textures and increase it slightly for structured materials.
Best for: cotton, T-shirts, casual wear, and flat fabrics.
Pro Tip: don’t rush it. Small, light strokes look more realistic than trying to smooth the entire shirt in one go. Think of it as “digital ironing.”
Method 2: Using the Clone Stamp Tool
If the wrinkles are deeper or cover textured fabric, the Clone Stamp is your best friend. It gives you full control over what you copy and where you place it.
Steps to follow:
-
Create a new layer before cloning (always work non-destructively).
-
Select the Clone Stamp Tool (S) and sample a clean area near the wrinkle.
-
Carefully paint over the wrinkles, matching the fabric’s direction and texture.
-
Use a low opacity (20–40%) for gradual blending.
Pro Tip: zoom in to 100% while working. It helps you match lighting and shadows precisely.
Best for: denim, jackets, heavy cotton, or fabrics with defined patterns.
One of my early mistakes was cloning at 100% opacity, the result looked like someone ironed the shirt with a blowtorch. Keep it subtle; less is more with the Clone Stamp.
Method 3: Frequency Separation Technique (for Professionals)
This one’s for the perfectionists who want magazine-level results. Frequency separation separates the texture (wrinkles) from the color and tones, allowing you to edit one without messing up the other.
It sounds complex at first, but once you try it, you’ll see why professionals swear by it.
Here’s how I do it:
-
Duplicate your image twice. Name one layer “Low Frequency” and the other “High Frequency.”
-
Select the Low Frequency layer and go to Filter → Blur → Gaussian Blur. Blur until the wrinkles disappear but the overall shape stays intact.
-
Select the High Frequency layer and go to Image → Apply Image. Choose the Low Frequency layer, set the blending mode to Subtract (or Add for 16-bit images), and apply it.
-
Change the High Frequency layer’s blending mode to Linear Light.
-
Now, grab the Healing Brush Tool and work gently on the High Frequency layer to remove wrinkles while preserving texture.
Ideal for: silk, satin, lace, or detailed fashion catalog work.
This technique keeps the natural fabric grain intact, which makes your edit look professional. It’s my go-to for luxury clothing shots or anything destined for print catalogs.
Method 4: Using AI or One-Click Tools
Let’s be honest, sometimes you don’t have time to open Photoshop and go layer by layer. That’s where AI-based wrinkle removers save the day.
Here are some popular ones I’ve tried:
-
Fotor – great for quick touch-ups and batch edits.
-
Luminar AI – uses smart masking for subtle wrinkle correction.
-
PhotoWorks – beginner-friendly desktop editor with auto-smooth tools.
-
Cleanup.Pictures – fast, web-based option for quick edits.
How to use them:
-
Upload your clothing image.
-
Select the wrinkled area using the retouch or cleanup tool.
-
Let the AI do its thing.
-
Download your polished, smooth result.
Pros: quick, easy, and perfect for beginners.
Cons: AI can sometimes over-smooth fabric, making it look fake or waxy.
If you’re editing dozens of product photos for an online store, AI tools can be a real time-saver. I just make sure to double-check the texture afterward to keep things realistic.
Method 5: Mobile Editing Apps (for Quick Fixes)
If you’re on the go or managing your store from your phone, mobile apps like Snapseed, AirBrush, and Lightroom Mobile can get the job done surprisingly well.
Steps:
-
Open your photo and use the Healing or Retouch tool to remove wrinkles.
-
Adjust structure, texture, and clarity sliders until the fabric looks smooth but natural.
-
Zoom in to double-check you’re not removing important details.
Perfect for: social media sellers, quick product updates, or when you just need a clean look fast.
I’ve used Snapseed for quick Instagram posts more times than I can count. It’s simple, free, and honestly fun to use. Just be gentle with the sliders—overdoing clarity can make clothes look crunchy instead of crisp.
Maintaining Realism: Avoid Over-editing

Here’s one thing I’ve learned the hard way: it’s easy to get carried away with wrinkle removal. You start fixing one small crease, and before you know it, the shirt looks smoother than a cartoon character’s outfit. That’s not the goal.
Wrinkle removal should always look natural, not plastic. The trick is to keep the fabric texture and weave details intact while removing the distractions. Customers want to see the real material, not something that looks painted on.
I always zoom in at 100% to check the texture as I go. If I notice the threads disappearing, I dial back my edits.
The Healing Brush Tool works best when used between 70–85% opacity. It’s strong enough to smooth the wrinkles but gentle enough to keep the fabric’s character.
I also recommend keeping a before and after view open while editing. It helps you stay balanced and spot when you’re going too far. If your shirt starts looking like plastic, undo a few steps. Realism sells, perfection doesn’t.
Batch Editing for Multiple Photos
When editing one or two photos, manual work is fine. But if you’re editing a full e-commerce catalog, that’s a different story. Nobody wants to retouch 200 shirts by hand, not even me, and I love editing.
To save time, I rely on Photoshop Actions. They let you record your editing steps once and apply them to every image automatically.
Here’s how to do it:
-
Open a sample photo and go to Window > Actions.
-
Click New Action, give it a name, and hit Record.
-
Perform your usual healing or cloning steps.
-
When you’re done, hit Stop Recording.
Now you can apply that same action to multiple photos in just one click. It’s like having your own digital assistant who never complains about long hours.
If you’re working with Lightroom, use the Sync feature instead. Edit one photo perfectly, then select the rest and sync your adjustments for color, exposure, and sharpness. This keeps your entire product gallery consistent, which is key for e-commerce branding.
Pro Tip: batch editing works best when your lighting setup and fabric types are similar across all images. For mixed shoots, I still prefer a manual check at the end — just to make sure every item looks naturally smooth.
Bonus: Prevent Wrinkles Before You Shoot
Here’s my favorite secret to saving editing time — fix wrinkles before you even open Photoshop.
No matter how good you are at retouching, nothing beats starting with a clean, well-prepped garment. Prepping clothes properly before the shoot can save hours of post-processing later.
Here’s what I always recommend:
1. Use a Steamer, Not an Iron
Steamers are your best friend, especially for delicate fabrics like silk or chiffon. They remove wrinkles gently without leaving shiny marks or burns. I learned this the hard way after accidentally giving a polyester dress a “new glossy finish.” Spoiler: it was not a good look.
2. Hang Clothes Properly During the Shoot
Never pile clothes on a chair between takes. Hang them on proper hangers or garment racks so the fabric can relax naturally. Wrinkles love lazy storage.
3. Adjust Lighting to Hide Creases
Lighting can either emphasize or hide wrinkles. Use soft light or diffusers to minimize harsh shadows. When you light your setup right, half the wrinkles disappear even before editing starts.
4. Use Fabric Clamps or Pins
If a shirt won’t sit right on the mannequin, use small clips or pins at the back to stretch it neatly. It’s an old photographer trick that makes clothes look naturally fitted and smooth.
Prepping before you shoot is like doing laundry before a trip — it saves headaches later. And trust me, editing is a lot more fun when you’re enhancing great photos instead of rescuing wrinkled ones.
Common Mistakes to Avoid
Even experienced editors slip up sometimes. I’ve made all of these mistakes myself and yes, a few were so bad I had to restart from scratch. Save yourself the pain by watching out for these common editing traps.
1. Overusing Blur or Smoothing Filters
It’s tempting to grab the blur tool and go wild, but that’s the fastest way to turn realistic fabric into a plastic sheet. Keep the texture visible. If you can’t see the threads anymore, you’ve gone too far.
2. Ignoring Shadows and Highlights
After wrinkle removal, the light balance often shifts. If you don’t recheck shadows and highlights, the area you edited can look flat. I always adjust exposure or dodge and burn lightly to bring back natural depth.
3. Not Matching Lighting Direction While Cloning
When using the Clone Stamp, always pay attention to how light hits the fabric. Cloning from the wrong side creates awkward shadows that scream “bad edit.” Follow the light — your photo will thank you.
4. Editing Low-Quality Photos
If the original image is blurry, there’s only so much Photoshop can do. Editing low-res files often leads to smudged textures or fake-looking patches. Always start with the best possible shot; you can’t polish what pixels don’t exist.
5. Forgetting to Zoom Out
We all get stuck zoomed in at 300%, trying to perfect every pixel. But sometimes the edit that looks great up close looks terrible from afar. I zoom out every few minutes to check the overall composition. Think of it like stepping back from a painting — perspective changes everything.
Pro Tips for Polished Results
These are my go-to tricks when I want product photos to look ultra-clean yet totally natural.
Combine Healing Brush with Dodge & Burn
After removing wrinkles, use Dodge & Burn to subtly fix uneven lighting. Lightly dodge dark crease shadows and burn bright spots to balance tones. This combo keeps fabric looking soft but dimensional.
Use a Pen Tablet (Optional but Awesome)
If you do a lot of editing, a pen tablet gives you smoother control than a mouse. It’s pressure-sensitive, so your brush strokes feel more natural. Once I switched, I wondered how I ever worked without it.
Always Compare Before and After
Toggle your edited layer on and off while working. Comparing helps catch over-smoothing or lighting mismatches before exporting. I always do one last look at 100% zoom — it’s amazing how often you spot small issues right at the end.
Export in High Resolution
Once you’re happy with your edits, export your images in high resolution. For e-commerce, 2000 pixels on the longest side usually keeps the details crisp for both web and print. Never downsize too much — sharp, clean photos make your products stand out.
Tools and Shortcuts Summary Table
Here’s a quick cheat sheet I use all the time when editing. Keep this handy if you want to move faster and stay consistent.
| Task | Tool | Shortcut | Time Needed |
|---|---|---|---|
| Minor wrinkles | Healing Brush | J | 2–3 mins |
| Deep folds | Clone Stamp | S | 3–5 mins |
| Texture preservation | Frequency Separation | Custom setup | 5–10 mins |
| Quick fix | AI Tools | N/A | 1–2 mins |
| Mobile edit | Snapseed | N/A | 2–3 mins |
I like to keep this list taped near my desk. It reminds me that every photo has its perfect fix — whether it’s a few minutes of brushwork or a one-click AI magic moment.
Before & After Comparison Ideas
If you really want to showcase your editing skills (or build trust with clients), nothing beats a before and after comparison. It’s visual proof of your effort and helps people see what’s possible with proper retouching.
I usually place both images side by side and describe exactly what I did. For example:
“Removed harsh crease near the shoulder using the Healing Brush and balanced lighting with Dodge & Burn.”
That one simple line shows skill and transparency. Plus, it’s a great way to market your editing services if you’re building a portfolio or Instagram presence.
When readers see how subtle but effective wrinkle removal can be, they start understanding the real difference between basic editing and professional work.
Final Thoughts
At the end of the day, wrinkle-free clothing photos don’t just look cleaner, they build trust, elevate your brand, and help products sell faster. Smooth, polished visuals are the secret sauce of a professional-looking e-commerce catalog.
Whether you’re an experienced retoucher or just learning the ropes, practice is everything. The more you experiment, the more natural your edits will feel. Try both manual and AI methods to find what works best for your workflow.
Remember, perfection isn’t the goal, realism is. Each photo has its own rhythm, and your job as the editor is to keep it looking natural while making it shine.
With just a few minutes and the right tools, your clothing photos can go from average to brand-quality. And trust me, when you see that transformation, it’s almost as satisfying as finally ironing your favorite shirt right on the first try.