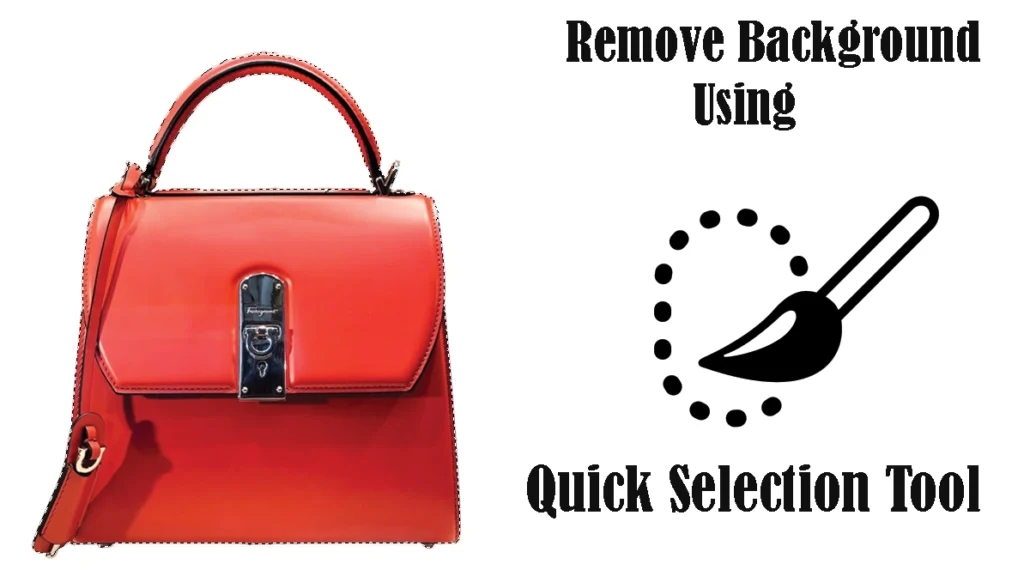
We will talk you through the step-by-step process of remove background in Photoshop using the Quick Selection Tool. Whether you’re a beginner or an experienced Photoshop user, you’ll find valuable tips and tricks to help you achieve clean and professional-looking results.
What is the Quick Selection Tool in Adobe Photoshop?

The Quick Selection Tool in Photoshop is a powerful selection tool that allows you to make fast and relatively accurate selections in your images. It is particularly useful when you need to select objects or areas with well-defined edges in your photos or designs.
The Quick Selection Tool is particularly effective when working with images that have a clear contrast between the subject and the background, but it may require additional adjustments and fine-tuning for images with more complex backgrounds or intricate details.
How to use the Quick Select Tool For Remove Background?

Step 1: Prepare Your Workspace
Before we dive into the background removal process, it’s essential to have a well-organized workspace. Here are some steps to ensure you’re set up for success:
- Open Your Image: To do this, go to “File” > “Open” and select your image file. Alternatively, you can drag and drop the image into the Photoshop workspace.
- Duplicate the Layer: This way, you’ll always have the original image as a reference, and you can easily compare the edited version to the original. To duplicate the layer, right-click on the background layer in the Layers panel and choose “Duplicate Layer.”
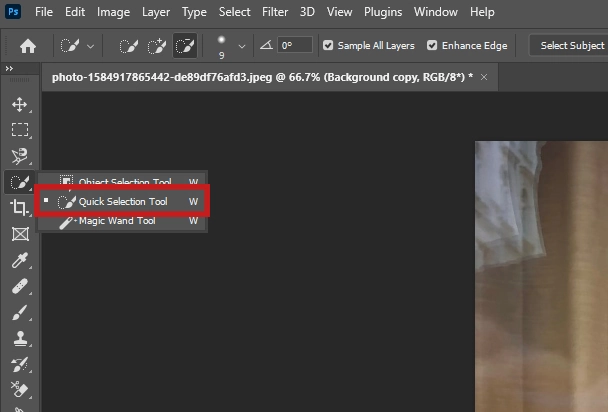
Step 2: Select the Quick Selection Tool
You can find the Quick Selection Tool in the Photoshop toolbar, which is usually on the left side of the screen. The icon looks like a paintbrush with a dotted oval around it.
Select the Quick Selection Tool by clicking on its icon in the toolbar or by pressing the “W” key on your keyboard as a shortcut.
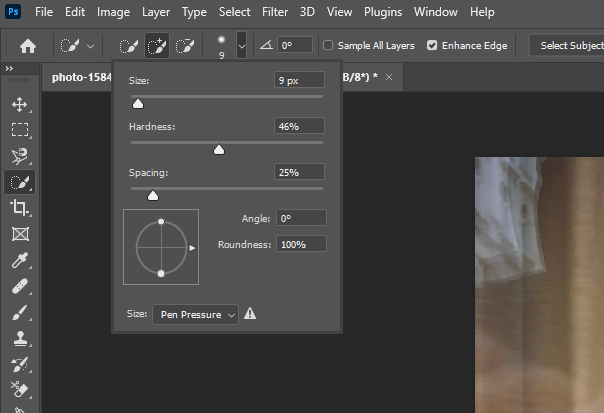
Step 3: Adjust Tool Options
Before using the Quick Selection Tool, it’s essential to adjust its options to suit your specific image and selection needs.
- Brush Size: In the options bar at the top of the Photoshop window, you’ll see a field labeled “Brush Size.” Adjust the brush size to fit the areas you want to select accurately. For finer details, use a smaller brush; for larger areas, use a larger brush.
- Hardness: A soft-edged brush creates a smoother transition between the selected and unselected areas, while a hard-edged brush creates a sharper transition. Depending on your image, you may need to experiment with this setting. For most remove background tasks, a moderately soft brush works well.
Sample All Layers: Make sure the “Sample All Layers” option is checked in the options bar.
Step 4: Make Your Selection
Now, let’s use the Quick Selection Tool to make a selection around the subject you want to keep. Here’s how to do it:
- Start with a Broad Selection: Click and drag the Quick Selection Tool over the subject’s outline. The tool will automatically start selecting pixels it considers part of the subject. Don’t worry if the initial selection isn’t perfect; we’ll refine it in the following steps.
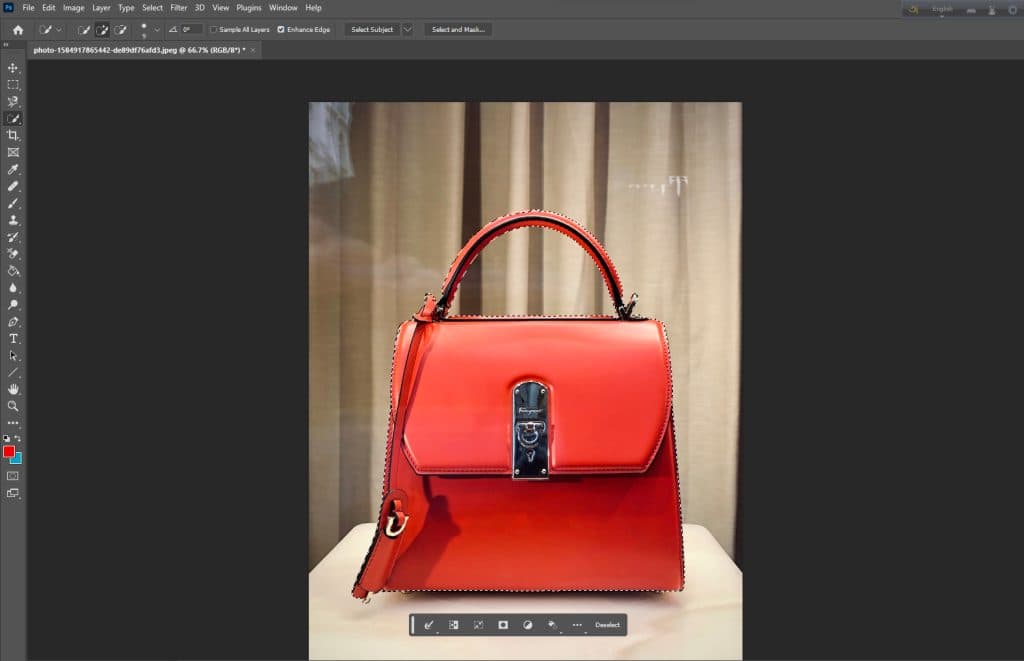
- Add or Subtract from the Selection: Click and drag the tool over the regions you want to include in your selection while holding down the “Shift” key on your keyboard. Holding down the “Alt” (Windows) or “Option” (Mac) key while dragging over the places you unintentionally selected will remove them from the selection.
Refine the Selection: For most images, you’ll need to refine your selection to ensure accuracy. Here are some tips for refining your selection:
Zoom In: Use the zoom tool (magnifying glass icon) to zoom in on the image for a closer view. This allows you to make more precise selections.
Adjust Brush Size: Change the brush size as needed to select both fine details and larger areas accurately.
Be Patient: Take your time with the selection process. It’s better to make multiple small selections and refine them than to rush through and end up with a rough selection.
Use Short Strokes: Instead of dragging the tool continuously, use short, controlled strokes. This helps you avoid accidentally selecting areas you want to exclude.
Check Your Progress: Periodically, turn off the visibility of the background layer (click the eye icon next to the layer in the Layers panel) to see how well you’ve isolated the subject. This allows you to identify areas that may need further refinement.
Continue to refine your selection until you are satisfied with the results.
Step 5: Fine-Tune Your Selection
Even after refining your selection, there may still be areas that require fine-tuning to achieve a perfect cutout. Here are some techniques to fine-tune your selection:
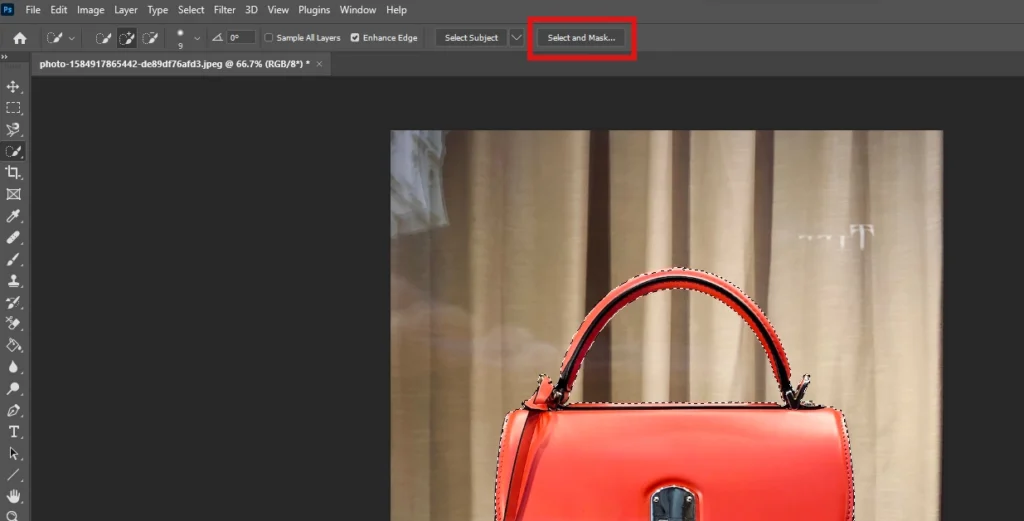
- Refine Edge: To access additional selection refinement options, go to “Select” > “Select and Mask” in the top menu. Inside the Select and Mask workspace, you can:
Inside the workspace, you can:
Use the “Refine Edge Brush Tool” to clean up the edges of the selection, especially if there are areas with complex details like hair or fur.
Adjust the “Smooth” and “Feather” sliders to soften the selection’s edges for a more natural transition.
Experiment with the “Contrast” slider to make the selection edges more defined.
Use the “Decontaminate Colors” option to fix color fringing, which can occur when removing the background.
After making adjustments in the Select and Mask workspace, click “OK” to apply the refined selection back to your main image.
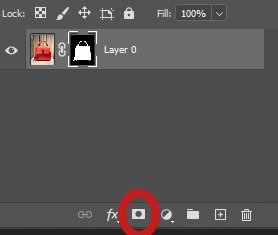
Step 6: Create a Layer Mask
Once you are satisfied with your selection, it’s time to create a layer mask to remove the background. Here’s how to do it:
- Apply the Layer Mask: With your refined selection active, click the “Add Layer Mask” icon at the bottom of the Layers panel. This will create a layer mask based on your selection, effectively remove background and revealing only the subject.
- Check Your Result: Turn off the visibility of the background layer to see the isolated subject against a transparent background. You can do this by clicking the eye icon next to the background layer in the Layers panel.
Step 7: Add a New Background (Optional)
With the remove background, you can now replace it with a new one or leave the background transparent. Here’s how to add a new background:
- Create a New Layer: Go to the Layers panel and click the “New Layer” icon to create a new layer.
- Place the New Background: Drag and drop the new background image onto the newly created layer. Position it below the layer containing your isolated subject.
- Change the background color: Choose a different background color if you’d like to change it. Just choose the color and click the Alt+Backspace.

Step 8: Save Your Work
Once you’re satisfied with the remove background and composite, it’s time to save your work. Here are the recommended steps:
- Save as PSD: Save your Photoshop project as a PSD (Photoshop Document) file first. This preserves all layers, layer masks, and settings for future editing. To save, go to “File” > “Save As,” choose a location on your computer, and select the PSD format.
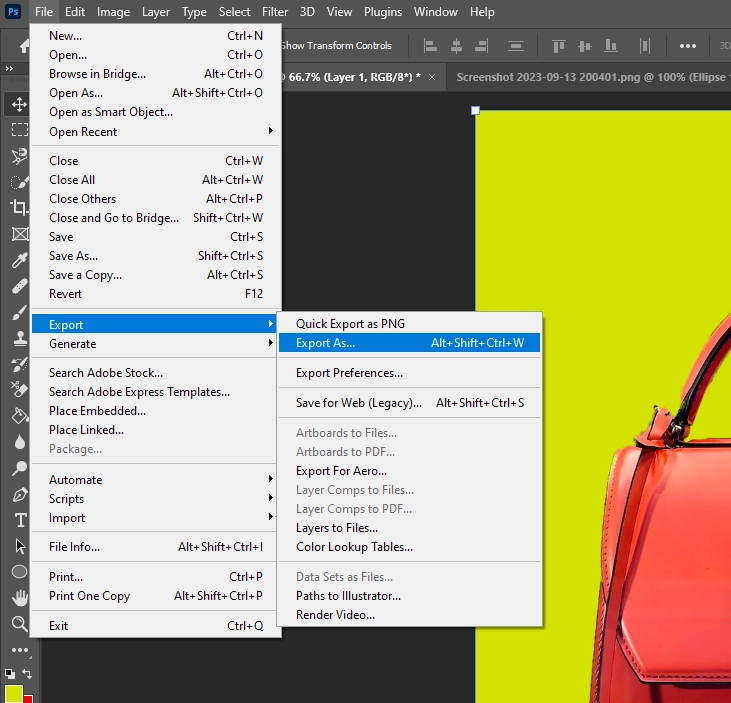
- Export for Web (if needed) If you intend to use the image on the web or in a digital format, you’ll want to export it in a web-friendly format like JPEG or PNG. To do this, go to “File” > “Export” > “Export As” or “Save for Web (Legacy)” to access the export options. Choose the desired format and adjust the quality settings as needed, then click “Save.”
Conclusion
In this guide, we’ve covered the entire process, from preparing your workspace to the final refinements of your composite image. By following these step-by-step instructions and practicing your selection and masking techniques, you can achieve professional-looking results and remove background in your Photoshop projects.