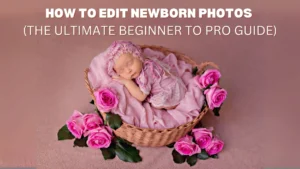
There’s something magical about newborn photos – soft skin, tiny fingers, peaceful sleep. Learning how to edit newborn photos, however, isn’t always as dreamy as it sounds. It demands a delicate, thoughtful approach unlike any other type of photo editing
Newborn skin is sensitive. Lighting can easily shift tones, highlight redness, or wash out those gentle details. While other genres might focus on contrast and sharpness, newborn photography calls for softness, warmth, and an honest emotional touch.
This guide is for anyone looking to master newborn photo editing — whether you’re a parent enhancing your baby’s first portraits, a photographer refining your workflow, or a creative editor wanting to specialize in newborn retouching.
From simple corrections to pro-level finishes, you’ll find everything you need right here: tools, techniques, expert tips, and a workflow that respects both beauty and authenticity.
Let’s begin turning those tender moments into timeless memories, with care and a human touch.
Why Editing Newborn Photos Requires a Gentle Approach
Newborns are fragile. And so are the memories we try to preserve through their portraits. A subtle change in lighting or skin tone can shift the entire mood of the photo. When editing newborn photos, it’s not about perfection; it’s about care..
Baby skin is incredibly soft. Often, you’ll notice a slight redness, flakiness, or uneven tone. These aren’t flaws. They’re part of what makes a newborn real. When you edit too heavily, that delicate beauty can disappear.
Techniques that work in other genres simply don’t fit when you’re working on newborn photo editing. Bold contrast or strong filters can take away the softness and innocence that define newborn portraits. That’s why gentle, minimal edits are always the better choice.
The goal isn’t to make the baby look flawless. It’s to make them look true to life. Real skin, natural light, and quiet emotion — that’s what matters most.
When you edit, think with feeling. Let every touch enhance the memory, not replace it.
Best Tools for Editing Newborn Photos
Editing newborn photos isn’t just about technique — it’s also about using the right tool for the job. Here’s a simple breakdown of the best photo editing tools used by professionals and beginners alike, and what makes each one ideal.
| Tool Name | Best For | Key Features | Price |
| Adobe Photoshop | Professional editors | Skin retouching, cloning, healing, layers, frequency separation | Subscription (Paid) |
| Adobe Lightroom | Fast & consistent photo editing | Exposure, white balance, presets, batch editing | Subscription (Paid) |
| Photoshop Elements | Beginners & casual users | Guided edits, basic retouching, more straightforward interface | One-time (Paid) |
| Affinity Photo | Budget-conscious professionals | Advanced tools, one-time payment, frequency separation, masking | One-time (Paid) |
| GIMP | Free option for DIY editors | Open-source, cloning, layer-based editing, customizable | Free |
Step-by-Step Newborn Editing Workflow
Editing a newborn photo isn’t about heavy transformation — it’s about polishing what’s already beautiful. When done with care, editing helps highlight a baby’s softness, innocence, and tiny details without losing their natural charm. Here’s how you can do it step by step.
1. Start by Importing RAW Files
When you edit newborn photos, always start by importing RAW files if possible. It gives you more flexibility when adjusting lighting, color, and fine details later. Import your photos into Lightroom, Photoshop, or your preferred software to start working non-destructively.
2. Fix Exposure, White Balance, and Temperature
Newborn photos often need gentle light adjustments. Babies’ skin can look too red, yellow, or even bluish, depending on the lighting. Use the white balance tool to warm up cool tones or cool down too much warmth, making the skin tone appear natural and soft.
3. Correct Skin Tones and Remove Blemishes Gently
Zoom in and take a close look at the skin. Don’t aim to make it “perfect.” Instead, remove only what distracts — like temporary blemishes, flaky patches, or redness. Use tools like the Spot Healing Brush, Clone Stamp, or a gentle frequency separation technique.
4. Clean Up the Background
Distracting objects like blankets, wrinkles in fabric, or even the photographer’s hand can steal attention from the baby. Use tools to clean the background while keeping the softness intact. A smooth, simple background helps focus all eyes on the baby.
5. Add a Soft Glow or Dreamy Light
Use radial filters or adjustment layers to add a soft glow around the baby’s face. Don’t go overboard — just enough to bring warmth and light into the image. Think “gentle sunlight” rather than “Instagram filter.”
6. Adjust Crop and Composition
Straighten the image if needed, and use a crop that enhances the baby’s position. Keep space around them to make the photo feel calm and balanced. Rule of thirds often works well, but trust your eye and the feeling of the moment.
7. Export for Print or Web
Once everything looks polished, export in high resolution for print, or resize and optimize for web sharing. Always save a copy in maximum quality for long-term use.
Editing newborn photos isn’t something you rush — it’s an art built on patience, observation, and care. Every click and every brushstroke should be intentional, aiming to preserve the quiet beauty of the moment.
Don’t just fix a photo. Feel it. Because when you edit with emotion, you’re not just enhancing an image — you’re protecting a memory.
How to Use Photoshop for Newborn Editing
Photoshop is one of the most powerful tools for editing newborn photos. But the secret to excellent editing isn’t in using every tool — it’s in knowing which ones to use, how gently to apply them, and when to stop.
Below is a breakdown of the most useful Photoshop tools for newborn editing and how to use them properly:
Essential Tools for Newborn Retouching in Photoshop
- Spot Healing Brush Tool
Used to remove minor blemishes, flakes, or tiny scratches on the baby’s skin. It automatically blends the correction based on surrounding pixels, making it ideal for quick, natural touch-ups. - Patch Tool
Best for slightly larger areas that need smoothing. You can select a part of the skin with texture issues and replace it with a clean area. It’s helpful for dry patches or red spots. - Clone Stamp Tool
Allows you to copy clean skin from one part of the image and paint over an area with flaws. Use it at low opacity for more natural blending. - Frequency Separation
An advanced technique that separates skin texture from tone. This lets you smooth uneven colors without losing the natural skin texture — perfect for keeping the baby’s skin real but refined.
Why Use Adjustment Layers and Layer Masks?
- Adjustment layers let you edit exposure, contrast, color, or sharpness non-destructively (without affecting the original image).
- With layer masks, you can apply edits to specific parts of the image — for example, brightening just the face while leaving the rest untouched.
- This approach keeps your editing flexible. You can always go back and adjust without starting over.
Using Presets and Actions
- Presets are pre-saved settings that can be applied with one click — for example, skin tone softening, warm glow, or pastel color tones.
- Actions are sequences of steps recorded inside Photoshop that automate editing tasks. They’re great for speeding up your workflow if you’re editing many similar photos.
- You can create your own or download free/premium newborn-specific actions from trusted sources.
Which Photoshop Version Should You Use?
| Version | Ideal For | Notes |
| Photoshop CC | Professionals & serious editors | Includes latest tools, cloud storage, AI-based features |
| Photoshop CS6 | Intermediate users | Still powerful, supports most retouching techniques |
| Photoshop CS5 | Basic users | Limited modern features, but fine for fundamental editing |
In newborn editing, less is more. Use only the tools you truly need, and apply each touch with care. Photoshop gives you the power — your job is to use it gently, with the baby’s natural beauty in mind.
How to Edit Newborn Photos in Lightroom
Lightroom is a powerful tool for photographers who want to edit newborn photos quickly and consistently, without compromising on softness and natural beauty. Its clean interface and non-destructive workflow make it ideal for handling multiple images from a session while keeping the edits light and professional.
Here’s how to use Lightroom effectively when editing newborn photos:
1. Start with the Basic Panel
The Basic Panel is where you’ll do most of the foundational corrections. Focus on the following settings:
- Exposure – Slightly increase if the image feels too dark or flat. Avoid overexposing baby skin.
- Contrast – Keep this low to maintain softness. Newborn skin looks better with subtle contrast.
- Highlights – Reduce highlights to preserve details in white blankets or clothing.
- Shadows – Slightly lift shadows to reveal hidden details, especially in the background.
- Whites/Blacks – Adjust gently to create a balanced tonal range. Be careful not to clip.
- White Balance (Temp/Tint) – Babies often appear too red or yellow. Adjust temp/tint for natural, creamy tones.
2. Tone Curve and Color Grading for Soft Skin
- Use the Tone Curve panel to fine-tune brightness and contrast in a more controlled way.
Add a slight S-curve for subtle depth without harsh shadows. - For skin tone adjustments, go to the Color Grading or HSL Panel:
- Reduce reds and oranges if the baby’s skin looks blotchy.
- Increase luminance in the orange channel for a soft, glowing look.
- Keep saturation low for a calm and creamy feel.
3. Use Lightroom Presets for Creamy Skin Tones
- Choose presets designed for newborn photography — they usually include warm tones, soft contrast, and gentle highlights.
- Presets save time and maintain consistency across multiple photos in a session.
- After applying a preset, constantly fine-tune basic adjustments based on your specific image.
- Many professional Lightroom eBooks and courses also provide preset packs tailored for newborns.
4. Spot Edits with Local Adjustment Tools
- Use Radial Filters to draw attention to the baby’s face by adding soft light or subtle brightening.
- The Adjustment Brush can be used to smooth skin, reduce redness, or gently brighten eyes.
- Graduated Filters help even out background lighting without affecting the subject.
5. Integrating with Photoshop for Advanced Touch-Ups
- If deeper retouching is needed (like removing flakes, hands, or distractions), send the photo directly to Photoshop from Lightroom by right-clicking → “Edit in Adobe Photoshop.”
- After editing in Photoshop, save it and it will auto-update back in your Lightroom catalog.
Which Version of Lightroom Works Best?
| Version | Best For | Notes |
| Lightroom CC | Cloud users & professionals | Cross-device syncing, modern UI, and fast editing features |
| Lightroom 5 | Offline desktop editors | Lacks cloud support but strong for core editing |
| Lightroom eBooks | Learners and hobbyists | Great way to learn editing theory, includes guided tutorials and presets |
Lightroom is all about efficiency, subtlety, and staying true to natural tones. When used thoughtfully, it can turn your raw baby photos into polished portraits full of warmth, softness, and timeless emotion — without ever losing their authenticity.
Time Management in Newborn Editing
Editing newborn photos can be a rewarding process — but let’s face it, it can also be time-consuming. When you’re editing an entire session with dozens of images, it’s easy to lose track of time. That’s why managing your editing workflow efficiently is just as important as the editing itself.
So, how long does it take to edit a newborn photo?
For a single image with detailed retouching, it can take anywhere from 15 to 30 minutes, especially if you’re working on skin tones, removing distractions, and adding soft glows. A full gallery of 20–30 images may take several hours if done manually and without a system.
But with some innovative techniques, you can speed things up without sacrificing quality.
Tips to Speed Up Your Newborn Editing Workflow
- Use Presets for Batch Edits
Start with a clean preset that matches your editing style. It helps you maintain consistency and saves time when editing multiple photos at once. - Edit in a Specific Order
Always follow a sequence — exposure and white balance first, skin next, then background cleanup. Jumping around adds time and confusion. - Work in Lightroom First
Do all the basic corrections in Lightroom before exporting to Photoshop for detailed retouching. It reduces back-and-forth switching. - Create or Use Actions in Photoshop
Actions automate repetitive edits like skin softening or background blur. One click can save you several minutes per image. - Set a Time Limit per Image
Try to finish basic edits within 3–5 minutes, and only spend longer if the image truly needs it. Not every photo requires perfection.
How to Edit a Newborn Photo in 5 Minutes
Yes, it’s possible — especially for basic edits. Here’s a quick 5-minute editing flow:
- Import the image and apply a base preset
- Adjust exposure and white balance.
- Reduce redness or color cast using HSL.
- Use a radial filter to brighten the face softly
- Apply slight skin smoothing (with brush or preset)
- Crop and straighten if needed.
- Export and move to the next image
When you have a workflow in place, speed follows naturally.
Being efficient doesn’t mean rushing. It means knowing exactly what you’re doing and doing it with focus. The goal isn’t to spend less time — it’s to use your time wisely so that every image gets the care it needs, no more, no less.
Conclusion
Newborn photo editing is a blend of skill, care, and sensitivity. From softening skin to adjusting light and preserving natural tones, every step you take should highlight the baby’s purity without losing their real features. Whether you’re using Lightroom for quick edits or Photoshop for fine retouching, the key is subtlety.
If you’ve got tips or experiences to share, we’d love to hear from you in the comments. Every insight adds value to this journey.
Looking for professional-level results? Contact Fix Any Photo — we specialize in gentle, flawless newborn edits that bring your photos to life while keeping them accurate to the moment.


