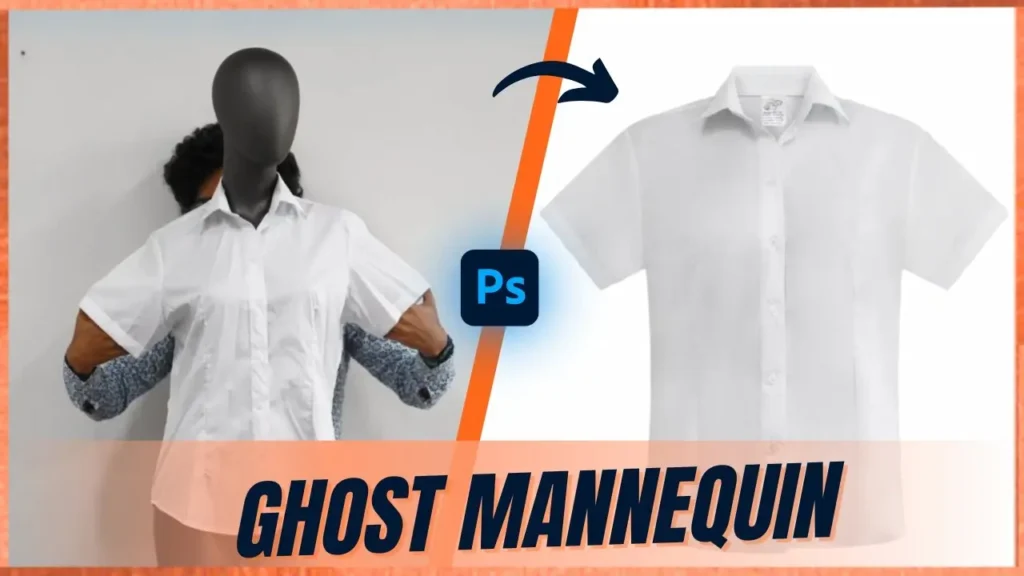
In this blog post you will learn how to create the ghost mannequin effect. To create a professional ghost mannequin effect, we need to use Adobe Photoshop. This blog post is written to be beginner-friendly, so don’t worry if you don’t know about Adobe Photoshop, and if you already know about Photoshop, then congratulations – you are already one step ahead. In this blog, we are also going to learn about clipping paths, frequency separation, colour corrections and many more. Stick with this guide, and you’ll find a video tutorial at the end to walk you through the process step-by-step. So let’s start.
Step 1: Prepare and Import Your Image into Photoshop
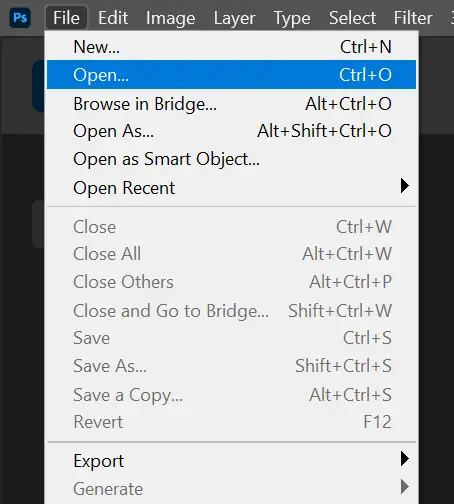
Before you start building the ghost mannequin effect, you need a clean and well-prepared image to work with. Open Adobe Photoshop and import your product photo. You can do this by clicking “Open” on the home screen, going to File > Open, or using the shortcut Ctrl+O on Windows or Command+O on Mac.
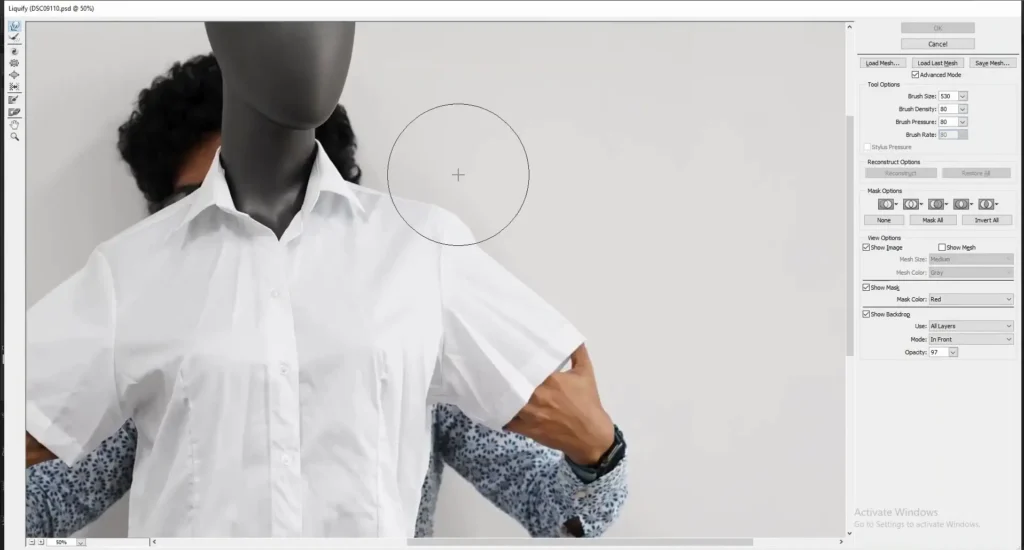
Step 2: Liquify The Garments If Needed
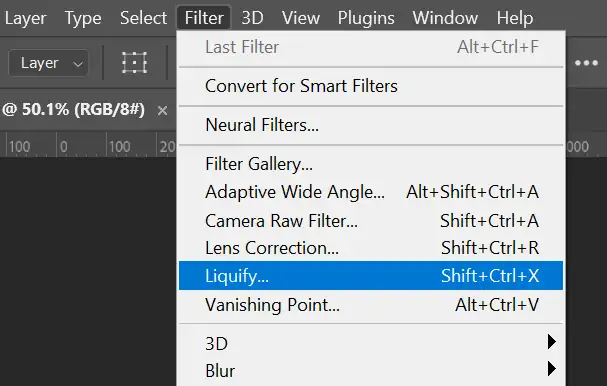
Once your file is loaded, take a moment to inspect the shape and details of the garment. If you notice any areas that look distorted or not properly shaped, fix them using the Liquify tool. Select the image layer, go to Filter > Liquify, and gently adjust the fabric or body shape so the product looks natural and balanced. This step ensures a clean starting point that will make your final ghost mannequin effect look much more professional.
Step 3: Create Outline Of The Garments
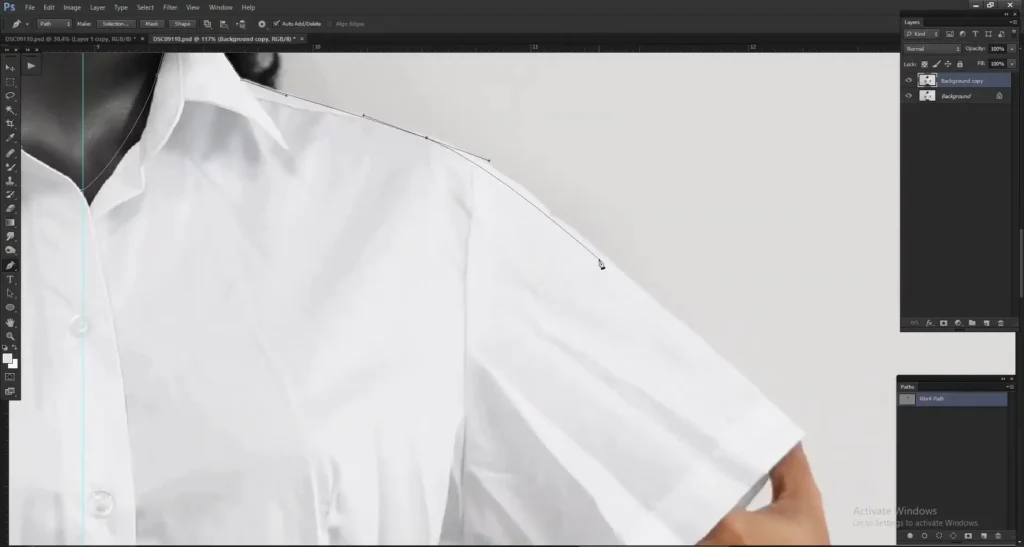
To set the correct garment shape, first select the Pen Tool in Photoshop. Make sure Path is selected on the top bar and take a new layer. Now draw a smooth outline around the shirt, not edge-to-edge, but following the ideal, standard shape you want the garment to have. Think of this as a guide to fix the shirt later, so keep your curves clean and natural.
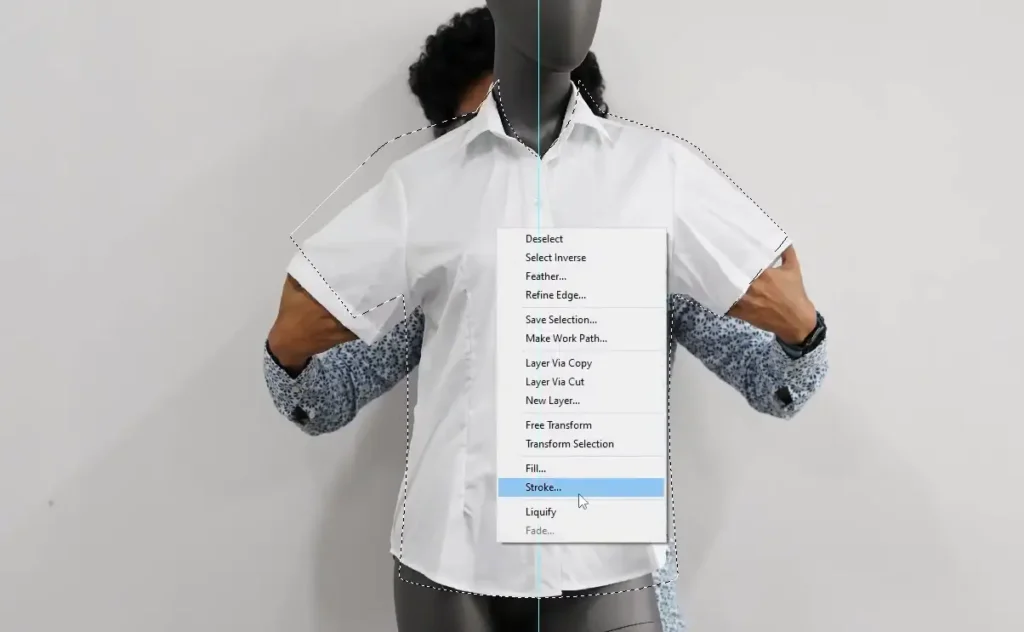
Once your path is ready, right-click and choose Make Selection. Then right-click again and select Stroke.
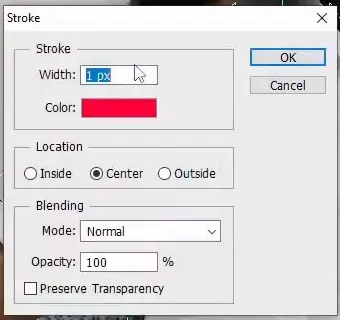
Apply a 1px to 2px stroke so you have a clear visible outline to work with.
Do the same process for the collar area. These reference strokes help you reshape and match the garment to a neat, professional ghost mannequin standard.
Step 4: Shape the Garment Using the Liquify Tool
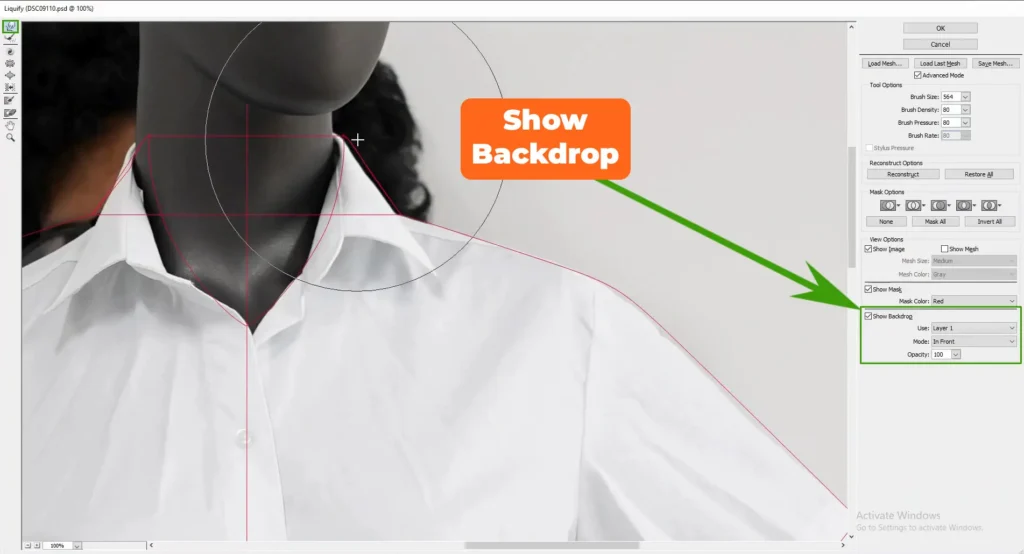
Now it’s time to match the clothing to your reference outline. Select the garment layer and open Liquify again. In the liquify panel, turn on Show Backdrop and choose the layer where you created the guide earlier. Set the backdrop opacity to 100 so you can clearly see the outline.
Pick the Soft Round Brush inside the liquify tool and gently push the fabric toward the reference line. Work slowly and make subtle adjustments. Avoid pushing too far, or the shirt may start to look unrealistic. The goal is to follow your guide smoothly and give the garment a clean, natural shape that fits the ghost mannequin style.
Take your time here. A polished shape will make a big difference in the final result.
Step 5: Remove the Extra Background Outside the Guide
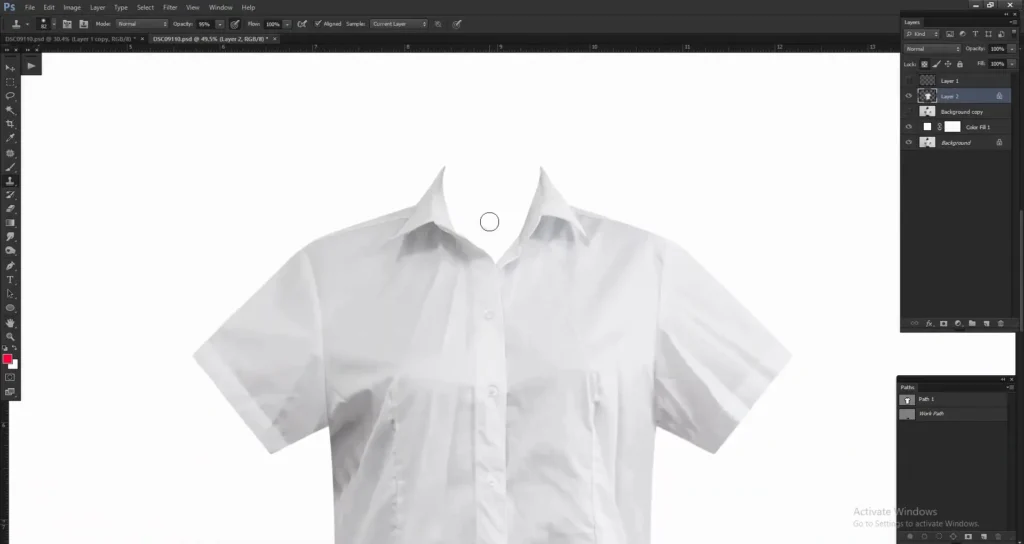
Once your garment’s shape is okay, it’s time to clean up the background. First, select the path you made previously and convert it to a selection. Next, navigate to the Select menu and click on Inverse. This will invert your selection and select the background of the garments.
Now simply press the Delete key on your keyboard. This removes the background of the garments.
Take a look to make sure the edges look smooth and natural. This step helps isolate the clothing and prepares it perfectly for the ghost mannequin effect.
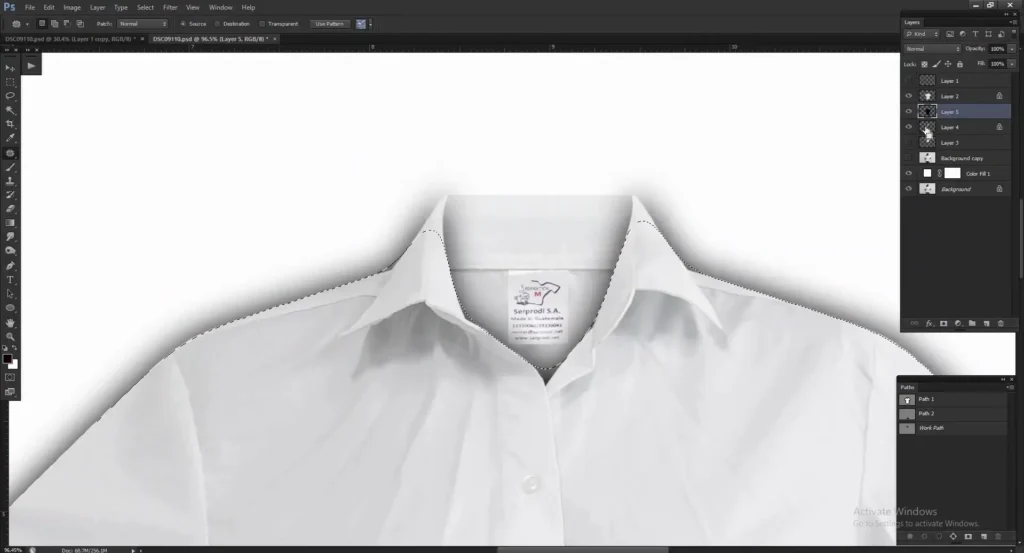
Step 6: Add and Align the Neck Joint
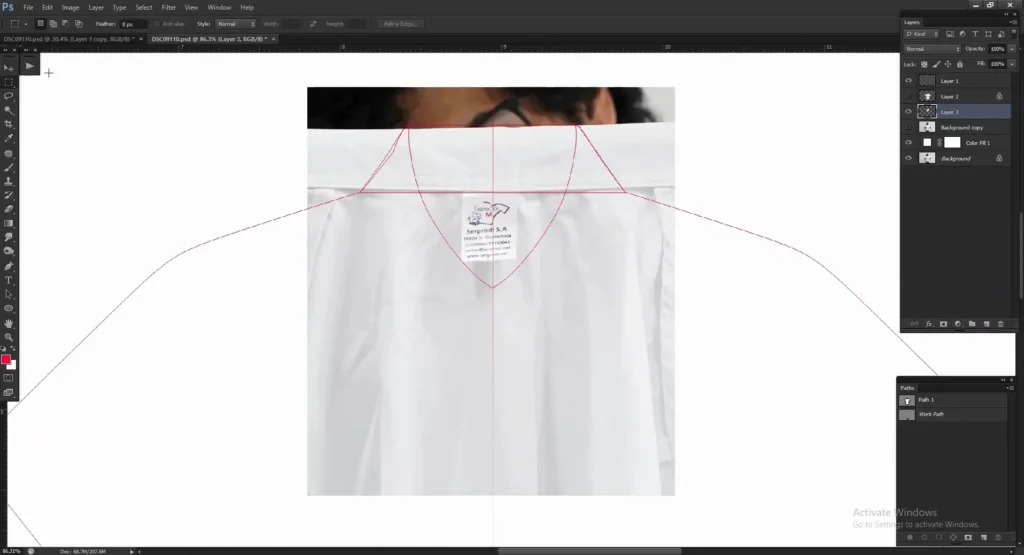
Now it’s time to work on the neck area. Bring in your neck image and line it up with the guide you created earlier. Turn off the main garment layer for a moment so you can see the guide clearly and match the neck shape accurately. If needed, use the Liquify tool again to make small adjustments and align it perfectly with the outline.
Once the neck matches the guide, place the neck joint layer behind the main garment layer. This helps create a natural inside-collar look. After positioning, carefully select and remove any extra areas you don’t need.
Take your time here. A clean and well-aligned neck joint plays a big role in making the ghost mannequin effect look professional and realistic.
Step 7: Create a Natural Shadow for the Neck Area
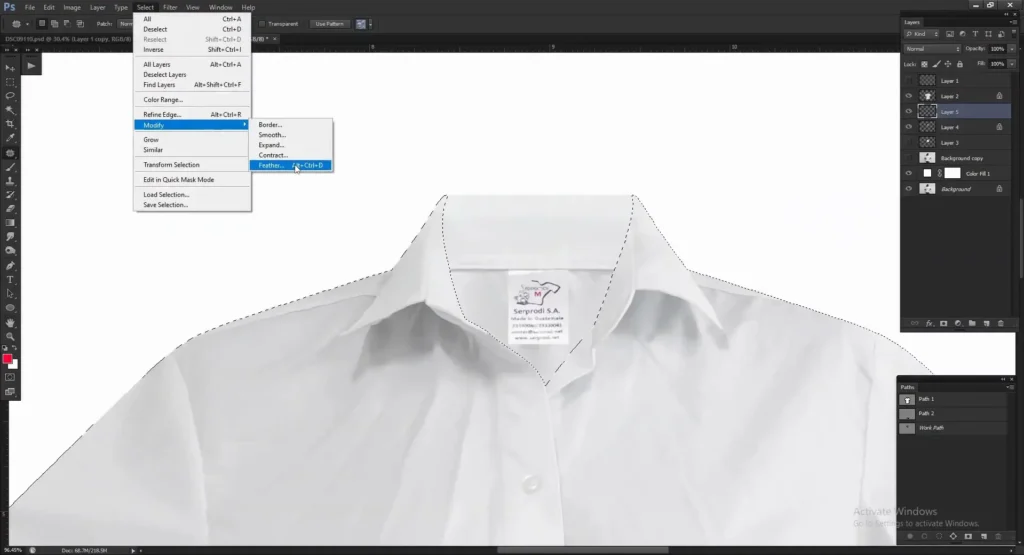
To make the neck area look realistic, you’ll need to add a soft shadow behind the main garment. For that, create a new layer above the neck layer and behind the garment’s layer and select it. Now, select that new layer, then press and hold Ctrl and click on the thumbnail of the main garments layer. This will create a selection around the garment.
Then, go to Select > Modify > Feather and apply a feather value between 30 and 40 pixels. You can adjust this depending on your image and how soft you want the shadow to look.
Now it’s time to fill the selection with color. Select Black as your foreground color. Then press Shift + Backspace (or Shift + Delete on Mac) to open the Fill dialog box. Choose Foreground Color and click OK.
To remove the extra parts, select the layer where you created the shadow. Then hold Ctrl (Windows) or Command (Mac) and click on the thumbnail of the neck layer. This will create a selection around the neck area.
Now, press Ctrl + Shift + I on Windows or Command + Shift + I on Mac to invert the selection. This selects everything outside the neck. Now press Delete on your keyboard to erase the extra shadow and keep only the shadow inside the neckline.
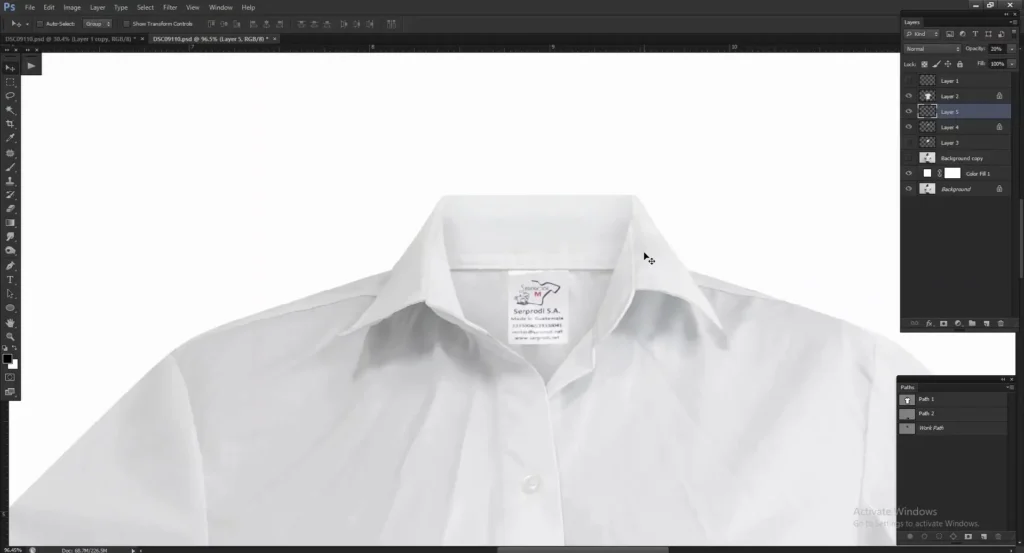
Now, adjust the opacity so it blends naturally with the garment. Select the shadow layer and slowly lower the opacity until it looks soft and realistic.
Step 8: Remove Wrinkles and Creases
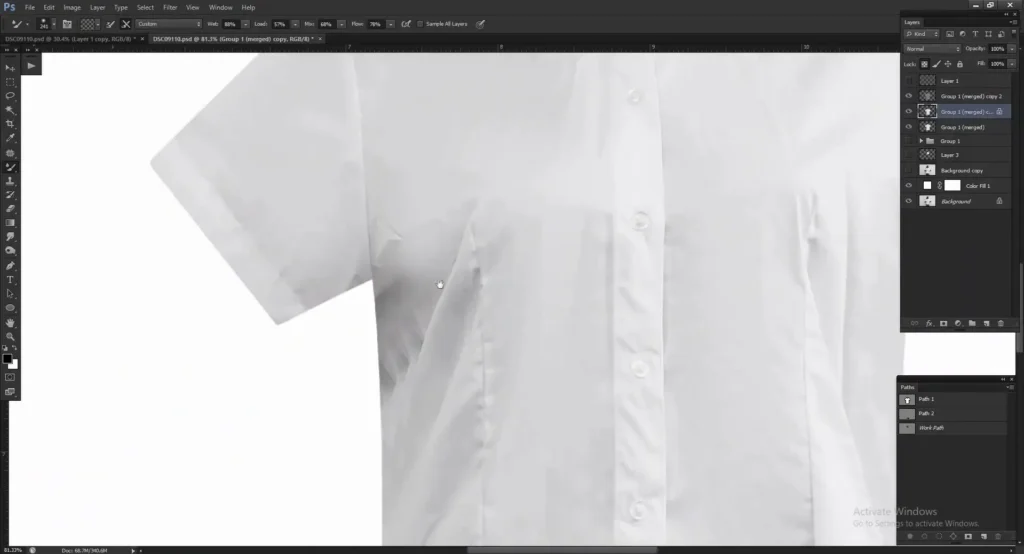
To remove the wrinkles and creases, we use Frequency Separation, which allows you to retouch texture and colour separately.
We won’t cover the full method here because it deserves its own detailed guide. But don’t worry! We’ll be publishing a dedicated blog soon where you can learn frequency separation and wrinkle remove step by step.
Watch How to Create Ghost Mannequin effect - Tutorial Video
If you want to see the invisible mannequin process in action, we already have a dedicated tutorial video on our YouTube channel. Feel free to watch it and follow along step by step. It will help you understand the technique clearly and create clean, professional ghost mannequin images with confidence.
Need Bulk Ghost Mannequin Service for Photographers, Studios, and E-commerce Brands?
Whether you have a few images or a large batch, we’re ready to help. Our team specializes in clean, professional ghost mannequin editing for photographers, studios, and e-commerce brands. We focus on natural shaping, accurate colors, and a polished look that helps your products stand out and sell more.
Send us your photos and we’ll handle the rest, so you can save time and stay focused on your business.
FAQs About Ghost Mannequin Effect
What is the ghost mannequin effect?
The ghost mannequin effect is a photo editing technique used to remove the model or mannequin from apparel product photos, giving the clothing a 3D hollow look.
Do I need advanced Photoshop skills for the ghost mannequin effect?
No. This tutorial is beginner-friendly. Even if you’re new to Photoshop, you can follow the steps to create a professional ghost mannequin effect.
What tools are required for creating the ghost mannequin effect?
You mainly need Adobe Photoshop, using tools like the Pen Tool, Liquify Tool, and basic layer masking techniques and frequency separation.
Can I outsource ghost mannequin effects for bulk images?
Yes, many professional photo editing companies provide bulk ghost mannequin services for photographers, studios, and e-commerce brands. We also offer reliable bulk ghost mannequin services designed for photographers, studios, and e-commerce brands.
Is there a video tutorial available for this process?
Yes. A step-by-step video tutorial is available on our YouTube channel to help you visually follow the process. Here is our channel: FixAnyPhoto