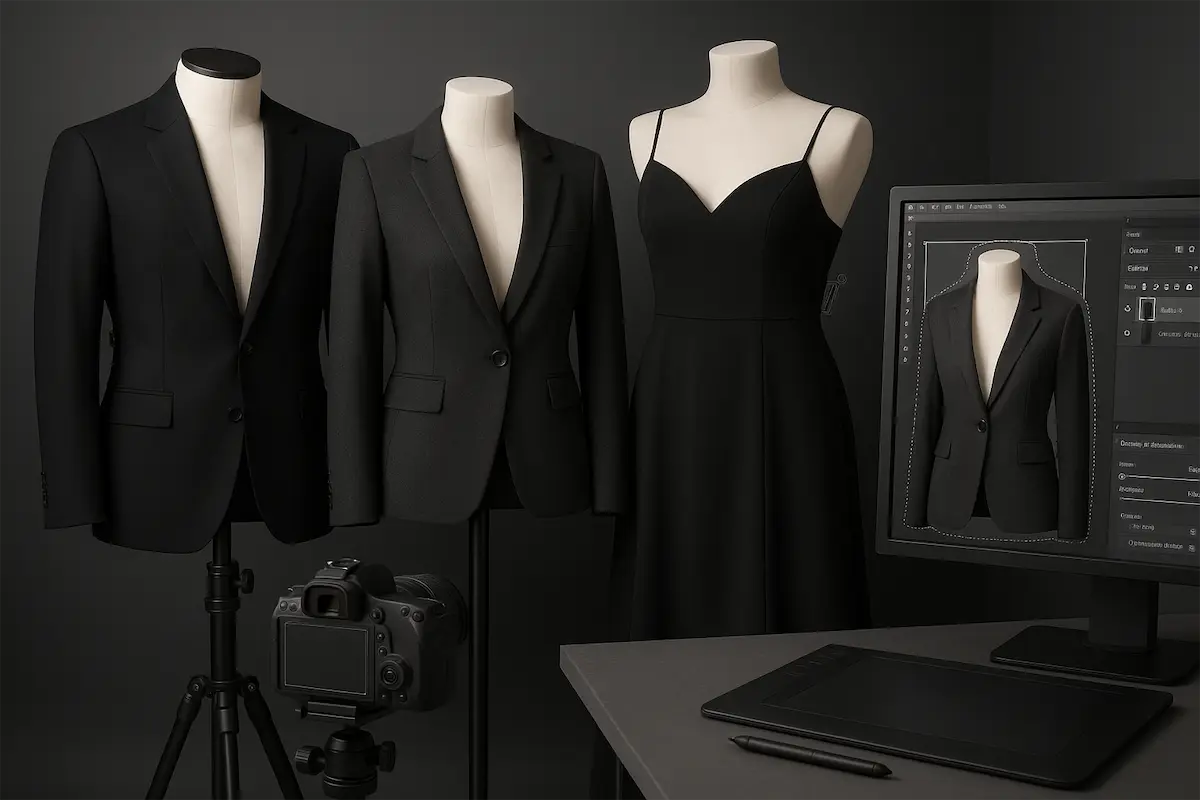
I love that ghost mannequin photography isn’t a one‑size‑fits‑all solution. While the basic technique stays the same, remove the mannequin to make garments float, the details change dramatically depending on the niche.
The first time I shot a lace bralette, my standard “steam it and pin it” procedure ended in tangled straps and a lot of frustration. Shooting a toddler’s dress the following week introduced a whole new set of challenges, mainly finding a mannequin small enough that didn’t look creepy.
Over the years I’ve learned that each niche demands its own tweaks in shooting, editing, and presentation.
Let’s explore how to adapt ghost mannequin techniques to sportswear, lingerie, kids’ clothing, formal wear and other niches.
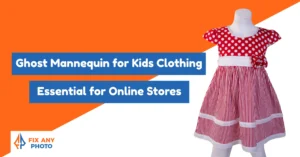
Sportswear & Activewear
The Challenge
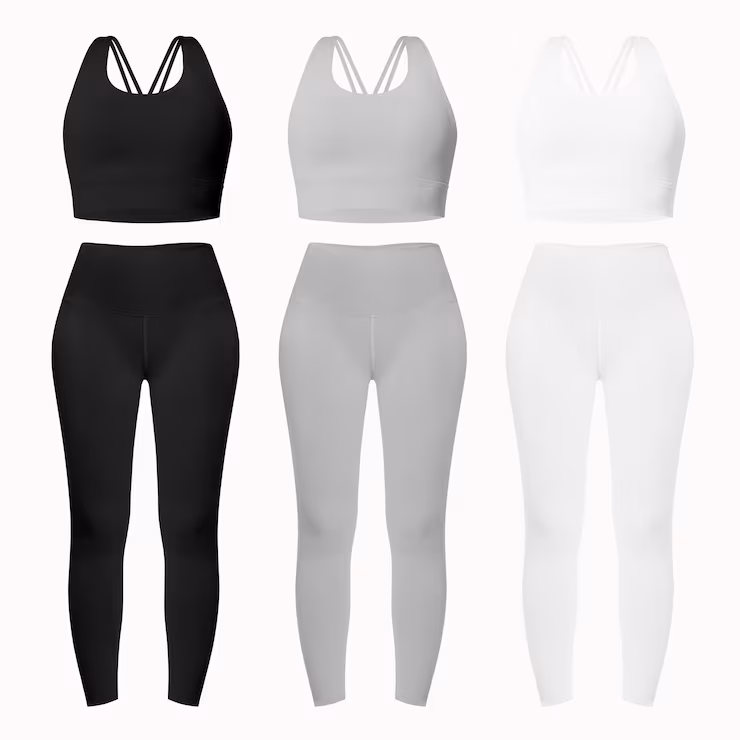
Sportswear needs to look dynamic and performance‑ready. Fabrics are stretchy, shiny, and often compression‑fit. Leggings, sports bras and jackets have design details like mesh inserts and reflective logos.
If you shoot them flat or poorly lit, they look limp and unflattering. Stretchy fabrics also reflect light differently than cotton or wool.
Shooting Tips
Use Smaller Mannequins or Padding: Athletic wear fits snugly. Choose a mannequin that’s slightly smaller than the garment so the fabric stretches naturally. Insert foam or padding to fill out hips, busts and calves without creating bulges.
Highlight Key Features: Sportswear often has performance features like zip pockets, thumb holes or mesh panels. Capture close‑ups of these details. For leggings, shoot the waistband, side pockets and any contouring seams.
Light Evenly: Shiny synthetic fabrics can blow out highlights easily. Use large softboxes and avoid direct reflections. When photographing reflective logos or piping, adjust lights so they catch a subtle gleam without overpowering the fabric.
Pose for Movement: Even though there’s no model, you can suggest movement by tilting the mannequin slightly or positioning sleeves as if arms are bent. This brings energy to the shot.
Editing Tips
Keep Colors True: Neon spandex can shift colors under mixed lighting. Set a custom white balance and check color values. Adjust Hue/Saturation if necessary to match the real product.
Maintain Texture & Stretch: Avoid over‑smoothing. Viewers should see the weave of the fabric and the slight tension from the stretch. Use selective sharpening on seams and logos.
Add Subtle Shadows: Athletic wear sometimes benefits from stronger shadow shaping to show muscle definition. Create a soft gradient shadow along the sides of leggings or sleeves to emphasize contours.
Lingerie & Swimwear
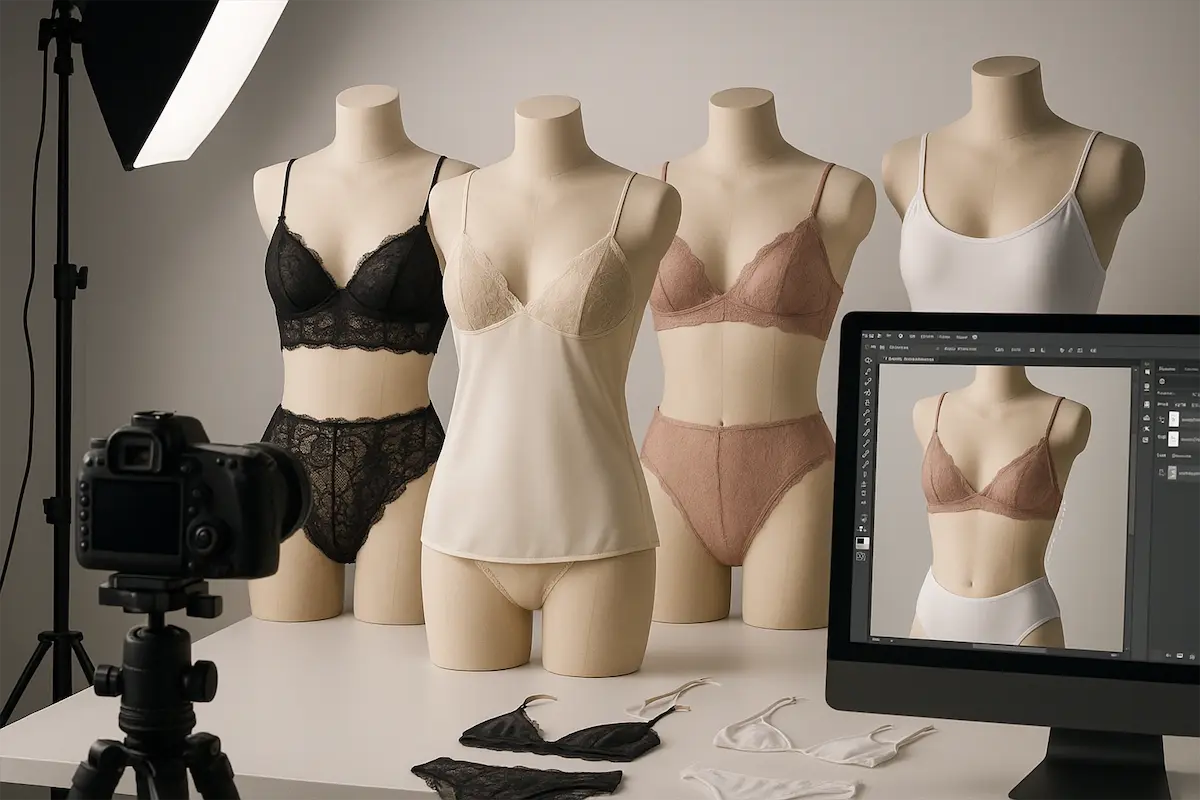
Lingerie and swimwear involve delicate fabrics, fine straps, lace, and sheer materials. The items are small and may include complex details like underwires, hooks, and embellishments.
Modesty is also a consideration; you want to showcase fit and style without being provocative or tacky. A competitor’s article on fabric challenges notes that editing sheer and lace requires careful masking and blendingdocs.google.com.
Shooting Tips
Use Transparent or Flesh‑Colored Inserts: For bras and bikinis, insert flesh‑colored or transparent forms to fill cups and give shape. This maintains modesty while showing fit.
Control Straps: Tape or pin straps in place to avoid tangling. Thin straps slide easily during setup, so double check before each shot.
Choose Backdrops Carefully: A plain white or light gray background works well. Busy backdrops distract from delicate details.
Diffuse Lighting: Lingerie fabrics, satins, silks, lace, are highly reflective Use diffusers and bounce cards to avoid glare. Side lighting can emphasize texture without flattening the garment.
Editing Tips
Precision Masking: Zoom in to 400% when masking lace edges or straps. Use the Pen tool or a combination of Select & Mask. Soft transitions are crucial; avoid harsh cutouts.
Blend Inside Shots: When compositing the inner layer (e.g., the inside of a bra cup), use layer masks and adjust opacity to create a believable transition. Avoid abrupt linesdocs.google.com.
Retouch Imperfections Gently: Remove stray threads and lint with the Spot Healing Brush. Smooth wrinkles while retaining the natural drape. Don’t overly smooth lace; viewers should see the intricate pattern.
Respect Modesty: Crop images tastefully. Avoid zooming in unnecessarily on intimate areas. Focus on fabric and design details.
Kids’ and Baby Clothing
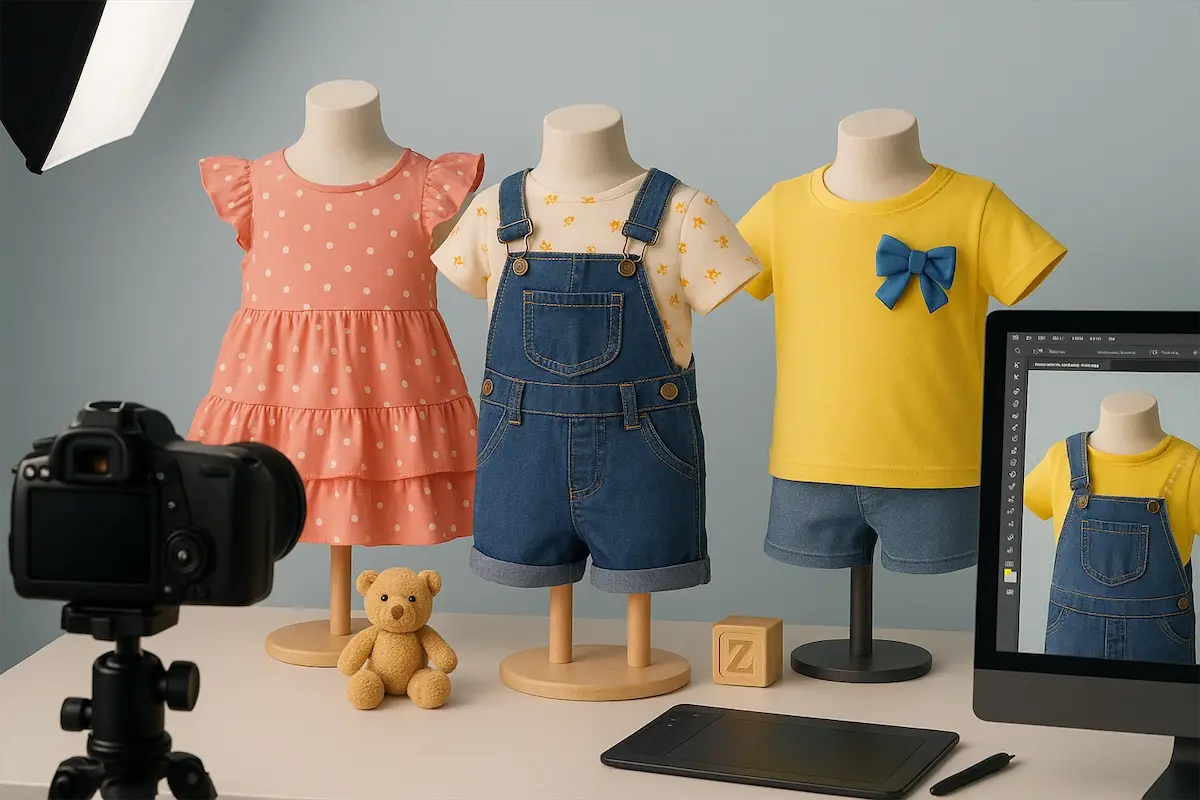
Children’s clothing is tiny, often brightly colored, and features playful designs like ruffles, bows and prints. Finding mannequins in toddler and baby sizes can be difficult.
Kids’ garments also have small necklines and sleeves, which complicates ghost mannequin compositing.
Shooting Tips
Use Smaller Mannequins & Forms: Invest in child‑sized dress forms or mannequins. If none are available, stuff garments with tissue paper and pin them to a foam board at the appropriate height.
Simplify Styling: Kids’ clothes often have many decorations. Avoid over‑pinning or stretching; let the garment hang naturally to preserve its charm.
Capture Playfulness: Arrange garments in fun poses, slightly off‑center, with sleeves raised or ruffles fluffed. Use props like toys or pastel backdrops sparingly to suggest context without becoming a flat lay.
Mind Proportions: Because children’s garments are small, position your camera closer and adjust your lens focal length to avoid distortion. A 50 mm–85 mm lens works well.
Editing Tips
Maintain Vibrancy: Kids’ clothing uses bright colors and patterns. When adjusting exposure, avoid flattening saturation. Use Vibrance over Saturation for more natural color boosts.
Careful Compositing: Tiny necklines and sleeves require precise masks. Use a graphics tablet if possible for better control.
Enhance Details: Sharpen prints and embroidery to make them stand out. Parents love to see fine stitching and playful motifs.
Formal Wear & Suits
Formal garments, suits, blazers, evening gowns, require precise tailoring. They’re structured and often made of heavier fabrics like wool, tweed or silk.
Lapels must lie flat, shoulder pads need padding, and pleats have to fall gracefully. In ghost mannequin photography, you must preserve the garment’s shape while making it look like it’s floating on its own.
Shooting Tips
Pad Shoulders & Sleeves: Insert foam or tissue into shoulders and sleeves to maintain structure. Use clips behind the garment to shape the waist without visible bunching.
Steam & Press: Crisp lines matter. Steam jackets, press pleats and iron hems thoroughly before shooting. Even the best editing can’t fix deeply creased lapels.
Shoot Multi‑Angles: Capture a front shot, back shot, and detail shots of lapels, buttons, pocket flaps, and any unique tailoring. For some suits, capture the inside lining for luxury appeal.
Use a Darker Backdrop: Dark suits may blend into white backgrounds. Choose a neutral gray or even a dark gray backdrop to maintain separation. Adjust your lighting ratio to avoid losing detail in black fabrics.
Editing Tips
Blend Seams Carefully: When compositing the inside collar or lining, align seams precisely. Use a soft‑edged mask and adjust the perspective to match the front shot. Refer to ghost mannequin editing guides that emphasize aligning and masking layers.
Retouch Fabric without Flattening: Use frequency separation to smooth wrinkles while preserving weave patterns. Heavy fabrics benefit from mid‑tone contrast adjustments to emphasize texture.
Add Structured Shadows: Create subtle drop shadows along the sides and under lapels to enhance the garment’s three‑dimensional shape. Use a gradient on a new layer set to Multiply, then lower opacity.
Niche Case Studies
Real-world examples show how ghost mannequin techniques adapt to different products. From yoga leggings to lace lingerie, children’s dresses, and bespoke suits, each niche comes with its own challenges, and creative solutions that boost sales and brand appeal.
Case 1: Yoga Apparel Brand
A small yoga apparel brand hired me to shoot their new leggings and sports bras. They wanted the garments to look alive, as if ready for a downward dog.
I used a mannequin slightly smaller than the garments and inserted foam at the calves and hips to create tension. I lit the scene with two large softboxes and a back light for separation. During editing, I preserved the stretch marks in the fabric and added subtle side shadows.
The images showcased the leggings’ contouring seams and high waist. The brand reported a noticeable increase in dwell time on product pages and an uptick in sales after swapping out flat lays for ghost mannequin photos.
Case 2: Boutique Lingerie Line
A boutique asked for classy images of their lace bralettes and high‑waisted panties. We used flesh‑colored padding to fill cups and pinned straps in place to avoid tangles.
The biggest challenge was masking the lace edges cleanly without losing the delicate scalloped pattern. I worked at 400% magnification, using the Pen tool and refining the mask edge by edge.
I then blended the inside cup shot gently using a layer mask. The final images looked elegant and tasteful, with the lace pattern perfectly defined.
The client said customers commented on how “expensive” the pieces looked and that return rates dropped after adding the new images.
Case 3: Children’s Boutique
For a children’s boutique, I shot a collection of ruffled dresses and embroidered rompers. We sourced mini mannequins and used tissue paper and foam to fill out sleeves and bodices.
The playful designs called for a bit of whimsy, so I angled some garments slightly and fluffed the ruffles. During editing, I paid special attention to keeping colors bright and cropping consistently.
The boutique owner later shared that parents found the images “adorable” and that sales of the featured outfits doubled.
Case 4: Custom Suit Maker
A bespoke suit maker commissioned ghost mannequin images to show off their tailored jackets and trousers. We steamed and pressed each suit, padded shoulders and inserted forms to mimic a broad chest. A dark gray backdrop helped define the rich blue and charcoal fabrics.
During editing, I carefully aligned the inner linings and buttonholes. I also added a subtle shadow under the jacket to ground it. The tailor used the images not only on their website but also in printed lookbooks.
They reported that clients appreciated being able to see the craftsmanship clearly and that bookings increased.
Tailoring Your Approach: Checklist by Niche
To summarize, here are quick checklists for each niche:
Sportswear
Smaller mannequin or padding to simulate stretch
Focus on performance details (mesh panels, pockets)
Soft, even lighting to avoid glare on synthetic fabrics
Preserve texture and stretch in editing
Lingerie & Swimwear
Use inserts for shape and modesty
Keep straps under control and backgrounds clean
Diffuse lighting and side lighting to capture shine and texture
Precision masking and blending for lacedocs.google.com
Kids’ Clothing
Source child‑sized mannequins or create forms
Emphasize natural hang and playful presentation
Adjust lens distance to avoid distortion
Boost vibrance and sharpen decorative details
Formal Wear & Suits
Pad and shape shoulders and sleeves
Steam and press garments thoroughly
Capture multiple angles, including lining
Use darker backdrops and structured shadows
Bonus: Accessories & Outerwear
Don’t forget that ghost mannequin techniques apply to accessories like scarves, gloves, and hats. For outerwear such as coats and jackets, use strong padding to fill the sleeves and body.
Highlight functional details like pockets, removable linings and hood shapes. Heavy fabrics like leather or denim benefit from side lighting to reveal texture.
Share Your Ghost Mannequin Secrets
Ghost mannequin photography isn’t just one trick, it’s a set of techniques you can adapt for each niche, from sportswear to formal wear. The goal is always the same: show fit, texture, and personality without distractions.
Your first attempts may not be flawless (I’ve had swimwear straps slip and toddler rompers sag), but every mistake teaches you how fabrics behave. The more you practice and refine your process, the smoother and more consistent your results will get.
Now I’d love to hear from you, what niche do you specialize in? Have you found clever hacks for tricky lingerie straps, reflective logos, or tiny baby collars? Share your ghost mannequin tips in the comments so we can keep learning and growing together.