In any photography place of work, merge photos is very important. You should try Canva if you’re a beginner because it’s easier than other tools. Merging photos in Canva is incredibly easy and accessible, whether you’re crafting a striking collage, a polished presentation, or engaging social media content. Canva’s intuitive tools allow users of any skill level to effortlessly blend images, making it simple to create visually stunning projects.
By bringing together separate photos, you can craft a cohesive visual story that transforms individual moments into a unified, compelling narrative. Canva’s tools make creating a personalized picture gift easy and quick, merging product images for an eye-catching catalog, or building a dynamic collage for social media. You can achieve outcomes of professional quality without being an expert in design.
Canva’s user-friendly design tools and huge resource library make it simple to combine photos and produce designs that look professional without requiring expert editing knowledge. Merging images can significantly enhance your work, whether you’re making a personal collage or designing marketing materials. In this tutorial, we’re going to lead you through the step-by-step process of merging photographs in Canva, so you can create the ideal design every time.
Step-by-Step Guide on How to Merge Photos in Canva
Step 1:
Go to Canva. Using Canva is very satisfying because it is effortless to use. So, start our merge photos tutorial by opening Canva
Step 2: Create a New Design
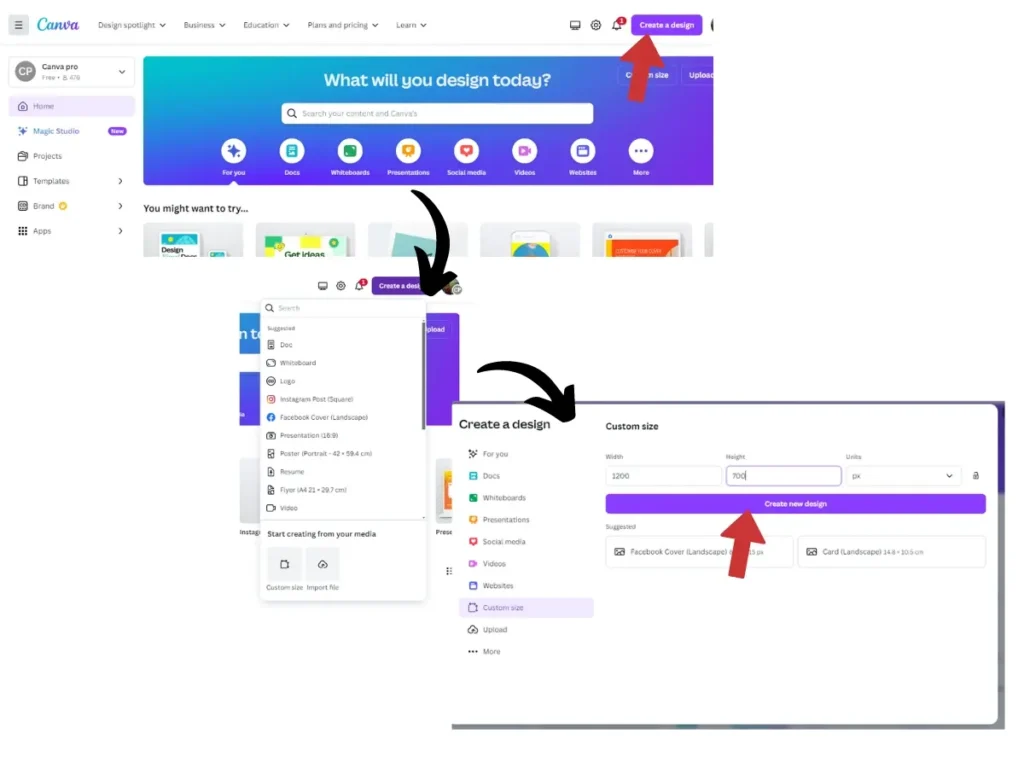
On the Canva dashboard, start by clicking the “Create a design” button located at the top-right corner. From there, choose a template that best fits your project. Alternatively, if you want complete creative control, select “Custom size” and input your desired width and height to design from a blank canvas.
Step 3: Upload Your Photos
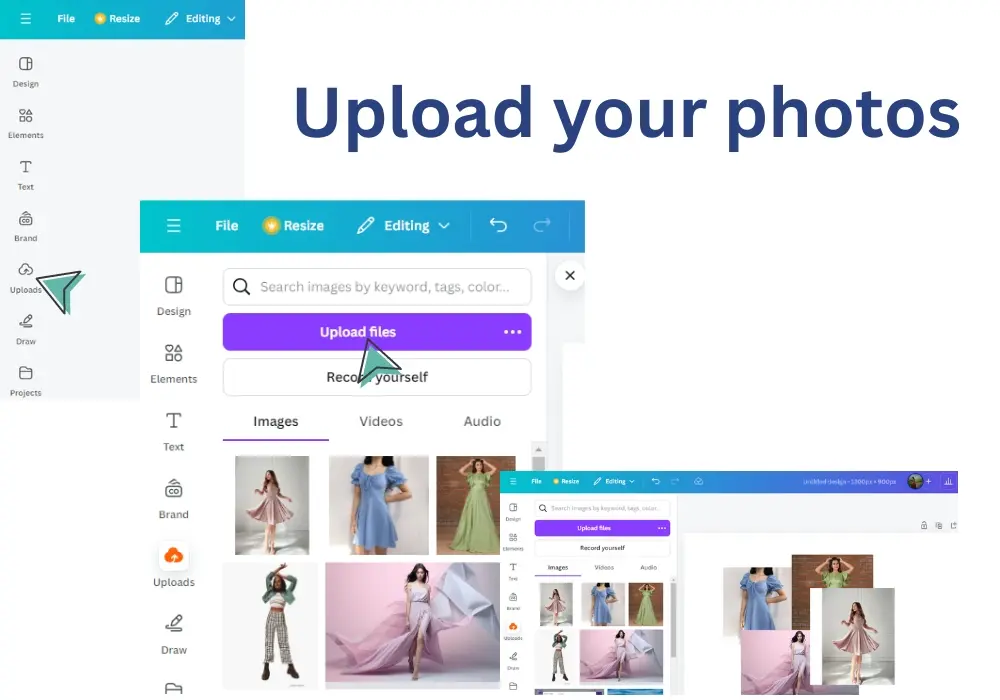
On the left sidebar, you can see ‘uploads’ click on “Uploads” and then “Upload Files” to import your photos from your device.
You can also drag and drop images directly into Canva or double-click on the photo
Step 4: Placing Your Photos on the Design
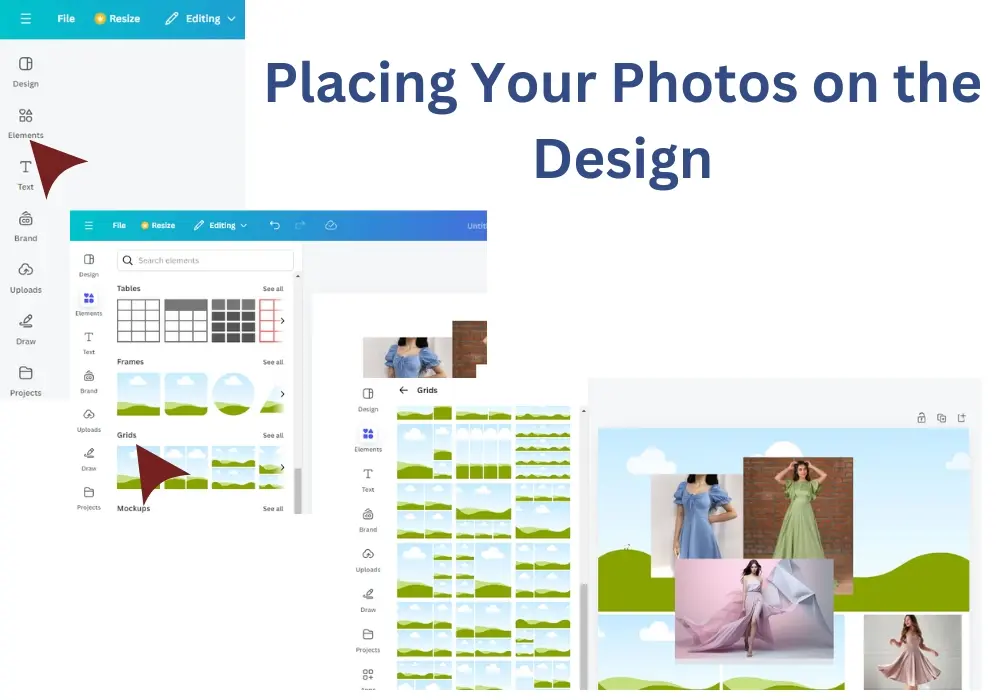
After uploading, drag your photos onto the canvas.
Use grids and frames from the “Elements” section for an easy layout that automatically aligns your photos.
If you want to place your photos manually, drag and drop them onto the canvas and position them as you like.
Step 5: Adjusting Photo Size and Position
Click on a photo to select it, and drag the corners to resize it proportionally.
Step 6:Enhance Your Photos (Optional)
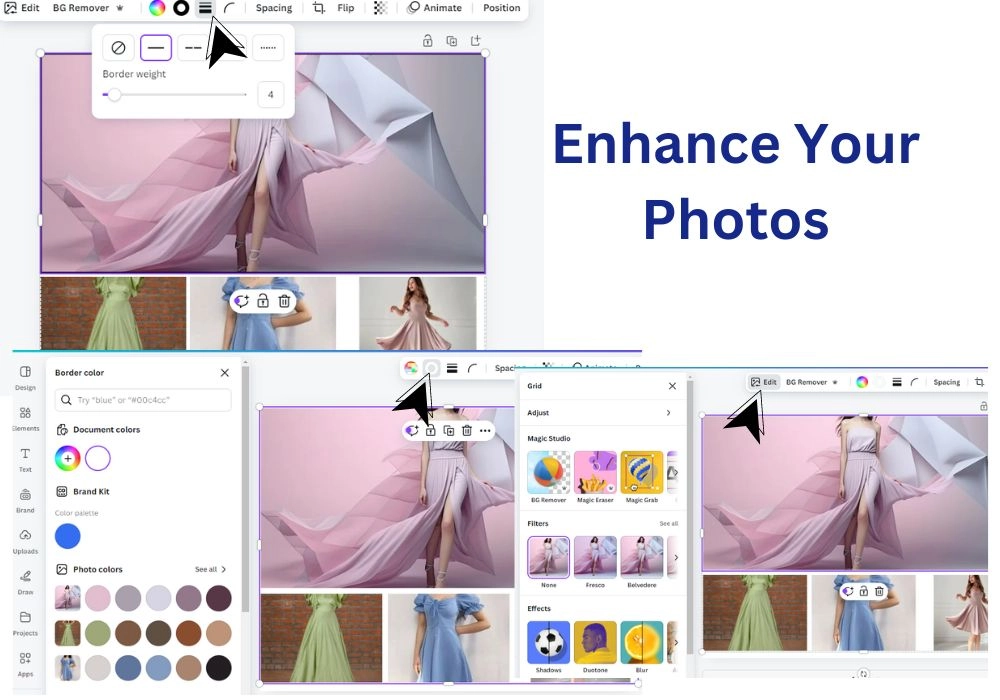
You can Use Canva’s editing tools to adjust brightness, contrast, saturation, and more.
Apply filters You can also add borders, and shadows to enhance the appearance of your merged photos.
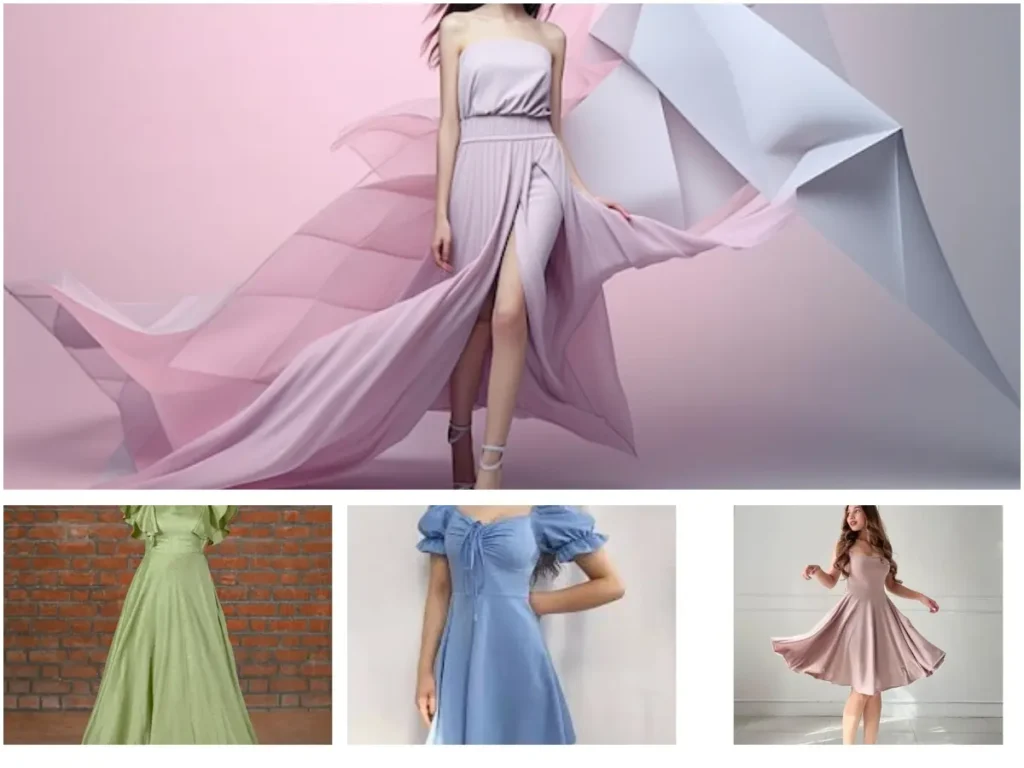
Step 7: Final Touches and Review
Once your photos are arranged and enhanced, take a final look at the design.
Check for alignment, balance, and any adjustments you want to make before exporting.
Conclusion
Using Canva to merge photos is not only simple but also a lot of fun! Canva makes the process easy and fun, whether you’re bringing together pictures for a presentation, making a collage for a special event, or simply experimenting with creative ideas. Making something that seems professional doesn’t require you to be a designer. For business, social media, or personal projects, merge photos in Canva is a simple and quick method to produce stunning graphics.
Canva’s adjustable templates and drag-and-drop interface make it simple for anyone, even without design knowledge, to combine pictures and create layouts that appear professional. You can easily blend photographs, change their size and placement, and even add your creative touches by following the easy instructions in this blog Canva offers every tool you need to realize your idea, whether you’re creating a collage, a presentation, or a social media post. Try it out and discover how simple it is to produce eye-catching images! For advanced guides and professional editing, you can use Photoshop guide.


