Aperture photography. It’s one of those terms used frequently in photography, as if it were some kind of big, scary secret. The reality is that learning aperture isn’t about learning numbers or becoming bogged down in technical terms. Whether you’re using a high-end DSLR or just your smartphone, the goal is to capture the wonder of light and focus in your images.
Consider it. Have you ever seen a portrait where the subject stands out because the surrounding dissolves into a buttery blur? Or a broad panorama in which every element is incredibly sharp, from the nearest rock to the most distant mountain? Aperture is at work there. What’s the best part? To utilize it like an expert, you don’t have to be one.
What We’ll Cover in This Guide:
- Understanding how aperture works in photography
- Decoding the meaning behind f-stop numbers
- Exploring how aperture influences depth of field
- Determining the best aperture settings for various scenarios
- The relationship between aperture and shutter speed
- The impact of lens size on aperture capabilities
- Understanding aperture diffraction and its effects on image sharpness
- Exploring aperture’s role in creating beautiful bokeh
- Step-by-step guide to adjusting aperture on a DSLR camera
Decoding the meaning behind f-stop numbers

Alright, let’s talk f-stops without putting you to sleep. I swear, whoever came up with these numbers was probably just trying to mess with our heads. I mean, f/1.8, f/4, f/16—what are these, secret codes? And the kicker: smaller number, bigger hole. Makes total sense… said no one ever.
Here’s the main idea, minus the math headache.
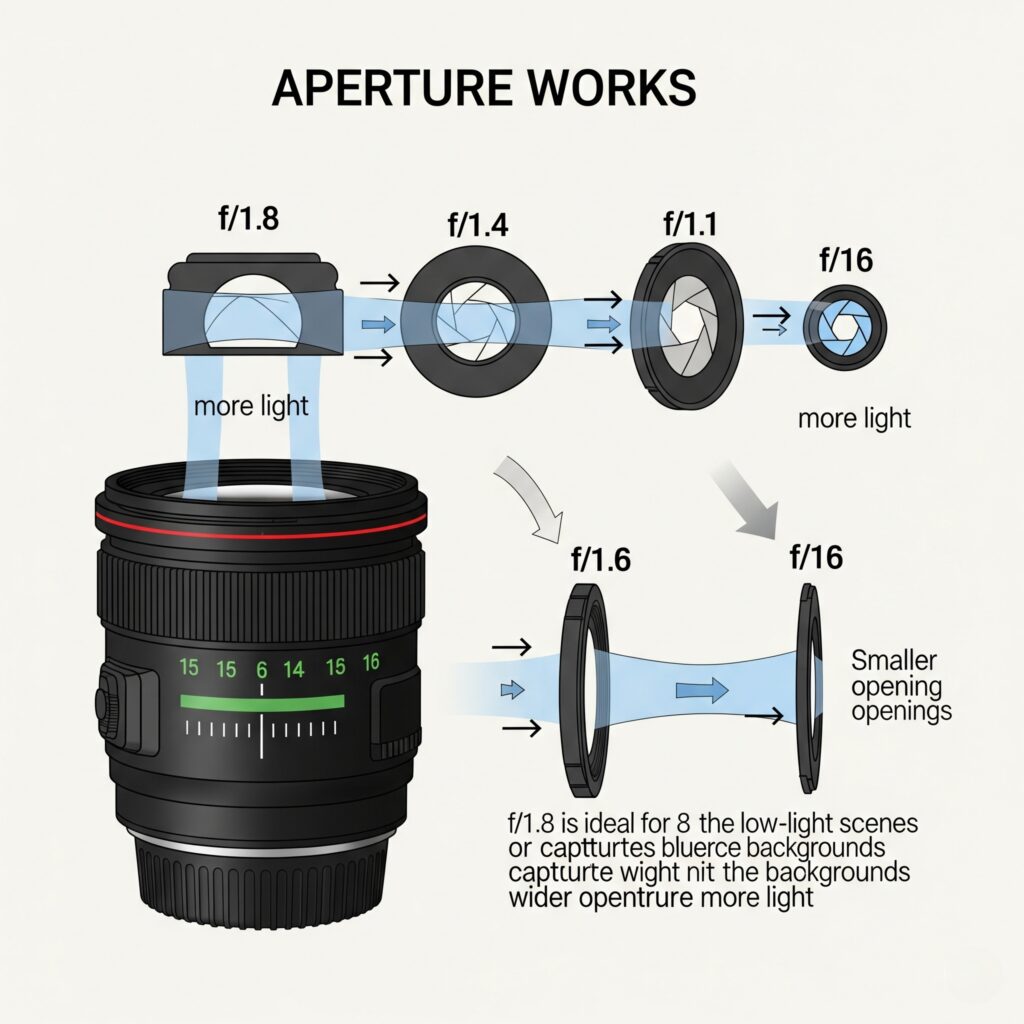
So, an f-stop (or f-number, if you want to be fancy) is just a way to talk about how wide your lens opens up. You’ll see it written like f/2.8, f/11, or whatever. That number? It’s basically telling you how much light your camera’s letting in.
Now for the plot twist: the smaller the f-number (like f/1.8), the wider the opening. Tons of light flood in. You want that creamy, blurry background? Shoot wide open. On the flip side, f/16 is a tiny little pinhole—barely any light, but hey, everything’s sharp from here to infinity.
Why so backwards? Well, it’s because the f-number’s actually a fraction—the focal length divided by the size of the opening. So f/2 means the opening is half the lens’s length. f/16? Way smaller. But honestly, unless you’re trying to impress a math teacher, who cares? Just remember:
f/1.4 – f/2.8: Super wide. Bright pics. Crazy blur in the background.
f/4 – f/8: Middle of the road. Good balance. Decent sharpness and light.
f/11 – f/22: Tiny opening. Darker image, but almost everything’s in focus. Landscape photographers live here.
So yeah, f-stops are weird, but you don’t have to memorize the math. Just play with the numbers till your photo looks right. That’s what most of us do anyway.
Aperture and Exposure: The Light Control Every Photographer Must Know

Wide-open window (f/1.8) = Flood of sunlight → Bright room, but you can only focus on one thing clearly (like a book in your hands), while the rest blurs into soft light.
Half-open blinds (f/5.6) = Balanced light → You can see your coffee mug and the view outside, both looking sharp. Tiny crack in the curtains (f/16) = Dim light → Now everything in the room is in focus, from your messy desk to the far wall—but it’s darker.
That’s aperture. It’s not about math—it’s about
✔ Light control
✔ Focus magic
Quick Cheat Sheet
Setting | Light | Focus Style | Best For |
Wide (f/1.4) | 🌟🌟🌟 | “Blur-tastic” | Portraits, moody shots |
Narrow (f/16) | 🌟 | “CSI Enhance!” | Landscapes, group photos |
Determining the Best Aperture Settings for Various Scenarios

Think about aperture as an ingredient to a recipe—change the amount, and you change the taste of the entire picture. Different situations demand different “doses” of light and focus control. Here’s your longer cheat sheet:
Portraits → f/1.8–f/2.8
Creates dreamy, unsharp backgrounds that move your subject center stage. Great for isolating faces from busy or distracting environments. Just be careful—at very wide apertures, even a slight miss with the focus will leave eyes soft.
Landscapes → f/8–f/16
You want it all in sharp detail—foreground rocks to background mountains. Pair this with a tripod if it’s low light, as small apertures are synonymous with slower shutter speeds.
Street Photography → f/4–f/5.6
It offers a good compromise here—subjects stand out, but there’s still enough background detail to tell the story of the scene. It’s also lenient if your focus isn’t quite spot-on in fast-paced scenes.
Low Light Indoors → f/1.4–f/2.8
Open your aperture to admit as much light as possible without turning the ISO too high. Great for dark cafes, parties, or cozy home shots.
Sports & Action → f/2.8–f/4
Wide enough to allow fast shutter speeds to freeze the action, but with enough depth of field to make sure that your subject stays sharp even if they move.
Macro Photography → f/8–f/16
In extreme close-ups, there isn’t much depth of field. Cut your aperture so more of the little subject will be in focus—even if you need to add additional light or flash.
Night Sky/Astrophotography → f/1.4–f/2.8
Large aperture to capture as much starlight as possible in a short exposure, minimizing star trails.
Group Photos → f/5.6–f/8
Keeps all in the row sharp, even if they are not all standing at the same distance from the camera.
The Relationship Between Aperture and Shutter Speed

Think of aperture and shutter speed as best friends who always support each other. Aperture controls how much light enters your camera, while shutter speed determines how long that light stays. When you adjust one, you need to change the other. If either one doesn’t change, your photo will turn out too bright or too dark.
The Quick Breakdown
Wide Aperture (f/1.8–f/2.8) = Big opening, tons of light.
Fast shutter speed (1/500+) → Freezes action (sports, pets, hyper kids).
Narrow Aperture (f/11–f/16) = Small opening, less light.
Slow shutter speed (1/30 or slower) → Sharp landscapes.
Why They’re Better Together
Low light? Open the aperture wide and speed up the shutter to avoid blur.
Need everything in focus? Close the aperture, slow the shutter, and brace yourself.
The Exposure Triangle Dance
Aperture, shutter speed, and ISO are all connected. Change one, and the others have to adjust:
Opened the aperture but want the same shutter speed? Lower the ISO.
Closed the aperture but still need speed? Crank the ISO—just expect some grain.
Cheat Sheet:
Action shots → Wide aperture + Fast shutter
Landscapes: Narrow aperture + Slow shutter (+ tripod!)
Low light → Wide aperture + Slower shutter
Mastering this balance? That’s where the magic happens.
The Impact of Lens Size on Aperture Capabilities

The maximum aperture setting of your lens determines your limit to how wide you can open it. Different lens models have maximum aperture capabilities which range between f/1.4 to f/2.8 and f/4 to f/5.6. The variation in lens specifications determines the way photographers approach their shooting methods.
A lens which features a broad maximum aperture allows more light to enter through its optical system. Photographers choose these lenses because they excel both at low-light photography and producing perfect background bokeh effects. The large aperture allows you to take faster shutter speeds thus minimizing motion blur risks.
The lenses included in most camera kits feature smaller apertures but they function adequately although they capture less light. Low-light photography becomes more challenging when using certain lenses because you need to either raise your ISO or decrease your shutter speed.
Lenses with bigger openings tend to be heavier and more costly than smaller lenses. Professional photographers spend their money on at least one “fast” lens with a big aperture because it provides them with superior lighting flexibility and creative possibilities.
Understanding Aperture Diffraction and Its Effects on Image Sharpness

You may believe that closing down your aperture all the way to f/22 will always make the photo sharper because more of the scene is in focus. And yes, it does increase the depth of field, but with one drawback: diffraction.
Diffraction occurs when light has to squeeze through a tiny aperture opening. Bending and scattering slightly as they pass through, the waves now soften some fine details in the photograph, thereby making it appear less sharp despite technically having everything in focus.
Well, guess what? Most lenses do have a sweet spot somewhere around f/5.6-f/11, where you are getting optimum sharpness and negligible diffraction. Wider than that, and depth of field gets very shallow; smaller than that, and sharpness will begin to decrease.
So if you want extremely sharp images, don’t stop down all the way if there is no relevant reason to do so for the extra depth of field. On some occasions, simply stopping a little bit before the smallest setting can change everything.
Exploring Aperture’s Role in Creating Beautiful Bokeh

Bokeh is that soft creaminess in blur which you see in the background in some photos-the very blur that causes a subject to stand out as if choosing its own little spotlight. While the lens design certainly contributes, aperture is usually the main factor.
A wide aperture with a small f-number is used for shallow depth of field (f/1.8 or f/2.8). This means the subject is watered down into sharp focus while the backdrop just melts into smooth-shaped blur; those out-of-focus circles of light one sometimes can see-well, they are bokeh.
The bokeh quality also depends upon the aperture blades in your lens. Lenses with more rounded blades tend to generate a softer, more pleasing blur. In contrast, lenses with fewer blades or angular blades tend to produce a more unpleasant-looking bokeh.
If you want a nice dreamy background, then put that aperture wide open, get close to the subject, and keep your background away. The wider the aperture, the creamier the bokeh.
Step-by-Step Guide to Adjusting Aperture on a DSLR Camera

Though changing your aperture sounds technical, it is quite easy when you know where to look.Here’s how:
Turn on your camera and change to Aperture Priority (A or Av) mode if you want the camera to regulate shutter speed or to Manual (M) mode if you desire total control.
Look for the control dial—usually near the shutter button or on the back of the camera.
Turn the dial to modify your fnumber.
Lower numbers (f/2.8, f/1.8) imply a larger aperture, more light, and a blurred background.
Higher values—f/11, f/16—smaller aperture, less light, more of the picture in focus.
Most DSLRs show the present aperture value on the screen or in the viewfinder; thus, you should examine your display.
Review your test shot.Change your depth of field or brightness or darkness if you so desire.
Changing aperture turns into second nature once you have done it a few times—just like turning volume on your phone.
Conclusion
Aperture is among the most effective creative instruments at your disposal, not only a technical camera word.It determines how much light your camera perceives, how much of your scene is in focus, and whether your background is silky smooth or crystal clear.
Aperture starts to seem like a creative dial you can turn to shape your photo precisely as you want once you grasp it and stops feeling like a figure on a screen.Open it broad for exquisite, fantasy-like paintings.For environments where every detail jumps, close it.
Experimentation is the secret.Change your aperture, grab some photos, and check the results.It will grow into second nature over time—just another tool in your photographer’s bag to enable you to convey precisely the way you see your narrative.


