You know that moment, you nail the lighting, the angles, the vibe… then zoom in and spot a wrinkle ruining it all?
Yeah, been there.
When I started shooting apparel, wrinkles were my worst enemy. I’d steam, smooth, and stretch, yet one stubborn crease always photobombed the shot. Nothing kills a clean, professional look faster.
I used to spend hours in Photoshop fixing fabric until I found AI photo editors. Total game changer. What once took an afternoon now takes seconds, cleaner, sharper, and more natural than ever.
In this guide, I’ll show you how AI tools smooth out wrinkles and polish your photos to perfection, so your shots look crisp, professional, and ready to sell.
AI Tools for Removing Wrinkles from Product Photos

Let’s get real, AI photo editors have come a long way. Whether you’re working on your laptop or editing on the go, these tools can smooth out fabric wrinkles faster than you can say “steam iron.”
Here are my favorite ones that actually deliver clean, natural-looking results.
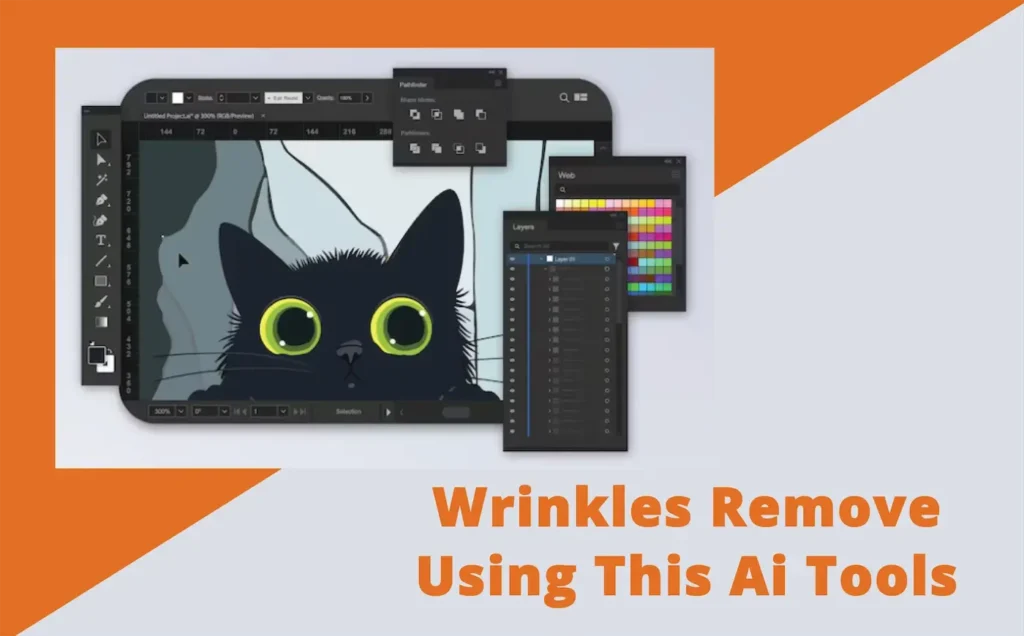
1. Adobe Photoshop (Generative AI & Neural Filters)
If you want full control and studio-quality results, Photoshop still reigns supreme, especially with its new Generative AI tools.
How to use it:
-
Open your photo in Photoshop.
-
Select the Remove Tool or Generative Fill and brush over the wrinkled area.
-
Let AI fill in the smooth texture automatically.
-
Fine-tune using Skin Smoothing under Neural Filters for softer fabric tones.
Pros: Total precision, professional-grade finish, excellent for high-end shoots.
Cons: Steeper learning curve, and yes, Adobe’s subscription isn’t cheap.
2. Luminar Neo (AI-Powered Texture & Detail Control)
Luminar Neo is my personal favorite for quick, realistic edits. Its EnhanceAI and AI Structure tools automatically detect and soften wrinkles, no complex selections needed.
Quick tutorial:
-
Import your photo into Luminar Neo.
-
Go to EnhanceAI slide up AccentAI and StructureAI until wrinkles soften but texture remains.
-
Fine-tune with Erase Tool for stubborn creases.
Pros: Fast, beginner-friendly, and perfect for batch edits in e-commerce photography.
Cons: Not as advanced for pixel-level retouching as Photoshop.
3. Fotor & Pixlr AI
If you just want something simple and browser-based, Fotor and Pixlr AI are your go-to tools. You don’t need any editing experience or fancy software; just upload, click, and let the AI do its thing.
How it works:
-
Upload your image directly to Fotor or Pixlr.
-
Use the AI Retouch or Smooth Fabric tool.
-
Adjust intensity to keep the texture natural.
Pros: Free, quick, and works right in your browser.
Cons: Limited control—great for casual edits, but not high-end detail work.
4. RetouchMe & Cleanup.Pictures
If you’re editing on your phone or need a one-click fix, RetouchMe and Cleanup.Pictures are lifesavers. These apps automatically detect fabric wrinkles and blend them out instantly, ideal for quick touch-ups before uploading product shots.
How to use:
-
Upload your image.
-
Select the Wrinkle Removal or Cleanup option.
-
Watch the AI smooth your fabric in one click.
Pros: Instant results, mobile-friendly, zero editing skill required.
Cons: Limited customization—best for minor wrinkles, not complex textures.
Step-by-Step: Using AI to Remove Wrinkles Like a Pro

Ever tried to photograph a perfectly folded shirt, only to realize the camera picked up every single wrinkle? Yep, we’ve all been there. When I started editing apparel photos for e-commerce clients, I used to spend hours cloning, healing, and patching.
Now? AI wrinkle removal tools have completely changed the game, they’re faster, smarter, and surprisingly realistic if you know how to guide them.
Step 1: Upload Your Product Image (Lighting Is Everything)
Before you even open an editor, make sure your base photo is solid.
AI can do wonders, but if the lighting is patchy or too harsh, it can misread shadows as wrinkles.
Pro setup tips:
-
Use soft, even lighting from both sides — this minimizes deep shadows that confuse AI tools.
-
Avoid yellow-tinted lights; aim for neutral white tones.
-
If possible, shoot against a plain background (gray or white works best).
Step 2: Choose Your AI Tool
There are plenty of ways to smooth wrinkles without overdoing it. Here are a few reliable options:
-
Photoshop (Generative Fill + Neural Filters): Best for full control and natural results.
-
Luminar Neo: Great for quick, automatic wrinkle smoothing.
-
Online editors (Fotor, Pixlr, etc.): Ideal for beginners or quick edits without software installs.
My pick: Photoshop’s Generative Fill is unbeatable when you want to remove wrinkles while keeping texture. It intelligently analyzes fabric folds, tones, and lighting to recreate a natural look instead of a “blurred patch.”
Step 3: Select the Wrinkled Area
Once your image is loaded:
-
Use a soft brush or Lasso tool to outline the wrinkled zone.
-
Stay close to fabric edges, but don’t include clean areas — this helps AI blend better.
-
Zoom in! AI can miss micro-folds if your selection’s too rough.
Quick tip: If your tool offers auto-selection or AI detection, test it first. Some software can recognize “fabric texture” regions automatically.
Step 4: Apply the AI Smoothing or Generative Tool
Now for the magic part. Run your AI wrinkle remover, and watch the creases fade while the texture stays intact. In Photoshop, this can be done via:
-
Filter → Neural Filters → Skin Smoothing (for fabric too!)
-
Or simply select the area → Right-click → Generative Fill → Prompt: “Smooth fabric, keep texture”
In Luminar, choose Structure AI or Enhance AI, then lower the “Details” slider to smooth out surfaces naturally.
Step 5: Fine-Tune for Realism
Here’s where many people stop — and where the “AI look” gives them away.
Don’t skip this step!
-
Add back natural folds: Use a low-opacity Burn tool to reintroduce soft shadows along edges.
-
Fix color mismatches: Wrinkle removal sometimes lightens fabrics, so adjust with Curves or Hue/Saturation to bring back even tones.
-
Enhance texture: Duplicate your original layer, set blend mode to Overlay, and reduce opacity to 10–15%. It adds back micro-texture lost in smoothing.
Step 6: Export in High Definition
When your image looks natural and clean, it’s time to export.
-
Use PNG or TIFF for web and catalog uploads. These formats preserve clarity and avoid compression artifacts.
-
Keep a PSD copy with layers if you ever need to adjust later.
-
For web display, aim for at least 2000px width and 300 DPI resolution — sharp enough for zoom views on e-commerce sites.
Common Mistakes When Using AI Wrinkle Removal Tools
AI can make your edits look too perfect, and that’s not a good thing. Here are the traps to avoid:
-
Over-smoothing — Makes fabric look like plastic. Keep some texture alive!
-
Ignoring lighting differences — AI can flatten contrast; always check highlights and shadows afterward.
-
Color inconsistency — Wrinkle removal may slightly shift tones; fix with selective color correction.
-
Over-reliance on AI — Combine AI speed with human touch-ups for best results.
When to Use Manual Editing Instead of AI

Let’s be honest, AI tools are great, but they’re not magic. There are times when no matter how advanced your wrinkle remover is, it just doesn’t “get” the fabric.
That’s when old-school manual retouching steps in.
1. Complex Fabrics Deserve Human Touch
Some materials have textures that confuse AI:
-
Leather: Too shiny, too detailed. AI often blurs the natural creases that define its look.
-
Silk or Satin: These fabrics rely on light reflection for their beauty. AI can easily turn that into a dull patch.
-
Mesh or Lace: The delicate transparency gets lost, making it look like a flat, opaque surface.
When working on product photos with these materials, I switch to Photoshop’s Clone Stamp or Healing Brush to fix specific spots while keeping highlights crisp. It’s slower, but the realism is worth every minute.
2. When AI Over-Blends Highlights or Shadows
AI tends to average out tones, great for quick cleanup, bad for depth.
If your product starts looking “flat” after AI smoothing:
-
Use Dodge & Burn to restore dimension.
-
Paint gentle light gradients to bring back fabric volume.
-
Adjust Curves locally to maintain realistic contrast.
3. The Best Approach: AI + Manual Retouching
In most professional workflows (including mine), AI isn’t a replacement, it’s a foundation.
Here’s how I blend both worlds:
-
AI Wrinkle Removal: Removes 70–80% of creases quickly.
-
Manual Photoshop Retouching: Restores texture, contrast, and micro-details.
-
Final Polish: Add shadow depth and tone correction to make the image pop.
It’s like cooking, AI preps the ingredients, but your hand decides the final flavor. Here is your in-depth detailed guide for the Wrinkle Removal in using photoshop
Why AI Wrinkle Removal Is a Must-Have for E-Commerce Businesses

When you’re managing hundreds or even thousands of product photos, every minute counts. AI wrinkle removal isn’t just about aesthetics; it’s a productivity powerhouse for modern online stores.
1. It Saves Hours of Editing Time
I’ve handled projects where we had to clean up entire clothing catalogs 500+ SKUs. Doing it manually would take weeks.
With AI tools like Luminar Neo or Photoshop’s Generative Fill, we cut that down to a few hours.
Batch editing becomes a breeze simply upload, apply, and fine-tune only what’s necessary.
2. Ensures Consistency Across Your Store
If you’ve ever browsed an online store and noticed one shirt looks perfectly pressed while another looks slept in — you know how distracting inconsistency can be.
AI wrinkle removal tools ensure uniform presentation:
-
All garments look professionally styled.
-
Lighting and smoothness remain balanced across the entire catalog.
-
Shoppers focus on design, not fabric imperfections.
3. Reduces Outsourcing Costs
Many brands spend a fortune outsourcing to retouching studios for simple fixes.
AI cuts down that expense by automating the first editing pass. Your in-house team can handle the rest, saving both time and money without compromising quality.
4. Industries That Benefit Most
AI wrinkle removal is a secret weapon across visual industries:
-
Apparel & Fashion: From T-shirts to gowns, polished fabric sells more.
-
Bedding & Home Textiles: Clean linens and wrinkle-free duvets create instant appeal.
-
Accessories: Think scarves, hats, or bags that need a smooth, crisp look.
-
E-commerce Photography Studios: Faster turnaround = happier clients.
The result? Sharper catalogs, higher conversions, and fewer sleepless nights over editing deadlines.
My Personal Workflow for Wrinkle-Free Product Photos
I’ll be real, no AI tool can replace good prep. Editing starts long before the first click of the shutter. Here’s how I handle it step-by-step.
1. Prepping Fabrics Before Shooting
Before I even touch Photoshop, I make sure the products are camera-ready:
-
Steam or iron every fabric to minimize wrinkles from the start.
-
Lay or hang garments naturally, avoid pulling or pinning that distorts fabric.
-
Check lighting: soft, diffused light brings out true texture and avoids harsh shadows that look like creases.
-
For shiny materials (like satin or nylon), I position lights at a 45° angle to reduce glare.
Think of this as “editing prevention.” The less you need to fix later, the more natural the final result.
2. My Go-To AI Tools for Speed and Precision
I often combine tools depending on project size and quality needs:
-
Luminar Neo’s Structure AI: Perfect for batch editing large collections. It smooths wrinkles but keeps texture.
-
Photoshop Generative Fill: My go-to for detailed correction — especially near seams or logos.
-
Retouch4Me Fabric or Skin Smoothing Plug-ins: Ideal when I need subtle texture work on delicate fabrics.
3. Real-Life Example from My Workflow
For a recent Shopify project, a fashion brand sent me over 200 T-shirt images that needed cleanup for their online catalog.
Instead of manually retouching every fold:
-
I imported all images into Luminar Neo.
-
Applied AI Structure smoothing in batch mode.
-
Exported and opened only 20–30 images in Photoshop for light corrections (color and shadows).
The shirts looked fresh, realistic, and brand-ready, and the client loved how consistent their store grid appeared.
4. My Post-Edit Quality Checklist
Before delivering any final batch, I always:
-
Zoom in to 100% and check fabric texture consistency.
-
Compare before/after side by side for lighting shifts.
-
Verify color accuracy with brand swatches.
-
Save final files in PNG or TIFF, ensuring high clarity for zoomed-in views on product pages.
Improve Product Photos After Wrinkle Removal
Once the wrinkles are gone, the job isn’t over, not if you want your product photos to truly shine online. Think of wrinkle removal as step one of your visual polish.
If you’re new to editing, you can check out my guide on AI wrinkle removal techniques — it walks you through the process of removing fabric wrinkles cleanly before moving on to enhancement steps.
The next steps are all about enhancing color, contrast, and lighting so your images look sharp, natural, and ready for upload.
1. Use AI for Smart Color Correction
Wrinkle removal can sometimes shift fabric tones slightly. Maybe that navy blue shirt now looks a bit faded, or that pastel pink turned warmer.
This is where AI-powered color correction tools come in handy.
-
Photoshop’s Camera Raw Filter or Luminar’s Enhance AI can detect and balance tones automatically.
-
Adjust white balance to make sure your colors match the real product.
-
If you’re editing a full collection, use batch color correction for consistent results across every SKU.
2. Enhance Shadows and Depth
After wrinkle removal, fabrics can appear “too flat.” Adding subtle shadows brings back realism and texture.
Here’s how I handle it:
-
Use Photoshop’s Burn tool (low opacity, 5–10%) along seams, collars, or folds to mimic natural shading.
-
In Luminar Neo, use Structure AI or Supercontrast to reintroduce depth where needed.
-
Check your image at both 100% and 50% zoom, shadows should enhance, not overpower.
Remember, shadows = depth, and depth = realism. Without them, even a perfect photo feels lifeless.
3. Clean Up the Background
AI wrinkle removal takes care of the fabric, but a messy background can still ruin the shot.
Use AI to tidy things up without cropping out important details:
-
Remove dust or stray threads using the Healing or Clone tools.
-
Try AI Background Cleanup in Photoshop or tools like Remove.bg for quick background refinement.
-
For e-commerce platforms (like Amazon or Shopify), stick to white or transparent backgrounds, it keeps the focus on your product.
If you’re working with lifestyle photos, soften the background slightly using a Gaussian Blur to highlight the subject without distractions.
4. Maintain Image Clarity and Natural Lighting
AI edits can sometimes oversoften details or mess with exposure.
Before exporting:
-
Recheck sharpness — use “Unsharp Mask” or “Clarity” adjustments for a crisp finish.
-
Keep lighting natural. Don’t crank up brightness; instead, use Curves for controlled contrast.
-
Always view your image on both desktop and mobile screens, lighting may look different across devices.
5. Optional: Add Watermark or Resize for Platforms
Before uploading, consider the practical touches that make your work protected and platform-ready:
-
Add a small watermark or logo in a corner, subtle enough to protect, not distract.
-
Resize images according to platform requirements:
-
Amazon: 2000 x 2000 px (zoom-enabled)
-
Shopify: 2048 x 2048 px
-
Etsy: 2000 px width minimum
-
-
Save in PNG for clarity or JPEG (85–90% quality) for faster loading times.
Conclusion
In today’s fast-paced e-commerce world, shoppers decide in seconds, and your product photos are the deal-makers (or breakers).
Using AI wrinkle removal tools helps you deliver images that are clean, consistent, and irresistibly professional without spending endless hours editing.
Let’s recap the key benefits:
-
Faster workflow: Smooth hundreds of images in minutes.
-
Professional look: Keep fabrics realistic while removing distractions.
-
Brand consistency: Every product photo feels part of one cohesive catalog.
I’ve seen firsthand how a wrinkle-free catalog can completely transform an online store’s presentation, it instantly elevates trust, makes your brand feel premium, and gives customers confidence in what they’re buying.