Think of 3D ghost mannequin editing as giving your clothes a superpower: they appear to float naturally in space, showing off their shape and fit, without the distractions of a mannequin or model.
Here’s how it works in simple terms:
-
A photo of a shirt (or dress, jacket, jeans, you name it) is taken on a mannequin or model.
-
Another photo captures the inside details (like the collar or lining).
-
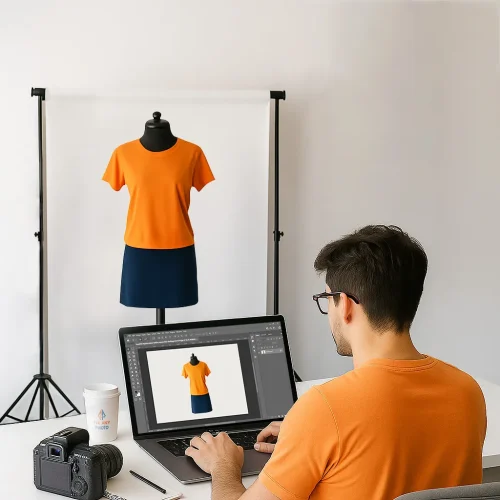
Using editing software (hello Photoshop!), the mannequin is removed, and the inside parts are seamlessly merged.
-
The end result? A professional, 3D-looking garment that feels like it’s hovering in mid-air.
2D vs. 3D ghost mannequin editing
-
2D ghost mannequin creates a flat, cutout look. It’s okay for basics but doesn’t always feel realistic.
-
3D ghost mannequin adds depth and dimension. Customers can clearly see how the garment would wrap around their body, making it more lifelike and appealing.
Why is it called “ghost”? Because the mannequin disappears completely, leaving behind a garment that looks like it’s being worn by an invisible model. Spooky? Maybe. Effective? Absolutely.
The Process of Creating 3D Ghost Mannequin Images

Here’s where the magic happens. If Part 1 was about why ghost mannequin editing is a must for e-commerce, Part 2 is about the how. And trust me, this process feels like doing a little photo surgery, with way more satisfying results.
I’ll break it down step by step, using examples from my own editing workflow.
Step 1 – Capturing the Right Photos
Editing starts way before Photoshop ever opens. If the photos aren’t shot correctly, no amount of retouching can save them.
Here’s the golden formula I follow:
-
Shoot garments on a mannequin (or a model if you don’t have one).
-
Take shots from the front, back, and inside details (collar, sleeves, or labels).
-
Always use a white background, it keeps things distraction-free and makes editing 10x easier.
-
Keep lighting consistent and soft to avoid harsh shadows.
-
Place the camera at chest height for tops, hip level for pants, so proportions don’t get distorted.
Example: When I photographed a blazer for a client’s Amazon store, I had to grab an extra shot of the inside collar. Without it, the final image would have looked incomplete once the mannequin was removed.
Step 2 – Removing the Mannequin or Model
This is the “ghosting” part. In Photoshop, I use tools like the Pen Tool, Layer Masks, and Background Removal to carefully erase the mannequin. The trick here is precision, cut too much, and you’ll ruin the garment’s natural shape; cut too little, and traces of the mannequin remain.
Example: Editing a jacket is always tricky. If I remove too aggressively around the shoulders, the jacket looks flat and lifeless. Keeping the natural slope of the shoulders is what makes it believable.
Step 3 – Adding Missing Parts
Once the mannequin is gone, you’ll notice gaps, like missing collars, sleeve interiors, or necklines. That’s where those extra detail shots come in handy.
-
I overlay the photo of the collar or sleeve interior.
-
Then I align it perfectly with the garment layer.
-
A bit of fine-tuning ensures it blends seamlessly, as if the garment is naturally filled out.
Example: For a polo shirt project, I had to add the inside collar with the label. Without it, the neckline would’ve looked like a hollow cave. With it, the shirt instantly looked realistic and shop-ready.
Step 4 – Refining with Retouching
Here’s where the polishing happens:
-
Liquify tool to fix minor distortions (like uneven fabric).
-
Color correction to balance tones and ensure colors are accurate.
-
Shadowing to add depth, because floating shirts with zero shadows look like ghosts in the wrong way.
-
Upscaling for high-definition clarity (a lifesaver for platforms like Shopify and eBay that auto-zoom product images).
Step 5 – Adding the 3D Touch
This is the cherry on top, the part that turns a flat photo into a dimensional masterpiece.
I add subtle layer blending, natural shadows, and shape adjustments to enhance depth. The goal is for the clothing to look like it’s being worn, without an actual model.
Pro Tip: Don’t overdo shadows. Too heavy, and the garment looks fake; too light, and it looks flat. I always test my edits on a white mockup page to see how it’ll appear in a real catalog.
Quick thought: Have you ever tried photographing apparel yourself and felt frustrated by how “off” the images looked? That’s exactly where ghost mannequin editing saves the day—it bridges the gap between DIY photos and professional-level results.
Tools & Software for 3D Ghost Mannequin Editing

You don’t need a spaceship control center to pull this off, but having the right software makes all the difference. Here are my go-to tools:
-
Adobe Photoshop – The king of ghost mannequin editing. It gives you complete, step-by-step control with tools like the Pen Tool, Layer Masks, and Liquify. If you’re serious about precision, Photoshop is the industry standard.
-
Lightroom – Perfect for color correction, sharpening, and adding clarity before or after you edit. I use it to make sure the garment’s color matches what customers will see in real life.
-
AI-powered editing tools – Yes, they’re getting better! They can remove backgrounds or mannequins in seconds, but they’re not foolproof. Often, they mess up details like collars or stitching. I use them for quick drafts but always fine-tune in Photoshop.
My tip: Always double-check mesh quality and fabric texture. Some tools blur details during export, and nothing kills sales faster than a shirt that looks like it’s made of plastic.
Pro Tips from My Workflow
After years of editing apparel photos for clients, I’ve learned a few tricks that save both time and sanity:
-
Iron clothes before shooting. Seriously. Every wrinkle you see in-camera = 10 minutes of retouching later.
-
Keep ISO low. ISO 100–200 gives sharp, detailed photos. High ISO = grainy mess.
-
Save layered PSD files. Trust me, your future self will thank you when a client asks for “just one more tweak.”
-
Use picture shadowing. Subtle shadows = natural, lifelike finish. They give depth without distracting from the garment.
-
Avoid over-editing. Customers want to see the actual fabric, not a blurry airbrushed version. Natural is always more trustworthy.
Common Mistakes to Avoid
Even experienced editors slip up sometimes. Here are the big ones I see (and how to dodge them):
-
Wrong camera angles. Shoot too high or too low, and your apparel looks distorted. Keep your lens at chest height for tops, hip height for pants.
-
Harsh shadows. Poor lighting setup creates unwanted shadows that editing can’t fully fix. Soft, even light is your best friend.
-
Over-smoothing textures. It’s tempting to go wild with skin-smoothing-style tools, but clothes aren’t supposed to look like cartoons. Texture sells quality, don’t erase it.
-
Forgetting inside parts. Skip the collar or waistband shots, and your final 3D ghost mannequin will look incomplete—like a puzzle missing its last piece.
Quick check-in: Do your current product photos fall into any of these mistake zones? If yes, don’t worry, you’re not alone. Even big brands mess this up sometimes, but the good news is: a few tweaks in shooting and editing can make a massive difference.
3D Ghost Mannequin Editing vs Alternatives

When it comes to showcasing clothing online, you’ve got options, but not all of them deliver the same results.
-
Flat Lay Photography → It’s the budget-friendly route, but let’s be honest… flat clothes often look lifeless, like they’ve been steamrolled. Not exactly “add to cart” material.
-
Lifestyle Photos with Models → These can be fun and engaging, but they come with distractions. Customers focus on the model’s pose, style, or even body type instead of the clothing. Plus, lifestyle shoots are expensive.
-
3D Ghost Mannequin Editing → The sweet spot. It combines realism with consistency, letting the garment speak for itself. Customers get a clear, distraction-free view of how the clothing fits—without breaking the bank.
Who Benefits the Most from 3D Ghost Mannequin Editing?
This isn’t just for big-name fashion houses. Ghost mannequin editing can elevate catalogs for:
-
E-commerce sellers on Amazon, eBay, and Shopify who want to stand out in crowded markets.
-
Fashion brands and boutiques that need consistent, polished visuals for their collections.
-
Catalog designers & digital marketers looking to keep product pages clean and professional.
-
Photographers who want to add high-end editing services to their client offerings.
Outsourcing vs DIY – Which Should You Choose?
Now the big question: should you roll up your sleeves or leave it to the pros?
-
DIY → Great if you’re already skilled in Photoshop, have a manageable product count, and enjoy the editing process.
-
Outsourcing → Best for large catalogs, tight deadlines, or when you want a polished, professional look without sinking hours into editing.
My rule of thumb: if editing feels like it’s eating into your selling or shooting time, it’s cheaper (and smarter) to outsource.
Final Thoughts
At the end of the day, 3D ghost mannequin editing isn’t just about “removing a mannequin.” It’s about transforming your product photos into visuals that sell. Clean, professional images help customers trust your brand, picture themselves in your clothing, and click “buy now” with confidence.
So here’s my challenge to you: take a look at your current apparel photos. Do they showcase your products at their very best? If not, ghost mannequin editing might be the missing piece.
Want to transform your apparel photos into sales-ready images? Let’s make your catalog shine—drop me a message today!
FAQs About 3D Ghost Mannequin Editing
What is 3D ghost mannequin editing?
It’s a photo editing technique that removes mannequins or models, leaving clothes looking naturally worn in 3D.
Why is it called “ghost” mannequin editing?
Because the mannequin disappears—like a ghost—while the garment stays perfectly intact.
What’s the difference between 2D and 3D ghost mannequin editing?
2D looks flat, while 3D adds depth and realism, showing the true shape of the garment.
Do I need special equipment for ghost mannequin photos?
No, just a mannequin or model, a camera, good lighting, and editing software.
Can I use flat lay photos instead of ghost mannequin editing?
Yes, but flat lays often look lifeless and don’t show the fit as well as 3D editing.
Is ghost mannequin editing better than using models?
For e-commerce, yes, it avoids distractions and bias, keeping the focus 100% on the clothes.
Which software is best for ghost mannequin editing?
Adobe Photoshop is the industry standard, though Lightroom and AI tools help too.
Can beginners do ghost mannequin editing?
Absolutely! It takes practice, but with tutorials and patience, you can DIY.
Should I outsource ghost mannequin editing?
If you have a large catalog, tight deadlines, or want professional polish, outsourcing saves time.
How much does ghost mannequin editing cost?
Prices vary, DIY is free if you own the software, while outsourcing can range from $1–$5 per image depending on complexity.
Does ghost mannequin editing help increase sales?
Yes! Clean, consistent, realistic product photos build trust and boost conversions.
What mistakes should I avoid?
Skipping collar shots, harsh lighting, wrong angles, and over-smoothing fabric textures.
Can I add shadows to ghost mannequin photos?
Yes, subtle shadows add depth and realism, but don’t overdo them.
What file format should I save ghost mannequin images in?
For web: JPEG or PNG. For editing: always keep a layered PSD file.
Who benefits most from ghost mannequin editing?
E-commerce sellers, fashion brands, catalog designers, and photographers offering product shots.


